
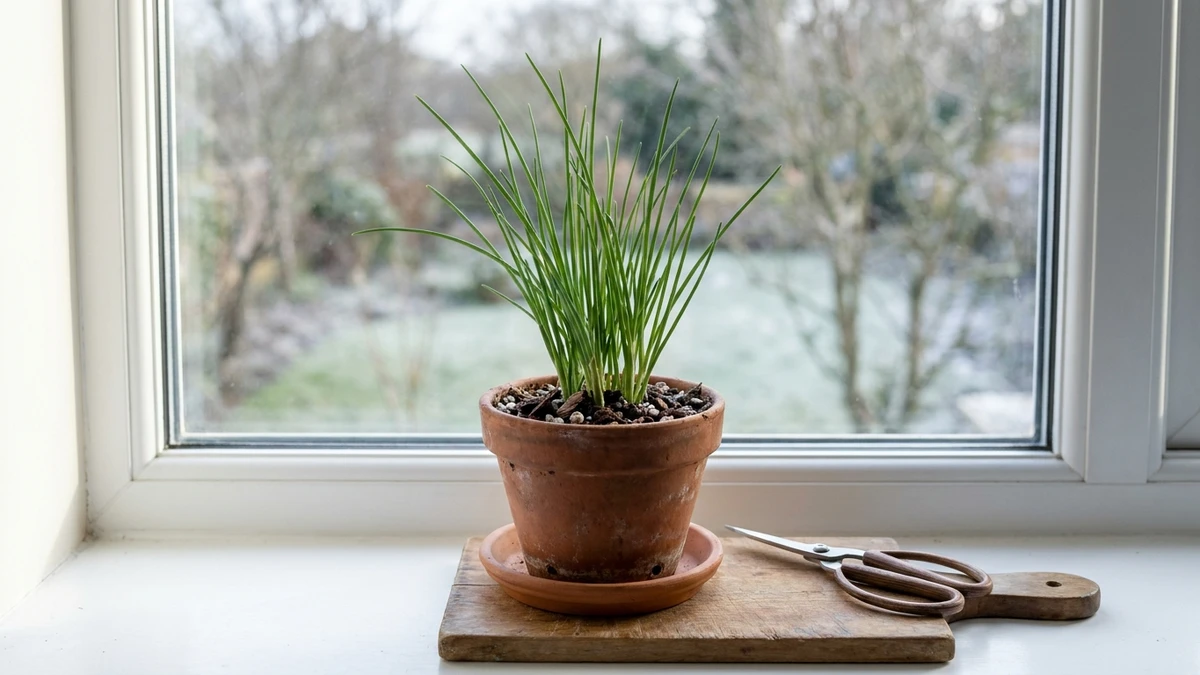
Learning how to grow chives indoors through winter starts with bright light and a cool room. A small soil pot can provide fresh leaves when growth allows, but short days call for lighter watering and a gentle approach to cutting.
Begin with a healthy autumn division from an outdoor clump before hard frost. This guide follows common chives into a draining pot at their original planting depth, then covers windowsill light, extra light when needed, watering, feeding, and cutting.
Chives are hardy perennials, but winter growth can slow or pause. A quiet pot in January is not automatically dead. Thin, pale leaves that flop are a reason to improve the light before adding more water or feed.
Keep the mix from staying soggy, watering when the top dries. For the kitchen, snip a few outer leaves above the base and leave the growing point intact. Expect modest leafy growth, with rest when needed, rather than winter flowers.
One soil pot, six care checks
Choose a Pot and Position That Suit Winter Light
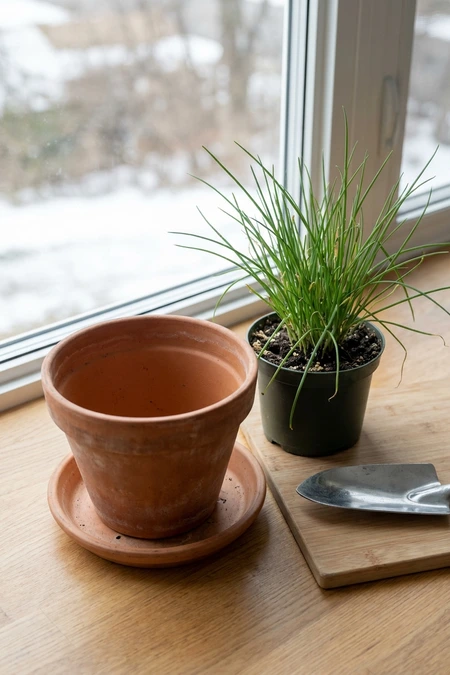
Before choosing a container, check your brightest indoor spot. Common chives need strong light to make sturdy leaves through winter. Choose a clearwindowsill in a cool room, away from heating vents, with enough space to keep foliage off cold glass.
A south-facing window is a useful starting point, but nearby buildings and trees can block it. Look for an open view of the sky and direct daylight when available. If every suitable sill is dim, choose somewhere a grow light can be fitted.
Choose a pot with drainage holes and a saucer that catches drips. The container should hold the planned division with a little room around its roots. Avoid a much larger pot, where unused mix may stay wet long after the roots need water.
Terracotta and plastic can both work; match the pot to drying. Porous terracotta tends to lose moisture faster, while plastic holds it longer. Neither material replaces a moisture check, and a decorative outer pot must never hide standing water.
Set the empty pot and saucer in place to check the whole base fits. Keep them level and fully supported, without an overhanging edge. If the sill is too narrow, use a stable stand close to the brightest window.
Match your space to a workable pot
Divide an Outdoor Clump in Autumn for the Indoor Pot
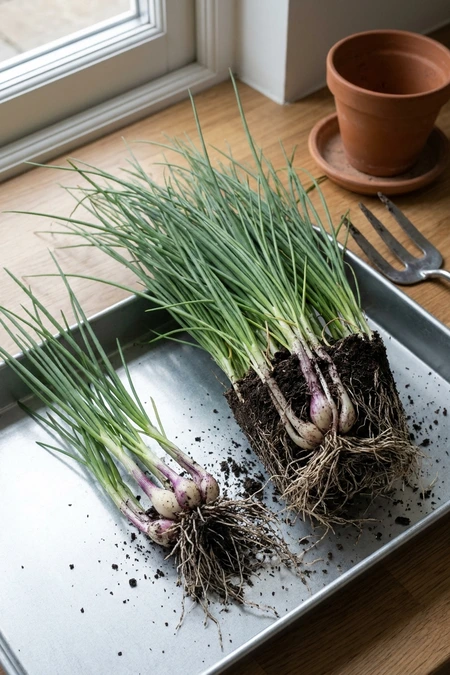
An established clump gives you roots and growing points already formed. Choose healthy common chives in autumn, before hard frost, and work while the soil is workable. Select a firm section with sound leaf bases; leave soft, rotting material out of the indoor pot.
Use a hand fork to loosen soil around the clump, keeping the tines away from its centre. Lift from beneath the roots, rather than pulling the leaves.
Set the clump on a tray and gently shake off loose soil so you can see where it separates.
Tease an outer section away with your fingers, keeping several shoots and roots together. If the roots are tightly tangled, use a clean sharp knife to separate the section. Avoid slicing through the small bulb bases or crushing the growing points.
Before bringing the division near other indoor plants, inspect between the leaf bases and along the leaves for aphids. Wash visible aphids off with plain water, keeping the roots out of a soaking bath. Let excess water drain and check again before potting.
Keep the division on the tray while you prepare its mix, with roots protected from drying out beneath a lightly damp cloth.
Notice the old soil line at the leaf bases. That mark will help you keep the same planting depth in its indoor pot.
From established clump to indoor division
Use a Free-Draining Mix That Stays Moist but Never Soggy
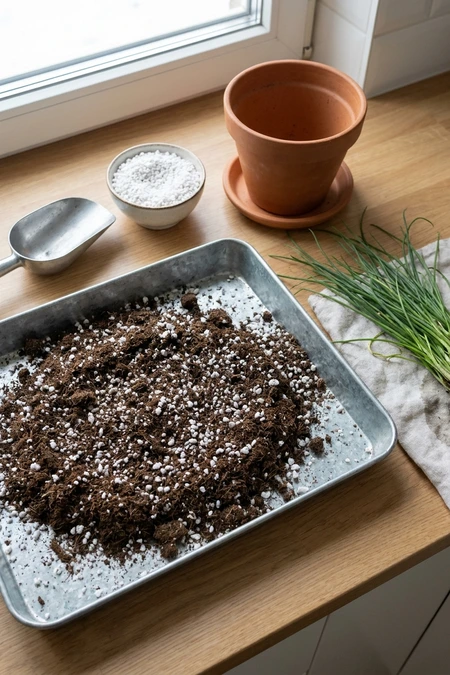
Winter roots need moisture and air together. Start with fresh compost made for containers, also sold as potting mix, rather than soil dug from the garden. Choose a loose mix that holds some moisture without becoming a dense, sticky mass.
For a moisture-retentive compost, blend in some coarse perlite to open its texture. A practical starting blend is three scoops of compost to one scoop of perlite. If the bagged mix already contains plenty of drainage material, use it without adding more.
Tip the ingredients into a tray and mix until evenly combined. Lightly dampen dusty material first, then fold it together with a scoop. Break up compressed lumps so the chive roots will meet the same loose texture throughout the pot.
Add water gradually until the blend feels lightly damp and crumbly. A squeezed handful should loosen again when touched, without dripping. If it smears into a wet lump, let it dry somewhat before planting; the division does not need a saturated start.
Keep drainage holes clear at the base and use the same mix throughout the container. Skip a gravel layer, which does not fix a wet root zone.
Even an airy blend can stay soggy if the pot stands in water or receives water too often.
A loose blend for winter roots
Pot the Division at the Same Depth It Grew Outside

The old soil mark on the division is your planting depth guide. Add some prepared mix to the pot, then lower the roots onto it. Adjust the amount underneath until that mark will sit level with the finished compost surface.
Leave a shallow space below the rim so water will not run straight over the edge. The roots should fit comfortably beneath the division. If they are forced into a tight bundle, choose a deeper pot instead of bending them sharply.
Spread the roots gently and fill the gaps around them with loose mix. Tap the pot lightly against the work surface to help it settle, then press gently around the clump. Firm enough to steady the plant without packing the compost hard.
Keep green leaf bases above the mix, matching their former position outside. Do not heap compost against the shoots or bury them to make the clump look upright. Newly divided leaves may lean while settling; extra planting depth will not correct that.
If the prepared mix feels dry around the roots, water gently to settle it. Add water slowly, stop when excess begins to drain, then empty the saucer. If the mix is already evenly moist and settled, leave it alone; never soak the pot.
Line up the old soil mark
Place the Pot on the Brightest Windowsill You Have

With the division potted, give the leaves clear daylight by placing it close to your brightest window. Open blinds and move objects that shade the clump. Keep the whole pot and saucer supported, with the leaves clear of the glass.
The brightest patch may change through the day as nearby roofs or trees cast shadows. Choose the longest bright window available, rather than a spot that catches one brief sunbeam. A south-facing sill often helps, provided the view outside is not heavily blocked.
Chive leaves may lean toward the window, so turn the pot a little when one side starts stretching toward the pane. This can spread exposure around the clump. Turning does not increase the total light available or rescue a deeply shaded position.
Watch the leaves emerging from the centre: thin pale growth needs more light, especially when it flops toward the window. Improve the position or add a grow light before reaching for extra water or feed.
Existing stretched leaves may stay weak, so judge new growth.
At night, keep the pot inside the room, rather than trapped between a closed curtain and cold glass. Shift it inward if that gap becomes chilly, then return it to the bright position when curtains open.
Keep it away from draughts through an open window.
Plan daylight around one chive pot
Add a Grow Light When Daylight Falls Short

If new leaves remain thin and floppy on your best sill, add light above the clump. A compact LED grow light can supplement weak winter daylight. Choose a fixture intended for plants that covers the whole pot, rather than lighting only its edge.
Secure the fixture and follow its recommended leaf clearance. Measure from the tallest leaf tips, not the compost surface, using the maker’s guidance. Keep leaves from touching the lamp and adjust its position as the clump grows; different lights need different spacing.
Use a timer to keep a regular day and night. Run the light during the day, extending the short daylight period as the fixture’s growing guidance suggests, then give the plant a dark overnight break. Do not leave the lamp running continuously.
Keep plugs and connections completely dry, with cables secured away from the saucer and walking routes. Leave clear space around the fixture and curtains, avoid overloaded sockets, and follow the maker’s electrical instructions. Use RCD or GFCI protection where required.
Judge the setup by new leaves that stand firmer, rather than expecting old floppy leaves to straighten. Watch for bleaching or drying closest to the lamp and recheck its clearance if these appear. Some midwinter slowing can remain normal even after the light improves.
Arrange the light from top to base
Water Little and Often Through the Dark Months
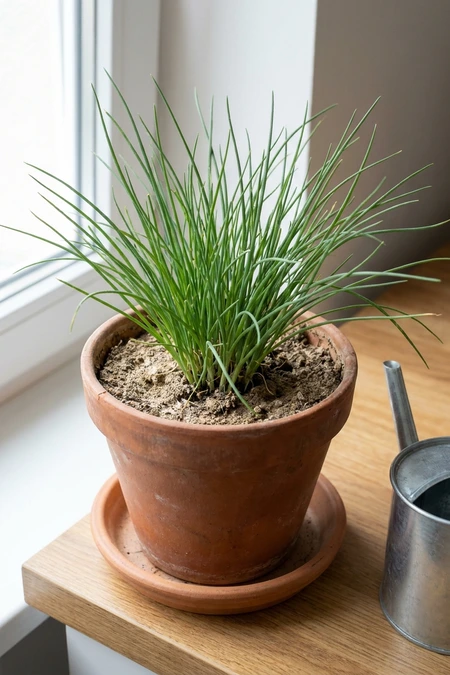
In winter, check often but water sparingly. The heading does not mean adding water every day: chives use less when light and growth slow. Touch the top mix before reaching for the can, and wait if it still feels damp.
When the surface has dried, feel just below the top to judge how much moisture remains. A pot that feels heavy and wet beneath a dry crust can wait. Avoid letting the whole root ball become hard, shrunken and completely dry.
Use a narrow spout to water the mix slowly, spreading water around the clump instead of pouring into the leaf bases. Add only enough to moisten the root zone, stopping when a little excess begins to drain. Do not leave the pot soaking.
Let drainage finish, then empty the saucer beneath it before returning the pot to its place. If water remains on the surface or drains very slowly, check for blocked holes and compacted mix. Adding more water will not solve either problem.
Adjust each watering to how the pot actually dries, rather than a weekly timetable. A cool, dim spell can lengthen the gap between drinks. Thin, pale, floppy new leaves point first to poor light; check moisture before treating them as thirst.
Check first, water when needed
Feed Lightly Only When Growth Is Active

New leaves lengthening from the centre are your signal to consider feeding. A resting clump needs patience, not a nutrient boost. If growth has paused in midwinter, leave feed out of the routine while maintaining bright light and careful watering.
Before opening a feed bottle, check what the compost contains. Fresh potting mix may already include nutrients, so follow its packaging guidance before adding more. Feeding a newly potted division straight away can supply more than it currently needs.
Once established growth needs support, choose feed for edible containers and follow its instructions for light feeding. Measure with the supplied measure rather than guessing. Do not add extra to chase faster leaves, and never put concentrated feed directly onto the roots.
For a liquid product mixed with water, feed when watering is due, provided the roots are not bone dry. Let excess drain and empty the saucer afterward. If the mix is already wet, postpone feeding instead of adding another drink to the pot.
Reassess before every planned application and pause feeding when growth slows. Thin, pale, floppy leaves need a light check before more feed. Brown tips after feeding also warrant a pause and a review of watering and product instructions, rather than another application.
Let growth set the feeding schedule
Cut Leaves the Right Way So They Keep Coming Back
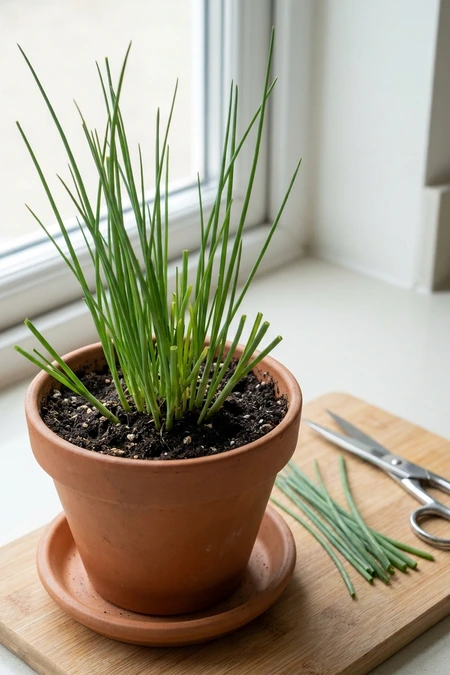
Wait until the division is settled and making fresh leaves, then choose a few outer leaves for the kitchen. Leave short central shoots to develop. A newly divided or resting clump needs its remaining foliage more than it needs a tidy haircut.
Use clean sharp scissors to snip above the leaf base, keeping the blades clear of the compost and the growing point. Take each chosen leaf near its lower end while leaving a short stub. Avoid cutting down into the clustered bases.
Leave most of the clump standing after each small cutting. Those green leaves help support further growth while winter light is weak. Do not gather the whole plant into a bunch and shear it down, even if that seems quicker.
Between cuttings, watch for fresh replacement growth before taking more leaves. If new growth slows or stops, pause harvesting rather than following a kitchen schedule. A normal midwinter rest can interrupt cutting without meaning that the chive plant has died.
For untidy foliage, remove only fully dry leaves with scissors, keeping healthy shoots intact. Do not tug at the clump or pull leaves from their bases. Save a fuller tidy-up for stronger growth instead of repeatedly trimming a quiet winter pot.
Take outer leaves and protect the base
Keep the Room Cool Rather Than Hot

Chives do better in a cool bright room than beside a strong heat source. Keep the pot away from radiators, stove heat and hot air vents. Warm, dry air can stress the leaves and make the compost dry unevenly.
When the heating comes on, check the air around the pot. A sill that feels comfortable earlier may sit in a rising stream of hot air later. Move the plant to another bright position if heated air passes directly through its leaves.
Keep daylight strong after any move. A cool hallway is only useful if the chives still receive enough light; a dark corner can produce thin, floppy growth. Choose a cooler window with clear daylight, or support the new position with a grow light.
Aim for steady conditions around the leaves, away from sudden draughts through an open window. Keep foliage off cold glass and the pot on the room side of closed curtains. Cool conditions suit chives, but a trapped, icy window gap is not the goal.
After moving the pot, recheck how the mix dries before watering again. It may stay moist longer away from heating. Slower winter growth can be normal, so do not move the plant back into strong heat or add feed to force new leaves.
Why a cool room helps
Watch for Aphids and Floppy Growth
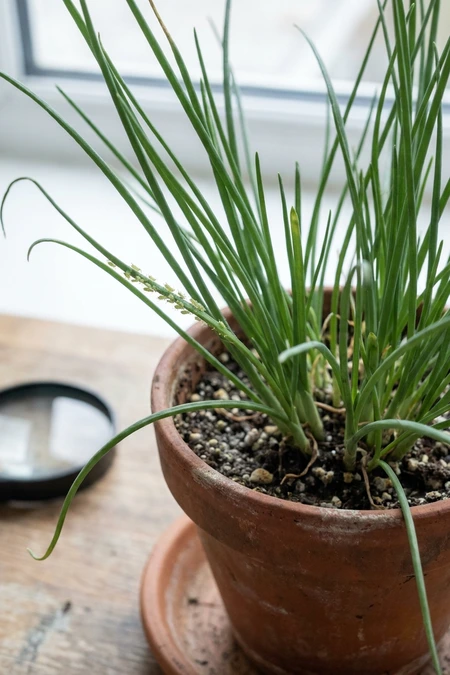
During routine moisture checks, look closely at new growth and between the leaf bases. Turn the pot to inspect every side, including the shaded undersides of leaning leaves. Aphids may gather on tender shoots; sticky patches and distorted young leaves are other clues.
If you find aphids, move the affected pot aside from other indoor plants. Check nearby foliage too, without moving healthy pots into the same washing area. Keep the chives in good light while you deal with the insects.
At the sink, wash aphids off with plain water, using a gentle stream over affected leaves. Shield the compost with a loose cover and angle the foliage over the basin so runoff drains away. Avoid soaking the root ball or using sprays indoors.
Remove the cover afterward and check again over the following days, because some aphids may remain between shoots. Repeat gentle washing where needed. Avoid pulling leaves apart forcefully or bending the clump at its base while looking for insects.
When new leaves are thin, pale and floppy without visible pests, check the light before watering. Improve daylight or adjust the grow light, then watch the next leaves. Existing stretched growth may stay weak; extra water or feed will not correct low light.
Inspect leaves before choosing a fix
Divide and Refresh the Pot Before Spring

As winter draws toward spring, check whether the clump is crowded. Roots filling the container and tightly packed shoots can make a refresh useful. A small division with room left does not need splitting again simply because the season is changing.
Plan the work for the return of active growth, when fresh leaves begin lengthening. If the plant is still resting, wait and reassess rather than forcing division to meet a date.
Firm bases and living roots warrant a recovery check, even when leaves are sparse.
When a crowded plant is ready, ease the root ball out with the mix slightly moist, supporting it from beneath. Loosen the outer roots gently and separate a healthy section with several shoots.
Use a clean sharp knife only where tangled roots resist teasing apart.
Remove loose old mix and refresh with fresh container compost, using the free-draining blend prepared earlier. Choose a clean draining pot that fits the division with modest room around its roots. Replant at the original soil line and keep green leaf bases uncovered.
Return the pot to bright light and a cool room, checking moisture before watering. Let it settle and produce fresh leaves before resuming small cuttings. Delay extra feed if the new compost already contains nutrients, and leave a resting clump time to respond.
Refresh when the clump is ready
Troubleshooting — When Indoor Chives Struggle in Winter
Leaves turn thin and flop over
Thin, pale leaves stretching toward the window usually mean winter light is too weak. The plant makes soft growth that cannot stay upright. More water or feed will not replace the light it needs.
Move the pot to a clearer, brighter window or add a grow light, following its placement guidance. Judge the next new leaves, because stretched leaves may remain floppy. Keep watering tied to the mix drying, rather than the way old foliage leans.
Growth stalls for weeks
Short days can slow common chives, and a midwinter rest is normal. A quiet pot in January is not automatically dead. Repeated cutting, weak light or a recent division can also leave the clump with little visible growth.
Pause feeding and cutting, maintain bright light, and water only when the top mix dries. Check for signs of recovery as conditions improve: firm leaf bases and fresh central shoots are encouraging.
If decline continues, inspect roots for firmness rather than judging by leaves alone.
Leaf tips turn brown
Brown tips can follow dry roots or hot airflow, while excess feed can also damage leaf edges. These clues do not prove the whole clump needs water. Check the mix, nearby heating and recent feeding before choosing a fix.
Move the pot clear of hot air, correct dry mix with careful watering, and pause feeding if it may be involved. Trim only the brown ends with clean scissors. Damaged tips will not turn green again, so watch the newer leaves.
Aphids cluster on new growth
Aphids may arrive on an outdoor division or spread from another indoor plant. They gather on tender shoots and leaf bases, sometimes leaving sticky patches or distorted growth. Look along every side of the tubular leaves, including beneath leaning foliage.
Separate the pot from nearby plants and wash aphids off with plain water over a sink. Shield the compost so runoff misses the roots, then remove the cover. Avoid sprays indoors and check again over the following days, repeating gentle washing if needed.
Leaves taste weak or look pale
Pale growth, especially when thin and floppy, often signals not enough winter light. Weak flavour alone is a less reliable clue. A clump repeatedly cut before it replaces its leaves may also struggle to make sturdy fresh growth.
Improve the light and give the clump a cutting break while fresh leaves develop. Do not add feed simply because flavour seems mild. Consider light feeding only when growth is active, the compost’s nutrients are spent and watering conditions are suitable.
The plant goes limp after watering
If the mix remains wet and the pot feels heavy, roots may be short of air. Standing water, blocked drainage or dense compost can leave the root zone soggy. Persistent wetness can damage roots, so another drink may make matters worse.
Empty the saucer and check that water can escape through the holes. Hold off watering while the mix is wet.
If it stays sodden or the bases soften, gently inspect the roots; remove rotten material and repot any firm, healthy section in fresh airy mix.
Follow the symptom to the next check
FAQ
Can chives grow indoors all winter?
Yes, common chives can live indoors through winter, but steady cutting is not guaranteed. Bright light and a cool room support growth, while short days may bring a resting spell. Take leaves only when the clump is replacing them.
Do chives need a grow light in winter?
Some bright windows provide enough light, but a dim sill needs support. Add a grow light if new leaves remain thin, pale and floppy in your brightest position. Follow the fixture’s clearance guidance and provide a dark overnight break.
How often should I water indoor chives in winter?
There is no fixed interval: water when the top mix dries. Check beneath the surface if the pot still feels heavy, and wait if it remains wet. Water slowly when needed, let excess escape and empty the saucer; never leave the pot soaking.
Can I grow chives from seed indoors in winter?
Yes, but seedlings need strong light and time to establish before cutting. Sow common chive seed in fresh seed compost according to the packet directions, keeping it lightly moist. An established division gives this winter method a more developed starting plant.
Why are my indoor chives floppy?
Thin, pale, stretching leaves usually mean the light is too weak. Improve the position or add a grow light before adding water or feed. If the plant instead collapses in persistently wet mix, check drainage and root condition as well.
Should I cut chives right back in winter?
Avoid stripping an indoor clump during slow winter growth. Snip a few outer leaves above the base with clean scissors, leaving the growing point and most foliage intact. Pause cutting when new leaves stop appearing, and remove fully dry leaves gently.
Do indoor chives go dormant?
They can: chives may rest in midwinter, even indoors. Sparse leaves or a pause in growth do not prove the plant is dead. Keep care gentle and check for firm bases, living roots and returning shoots as light improves.
Can I bring an outdoor chive pot inside for winter?
Yes, move a healthy common chive pot indoors in autumn before hard frost. Inspect it closely for aphids, including around the leaf bases and beneath leaning leaves. Check drainage, wash off insects with plain water and place the pot in a cool, bright room.
What is the best pot for indoor chives?
Choose a stable pot with drainage holes, a fitted saucer and modest room around the roots. Terracotta and plastic can both work, though they dry differently. The whole base must fit its surface, and the pot should never stand in collected water.
When can I move chives back outside?
Wait for settled spring conditions and adjust the plant gradually outdoors. Common chives are hardy, but soft indoor growth needs time to meet wind and stronger sun. Begin with short sheltered spells, extending them gradually, and bring the pot back during harsh cold snaps.
Conclusion — Keep One Pot of Chives Growing All Winter
Learning how to grow chives indoors through winter means matching care to the season. Start with bright light and free drainage, keep the room cool, and let the mix guide watering. A small soil pot can support fresh leaves whenever the clump is growing.
Use small cuttings and patient care to keep healthy foliage on the plant. Feed lightly only during active growth, check new shoots for aphids, and improve light when leaves turn thin and floppy. A resting clump needs time, not stronger feeding.
Begin with one check of your pot today: look at its light, feel the mix and inspect the leaf bases. Make the change those clues call for, then watch new growth. Let recovery guide further cutting and any division as spring approaches.