
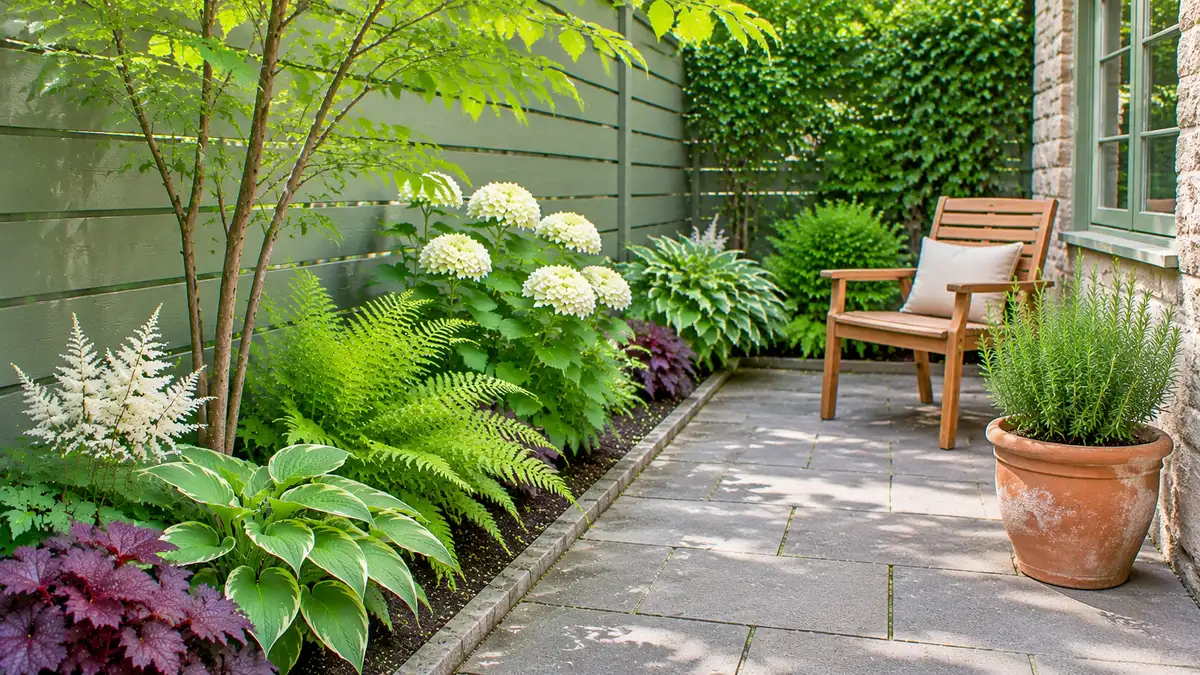
Do you ever step into your small garden and feel like every corner is asking for your attention at once?
A crowded pot here, a chair squeezed behind a plant there, and a path that feels more like an obstacle course than a place to relax.
It is easy to think a small garden needs more plants and more features to feel complete. In fact, the opposite often works better.
A few clear choices, plenty of breathing space, and one or two strong focal points can make the same garden feel calm, open, and much easier to care for.
These 17 minimalist small garden ideas are made for real small spaces: balconies, courtyards, narrow side yards, and tiny back gardens. Each one focuses on a simple layout, a limited plant palette, and a practical detail you can copy without starting over.
Save the ideas that fit your space, light, and routine. A calm garden is not about having nothing in it. It is about choosing well, leaving room to breathe, and letting each plant and surface do its job.
1. Give One Rosemary Plant a Generous Terracotta Pot

The little pots beside the back step often become a collection of watering jobs. In a sunny garden, one rosemary in a large terracotta pot can look calmer than several small pots competing for the same spot.
A container around 50 cm wide is a useful starting point, with drainage holes and a free-draining potting mix. Keep the plant in full sun where possible.
- Position it beside the seating area, beyond passing elbows.
- Raise the base slightly on proper pot feet.
- Leave the soil surface clear so moisture is easy to check.
The trade-off: terracotta dries quickly, and rosemary needs winter protection where conditions are too cold or wet.
Simplify the pots, keep the useful plants
BEFORE
Several small containers sit in different saucers. Leaves hide the soil, and sweeping means moving everything.
AFTER
One useful herb anchors the corner. Rehome surplus plants instead of squeezing plants with different watering needs into the same pot.
2. Move the Planting to One Side of a Narrow Garden

In a narrow garden, beds down both sides can leave a passage that feels like a corridor. Moving the planting to one side can open a clear route and give you one main view to enjoy.
Lay a hose about 60 cm from the fence to test a slim bed. Treat that as a starting point, then adjust for access, gates, and drainage.
Before digging:
- Pull the chair out as though someone were sitting.
- Carry a filled watering can along the route.
- Check that the gate opens fully.
Keep the opposite side free of scattered pots. The trade-off is less planting space, but the garden feels easier to use.
Choose the better boundary
- Watch the light on each side before deciding where plants belong.
- Keep the side with drains or inspection covers accessible.
- Use flush, firmly installed brick edging where paving meets soil.
- Do not raise soil against timber fence boards, wall vents, or damp-proof courses.
3. Repeat ‘Evergold’ Sedge Beside a Part-Shaded Path
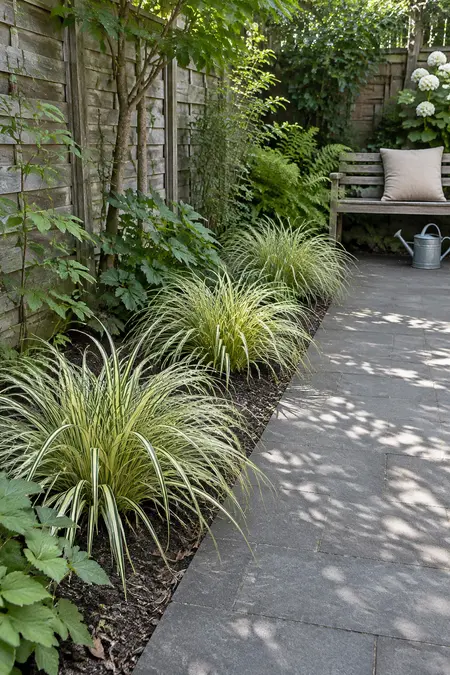
The cream stripes on 'Evergold' sedge make a quiet border easier to see beside dark paving. Its arching leaves also soften a straight edge without adding bright flowers.
Repeat this clump-forming sedge along a short, partly shaded path with moist but well-drained soil.
Space for the leaves, not the nursery pots. Use the mature spread on the label, and set each crown back from the paving so the leaf tips stay out of the walking route.
Old blades may need tidying. Keeping that work reachable is more useful than making every clump look identical.
🌱 Do this
Repeat the same variety within a stretch of similar growing conditions.
Leave gaps while young plants grow into their allotted space.
👎 Skip this
Do not plant extra clumps just to hide all the soil immediately.
Avoid carrying the row into a hot, dry corner simply to keep the pattern going.
4. Pair Blue Hosta Leaves With Silver Fern Fronds
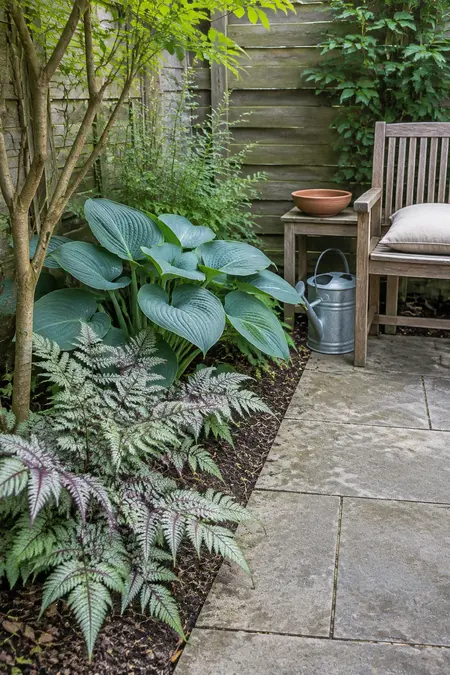
A shaded corner can hold your attention without a collection of bright flowers. Pair the broad blue-green leaves of a hosta with the silver-marked fronds of a Japanese painted fern.
Both suit a sheltered spot with moist, well-drained soil where the local climate allows. Give the hosta room to reach its mature size.
- Place the hosta slightly behind the fern.
- Keep their crowns separate and visible.
- Leave a small mulched gap between the groups.
This pairing has a seasonal limit: both die back in winter. Let a plain fence or existing stone edge carry the corner until spring growth returns.
5. Fan a Non-Clinging Clematis Across a Plain Trellis

Not every clematis grips its support. 'Arabella' has a scrambling habit, which lets you guide its stems across a plain trellis rather than relying on the plant to climb on its own.
Use a sturdy panel and a generous draining container, around 50 cm wide as a starting point. Check that the panel can support the plant as it grows.
- Secure the panel before filling the pot.
- Spread young stems across the lower supports.
- Add loose, soft ties as they lengthen.
The violet-blue flowers bring seasonal color. The trade-off is regular tying and pruning, so place the pot where that work is easy to reach.
Plan the support before the flowers
💧
Accessible soil
Leave room to water the pot directly without reaching through a wall of stems.
🪢
Loose ties
Use soft ties with growing room. Check them as stems thicken.
✂️
Seasonal reset
Follow the variety’s pruning guidance. Choose a trellis you also like when the stems are bare.
6. Plant Creeping Thyme in Selected Paving Joints

A thin ribbon of thyme can soften paving without turning the whole path into another planting bed. Use Thymus serpyllum, in sunny joints with gritty, well-drained soil.
Start with a few gaps near the path edge, roughly 5 to 8 cm wide where the paving layout allows. Keep the planting away from the most-worn centre of the path.
- Remove weeds and loose debris before planting.
- Set small rooted plugs into soil, not solid mortar.
- Water while the roots establish.
Keep it out of busy pinch points. Thyme tolerates occasional footsteps better than constant traffic, and flowering patches attract bees.
🌱 Choose the gap before the plant
Good candidate: an existing soil-filled joint beside a sunny path, where water drains away after rain.
Leave alone: structural paving joints, constantly wet gaps, and routes that need a continuous smooth surface for wheels or mobility aids.
7. Frame a Gravel Sitting Area With Reclaimed Bricks

Gravel looks simple until chair legs sink into it and stones spread across the path. A small framed area keeps the surface contained and the seating zone clear.
Use reclaimed bricks to contain a modest rectangle of angular gravel. Within it, lay a level paving slab or stable base under each chair leg.
Check the ground first. Gravel does not fix drainage problems beneath it, and a deep loose layer makes furniture harder to move.
Keep the material palette quiet: warm gray gravel, weathered brick, and plain paving. Expect occasional raking and top-ups.
Gravel around the seat
Adds a textured surface that can be reshaped later.
Needs a firm edge. Fallen leaves are harder to remove than they are from paving.
Paving beneath the seat
Supports chair feet and makes small furniture easier to reposition.
Needs proper preparation beneath it. Loose slabs placed directly on gravel may rock.
8. Tuck a Backless Bench Against an Existing Wall
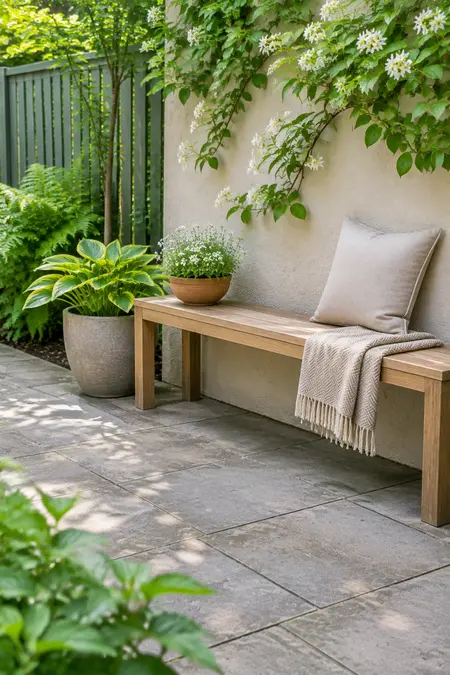
At the end of a narrow garden, the space behind pulled-out chairs can swallow the last useful patch of ground. A backless bench against the wall can give you a seat without that extra clearance.
Look for a plain timber seat around 35 to 40 cm deep if you only need a perch for coffee or changing shoes.
- Leave a small gap behind it for cleaning and drying.
- Keep legs on firm, level paving.
- Store the cushion indoors when rain is expected.
A shallow bench saves space, but it offers less support for long sitting. Choose a backed seat if comfort matters more than the saved depth.
Check the bench position with a cardboard footprint
- Allow room for knees and feet beyond the seat edge.
- Keep the bench clear of opening windows, gates, and drain covers.
- Check that nearby stems will not brush across the sitting area as they grow.
- Leave the space underneath open so it stays easy to sweep.
9. Size a Slim Garden Cupboard Around Your Folding Chair

The folding chair is often the awkward item that keeps a small garden looking unfinished. Measure it before buying storage, so the cupboard fits the chair rather than the other way round.
A tall, shallow cupboard can hold the chair upright, with hooks beside it for a hand trowel and brush.
Make a wet-tool rule: let tools dry before putting them away. A closed door hides clutter, but it also hides trapped moisture.
Place the cupboard on firm ground near the garden entrance, with enough room to open its door without blocking the path.
Measure what needs hiding
BEFORE: Storage by guesswork
A small box holds pots but not the chair. Long tools lean against the wall, and the brush stays beside the door.
AFTER: Storage by fit
Check internal height, shelf positions, and door-opening width. Leave enough space to lift the chair out without unloading everything else.
10. Use a Dwarf Mountain Pine as a Winter Anchor

A garden built only around summer leaves can look oddly empty after they fall. One dwarf mountain pine, Pinus mugo 'Mops', gives a sunny bed a rounded evergreen shape without needing a tightly clipped outline.
Plant it toward the back of the bed in well-drained soil, where its eventual width will not narrow the path.
Before choosing it:
- Check the variety's expected mature spread.
- Allow space around its lower branches.
- Make sure the site suits its climate and light needs.
'Dwarf' describes slower or smaller growth, not a plant that stays nursery-sized. Skip this idea if the bed cannot hold its mature width.
Read beyond the word “dwarf”
- Confirm the cultivar name, since mountain pines vary in size and shape.
- Check whether the listed dimensions describe a particular age or eventual size.
- Measure the bed after allowing for access and neighboring plants.
- Choose for the space available, rather than planning to keep cutting the plant smaller.
11. Hide Separate Herb Pots Inside One Slatted Trough
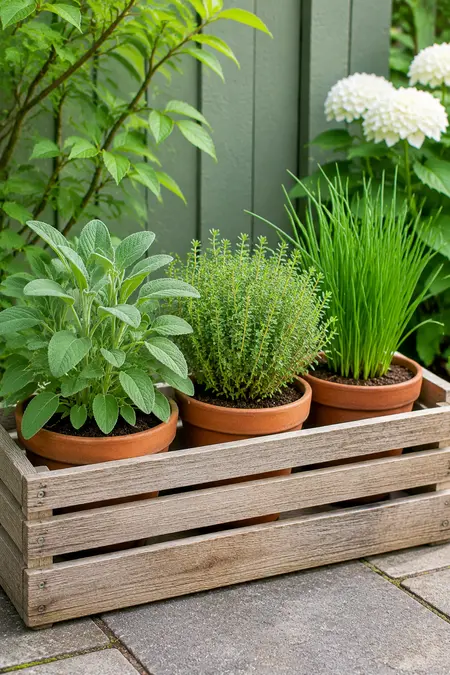
Sage, thyme, and chives look tidy together, but they do not all need watering at the same pace. Set each herb in its own pot inside one slatted trough, so the group looks unified while watering stays separate.
Choose a trough wide enough to lift each pot out easily. Slatted sides and an open base let water escape and air reach the pots.
- Group sage and thyme at the sunnier end.
- Keep chives in a separate pot you can check more often.
- Leave pot rims accessible beneath the foliage.
The hidden pots also make replacements easier. Avoid filling the gaps with soil, which would undo the separate-watering advantage.
One outer frame, separate root spaces
🌿
Sage
Allow room for its broad leaves and woody growth. Choose a compact variety if the trough is narrow.
☀️
Thyme
Keep taller herbs from shading it. Check drainage before adding more water.
💧
Chives
Aim for more even moisture during active growth. Water this pot separately when needed.
12. Run a Serviceable Drip Line Behind the Plants
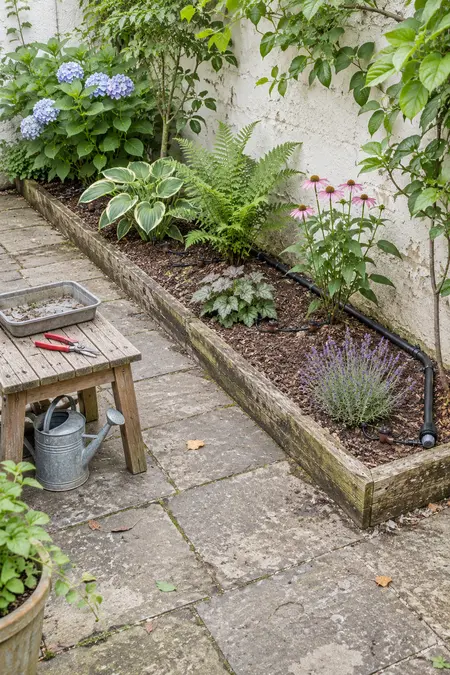
Dragging a hose around chair legs makes a small garden feel busier than it needs to. A drip line tucked behind the plants can water the bed without crossing the seating area.
Lay the supply tubing along the back of the bed, with emitters positioned for the plants rather than in a straight line for tidiness alone.
Test before hiding anything. Run the system, then check the soil around each plant. A wet patch beside an emitter does not mean the roots below are evenly watered.
Follow the kit's instructions for pressure, filtration, and covering tubing. Seasonal adjustments and occasional checks keep the system useful rather than hidden and forgotten.
Make the watering easy to check
Group plants with similar watering needs on the same watering zone where practical.
Secure tubing away from walking routes. Keep fittings visible until the system passes a leak check.
Recheck soil moisture after weather changes. Adjust watering instead of leaving one setting all season.
13. Keep Seasonal Flowers in One White Pocket

White flowers stand out against green leaves without asking the whole garden to compete for attention. Keep the seasonal color in one pocket, so the rest of the garden can stay calm.
In a sunny spot with suitable soil and climate, white 'Jeanne d'Arc' crocuses can provide early flowers, followed by a white hardy geranium for summer.
- Plant the bulbs beside the geranium's eventual spread, not beneath its crown.
- Let bulb leaves fade naturally after flowering.
- Leave room for the geranium to form a broad clump.
There will be weeks without flowers. That pause is part of the plan, with foliage carrying the corner in between.
Plan for flowers and the gaps between them
Early season
Crocuses use a small open patch. Mark their position discreetly so later digging does not disturb the bulbs.
Later growth
The hardy geranium supplies white flowers and a leafy mound. Check its mature width before planting.
Quiet periods
Keep the bed edge tidy and accept the seasonal pause. Continuous flowers would require a different planting plan.
14. Choose a Narrow Tree for Height Without a Wide Crown
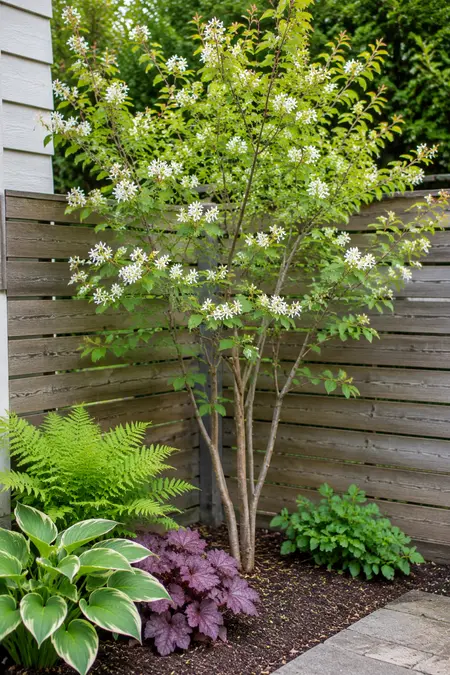
An upright tree can give a small garden height while leaving more side-to-side space open. An upright serviceberry, Amelanchier, suits that role where climate and soil allow.
Its seasonal changes give you several points of interest in one plant: spring flowers, summer berries, and autumn color.
Measure upward as well as outward. Check overhead wires, nearby windows, and access for future care. A narrow crown does not mean a small root system.
Plant away from the main sitting spot if fallen berries would bother you. This is a long-term choice, so check mature size before planting.
🌲 A slim tree still needs a proper site
Check the cultivar’s eventual height and width, soil needs, and climate suitability. Nursery labels may describe size after a set number of years rather than final size.
Assess nearby foundations, drains, and underground services before planting. Choose a different idea if the available corner cannot accommodate a tree without repeated heavy pruning.
15. Let a Quiet Boundary Tie Mixed Materials Together

The red fence panel, orange trellis, and pale wall may compete more than the plants do. Before buying new plants, look at the boundary itself.
On sound timber you are allowed to finish, a muted olive-gray exterior coating can bring mismatched surfaces into one quiet background.
Test a sample behind the foliage and view it in morning and evening light.
- Choose a finish suitable for the existing surface.
- Keep useful gates and access panels visible.
- Avoid covering ventilation gaps.
Paint adds future upkeep. Weathered natural timber may be the simpler choice if its changing color does not bother you.
Choose the backdrop you want to maintain
Natural timber
Suits a garden where grain and gradual weathering are part of the look.
Replacement boards may stand out at first. Existing coatings affect how evenly the timber weathers.
Muted painted timber
Can unify suitable panels and trellis sections with different starting colors.
Needs surface preparation and later touch-ups. Keep the color reference for future repairs.
16. Light the Route Without Outlining the Whole Garden
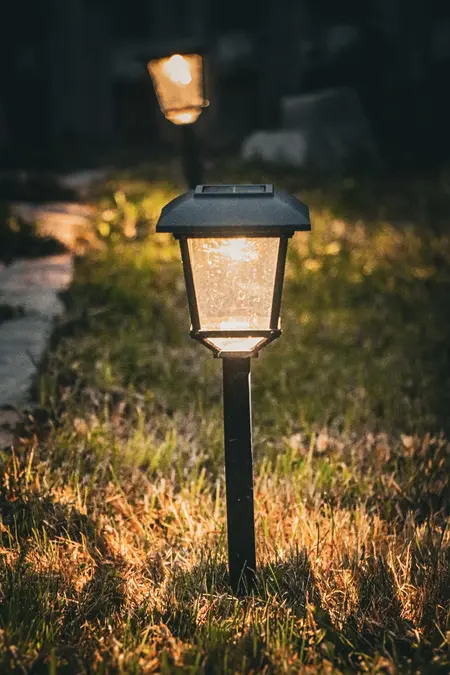
After sunset, a small garden does not need every fence panel and plant lit up. A few shielded fixtures along the route can make the garden usable without turning it into a display.
Start where the route changes: a step, a turn, or the approach to the seat. Choose warm-white outdoor fixtures with a shielded, downward direction.
Check the view from the chair. A fixture that looks discreet from above may shine straight into your eyes when you sit down.
Solar lights need sufficient daylight to charge, so they may disappoint beneath dense planting. Keep fixtures accessible for cleaning and bulb changes.
Check the light after dark
- Aim light across the walking surface without leaving a step edge hidden in shadow.
- Keep fixtures outside the space needed for feet, wheels, and sweeping.
- Look from the seat and nearby windows to check for glare.
- Direct light away from neighboring windows and leave planted corners dark where practical.
17. Use Fine Bark Mulch to Quiet the Gaps Between Plants

Freshly planted beds often look unfinished because every gap shows a different patch of soil. A consistent layer of fine bark mulch can quiet those gaps while the plants fill in.
Choose plain bark without bright dye. Weed first, water dry soil, then spread it around established plants.
- Keep mulch away from trunks and plant crowns.
- Leave emerging shoots uncovered.
- Keep the finished surface below the path edge.
Skip a deep bark layer around thyme or other plants that dislike damp material against their crowns.
Read the bed from the soil upward
🌱
Soil beneath
Remove weeds before covering the surface. Mulch will not reliably stop established perennial weeds from returning.
🍂
Mulch above
Spread an even layer. Check what remains before adding more, rather than building it higher each season.
🌿
Clear at the crown
Keep the point where stems emerge uncovered. Do not mound bark against woody trunks.
You do not need to use all 17 minimalist small garden ideas to make your space feel more settled. Start with the thing you move, trip over, or work around most often.
Give that spot one clear purpose, then live with the change before adding anything else.
Leave room for plants to reach their natural size and for everyday jobs like sweeping and watering. A few fallen leaves or an uneven fern frond will not spoil the look. The goal is a garden you can enjoy without constantly rearranging it.
Save this list to your Pinterest garden board for your next small outdoor project.