
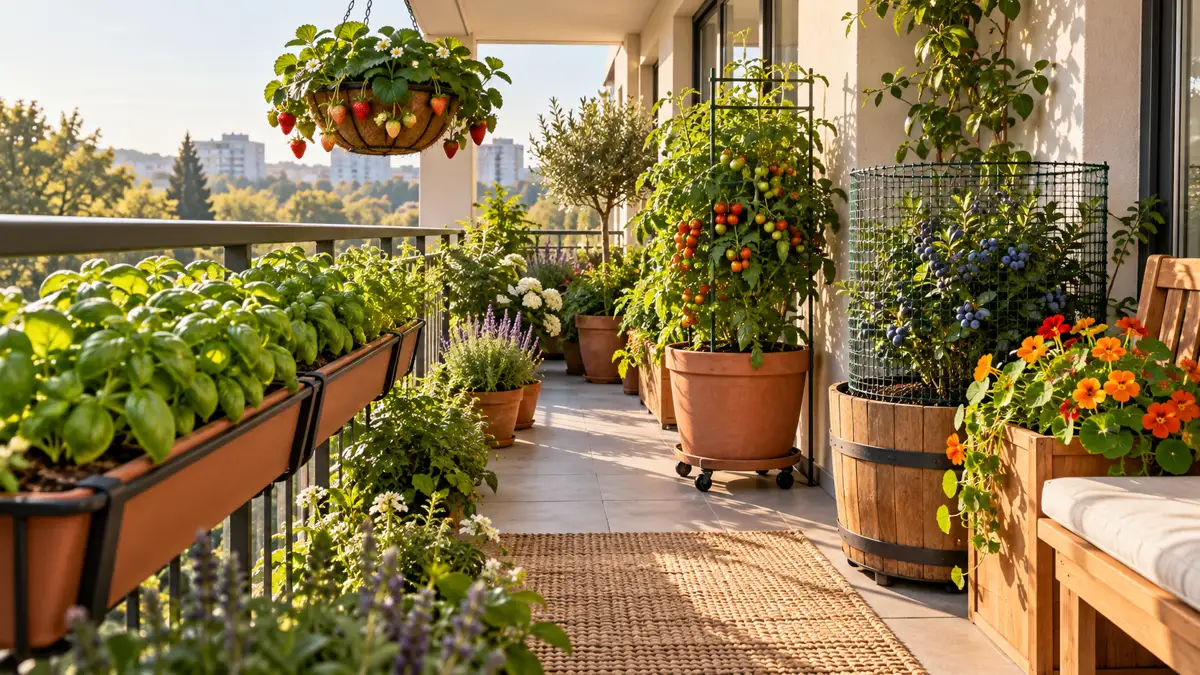
A balcony can feel full before you have planted much. One pot blocks the door, another catches your foot beside the chair, and the sunniest spot seems to move every time you look.
Then there is the wind, the weight of wet soil, and the neighbor below who would rather not share your watering routine.
These balcony container garden ideas give each part of that small space a clear job. You will find ways to use the inside of a railing, a sheltered wall, and an awkward corner without filling every patch of floor.
Each idea solves a different balcony problem, so you can choose what fits your space instead of trying to squeeze in the whole list.
Before buying containers, check your building’s rules for planters, attachments, and balcony loads. Count wet potting mix and stored water along with the pots themselves. Watch where the sun lands, notice where gusts come through, and leave the door and walking route clear.
Those simple checks help you pick a setup you can reach, water, and enjoy.
1. Mount a Basil Trough Inside the Balcony Railing
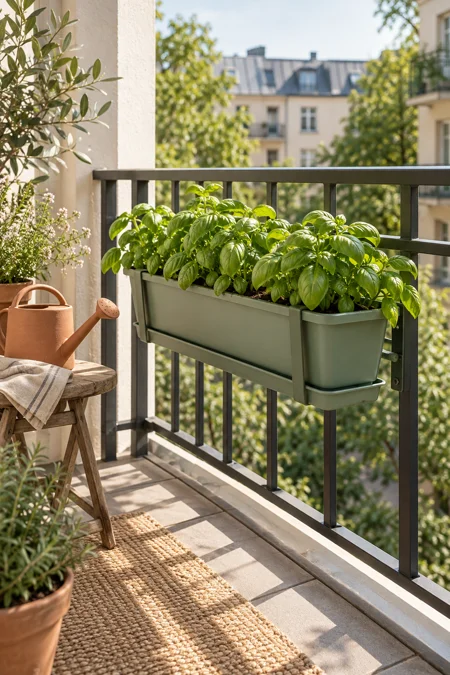
Fit a railing trough so the entire planting box sits inside the balcony edge. Basil stays close enough to snip while the floor below remains open.
Choose a purpose-built mounting system that matches your railing and is approved for the filled planter’s weight. A bracket that almost fits can shift when the wind picks up.
- Check that your building allows railing attachments.
- Leave room to reach the back of the trough.
- Choose a removable drip catcher you can empty from inside.
Basil needs suitable sun and shelter from harsh gusts. Position the trough where leaves will not brush against your sleeve every time you pass.
🌿 Check the fit before filling
Rail shape
Match the mounting kit to the rail profile. Check whether lower supports also need contact points.
Inside clearance
Allow for brackets and full-grown leaves when checking the walking route.
Tray access
Make sure the catcher slides out inward without removing a full trough or leaning over the rail.
2. Keep a Sedum Bowl Below the Windiest Railing Gaps

Tall stems take a beating where wind pushes through balcony rails. A low bowl of mat-forming sedum keeps the planting close to the floor, with less growth standing in the gusts.
Choose a broad-based bowl with drainage holes and enough depth for the sedum you select. Set it back from the railing on a nonslip surface, with a fitted saucer beneath. Keep it out of the walking route and empty collected water after rain.
Keep the surface simple: skip loose gravel that could scatter across the balcony. Low-growing sedum can spread over the exposed mix as it fills in. Choose a variety suited to your sun and climate.
⚠️ Low does not mean windproof
Check the bowl when its mix is dry, too. A light container may shift more easily then. Keep loose decorations out of the planting and move the bowl to shelter before severe weather, if you can do so safely.
3. Fit a Fern Pocket Panel to a Shaded Balcony Wall

Soft fern fronds can fill a blank balcony wall without another pot beside your feet. Use a purpose-built pocket panel on a sheltered wall that gets bright shade, away from the dry draft around an exposed corner.
Choose compact ferns suited to your local outdoor conditions. Small pockets dry quickly, so keep the whole panel within easy reach.
- Confirm that wall attachments are allowed and suitable for the panel’s wet weight.
- Choose a system with a waterproof backing and a bottom collection channel.
- Water slowly, then empty the channel before it overflows.
Leave the gap behind the panel that its maker requires. Damp pockets should not rest directly against the wall.
🌱 Give the wall a planting job
BEFORE
Separate floor pots crowd the shaded wall. Reaching the back pot means moving the front one.
AFTER
A reachable wall panel holds the planting. Keep its collection channel visible so a rising water level is easy to spot.
4. Train Jasmine on a Fan Trellis to Screen One Neighbor-Facing Corner

A jasmine fan can soften the view toward a neighboring balcony without enclosing your whole seating area. Place a deep, square planter at the shared sightline and train the stems across a narrow fan trellis.
Pick a jasmine suited to the available light and your winter conditions. Some lose their leaves seasonally, so check before relying on year-round cover.
- Spread young stems sideways with soft plant ties.
- Keep new growth within your balcony.
- Leave space to reach the planter’s drainage tray.
Secure the support using an approved method. Leafy growth catches wind, and a trellis simply pushed into potting mix may not provide enough support on an exposed balcony.
🌿 Check the corner before planting
- Check the sightline at seated height. The screen may not need to reach as high as you first expect.
- Match the jasmine to the light reaching this corner, including shade cast by the balcony above.
- Confirm attachment permission and support requirements before buying the trellis.
- Leave a reachable edge for pruning so stems do not cross into the neighboring space.
5. Move a Tomato Tub Between Sun Patches on Locking Casters

By afternoon, the bright patch beside your balcony chair may sit at the other end of the floor. A tomato tub on locking casters lets you follow that shift without lifting wet soil.
Choose a compact tomato and a stable rolling base rated for the fully watered container. Keep its plant support attached to the tub so the whole setup moves together.
Test the route before planting. Roll the empty setup between the intended spots and check for tile lips, thresholds, and tight turns.
Use a fitted catch tray, lock the wheels whenever parked, and keep both resting spots clear of the door. Move slowly using the base, never the tomato cage.
☀️ Plan the route and the parking spots
6. Give Peppers a Reservoir Planter on a Fast-Drying Balcony

A warm balcony breeze can dry a pepper container while the potting mix still looks damp on top. A reservoir planter stores water below the growing area, helping stretch the gap between checks.
Choose a model with a visible water gauge, an accessible fill opening, and an overflow outlet you can catch inside the balcony.
- Use the growing mix the planter maker recommends.
- Water new plants from above until their roots establish.
- Check the reservoir and soil before refilling.
Keep the overflow outlet open and direct it into a removable catcher. Rain can fill the reservoir too, so leave room to inspect and empty that catcher.
💧 A quick reservoir check
Read the gauge. Follow the planter’s refill guidance instead of topping up automatically each morning.
Check the root area. Damp mix and a full reservoir call for a different response than dry mix around a new transplant.
Look below the outlet. Empty the catcher after overflow or rain, and keep the outlet clear of roots and debris.
7. Make a Lift-Out Watering Basin for Pots That Would Drip Below

Drainage holes help roots, but water running through balcony decking can land on someone else’s chair. Give small, liftable nursery pots a dedicated watering basin that catches runoff before it reaches the floor.
Set a sturdy draining rack inside a watertight basin, with space beneath it for water to collect. Place one pot on the rack, water slowly, and let it finish draining before returning it to its usual spot.
Keep the job manageable: choose a basin you can empty without carrying a heavy sloshing load. Transfer collected water into a manageable jug for indoor disposal. Leave the balcony floor drain clear.
💧 Catch the water, then remove it
✅ Do this
Check the basin for cracks before watering.
Keep collected water below the pot’s drainage holes.
Empty and rinse the basin after the watering session.
🚫 Skip this
Leaving a nursery pot soaking in its runoff.
Pouring collected water through the balcony decking.
Reusing runoff on other plants, which can spread pests or disease.
8. Reduce Empty Container Weight With a Foam Planter for Dwarf Citrus

A large citrus pot does not have to start with a heavy shell. An outdoor-rated foam planter can reduce the container’s empty weight while leaving room for roots.
That saving does not tell you whether the filled setup suits your balcony. Wet potting mix, the tree, and any stored water still count.
- Confirm the balcony’s load limits before choosing the filled planter size.
- Select a broad base and unobstructed drainage holes.
- Use container potting mix without adding a gravel layer underneath.
Choose a dwarf citrus suited to the available sun and your winter plan. Leave room to reach its catch tray without dragging the tree across the floor.
🪴 Separate shell weight from filled weight
| Part of the setup | What to account for |
|---|---|
| Empty planter | Use the product’s listed weight. Compare containers of similar capacity. |
| Growing mix | Account for the full volume when wet, not just the dry bag weight. |
| Tree and root ball | Allow for growth beyond the size brought home from the nursery. |
| Water and accessories | Include the tray, retained water, and any support or base. |
9. Hang a Strawberry Basket Under a Sheltered Balcony Ceiling
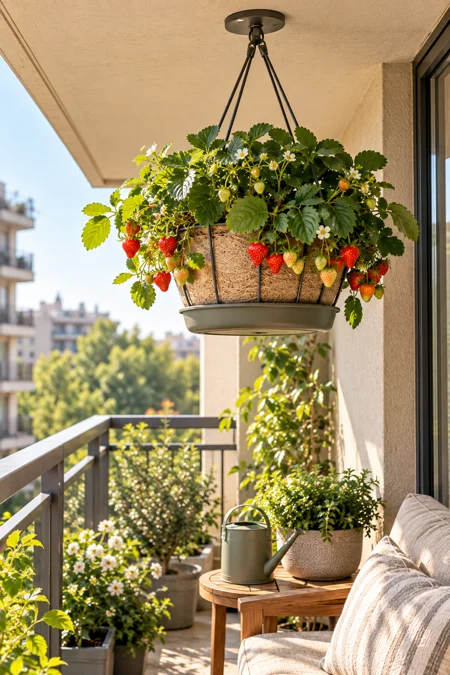
Red strawberries hanging near eye level make harvest checks easy. A basket beneath a sheltered balcony ceiling also uses space above the floor, provided it stays clear of heads and the door.
Use a purpose-made hanging container with a removable drainage catcher. Keep it low enough to water and inspect without climbing or leaning over the railing.
Check the attachment first: get permission and use a fixing suited to the actual ceiling material and the basket’s fully watered weight. Do not hang it from a pipe or an unverified hook.
Choose a sunny, protected position. Keep runners trimmed if they trail into the walkway, and empty the catcher after watering.
🍓 Check the basket at every level
Above
Check the fixing, straps, and connectors for wear. A roof overhead does not rule out sideways gusts.
At the rim
You should be able to see the growing mix while watering and reach fruit on the far side.
Below
Leave room to remove the catcher. Keep chairs and other climbing footholds away from the balcony guard.
10. Nest a Chive Pot in an Insulated Crate for Cold Balcony Nights

Think of the crate as a winter jacket for the roots. A chive pot sitting above ground on a balcony has less protection from cold than a clump growing in garden soil.
Nest the pot inside a weather-resistant crate, with secured insulation around its sides. Keep the soil surface uncovered and the pot’s drainage holes clear. Set the crate in a sheltered spot, away from the door’s draft.
- Leave access to a removable drainage tray.
- Check the mix during mild weather and water lightly if dry.
- Expect the leaves to die back as the plant goes dormant.
Insulation slows temperature changes. It does not make a container freeze-proof or keep chives growing through winter.
📌 Protection has limits
A sheltered corner may still get very cold during a long freeze. Where local winters exceed what potted chives can tolerate, arrange a suitable cold, protected overwintering space. Check that rain cannot pool inside the crate or soak absorbent wrapping.
11. Shade a Lettuce Grow Bag Beside Heat-Trapping Balcony Glass

The strip beside a glass balcony panel can look like a good growing spot until afternoon sun leaves lettuce wilted. A removable shade panel can soften that direct light without moving the crop into deep shade.
Place a lettuce grow bag on a watertight tray, leaving space between the bag and the glass. Position outdoor shade cloth on a small, securely supported frame where it intercepts the harshest sun.
- Keep the sides open for airflow.
- Check soil moisture before treating every wilted leaf as thirst.
- Remove the panel before strong winds.
Use only permitted attachments. Shade can help with exposure, but lettuce may still struggle during sustained hot weather.
🥬 Soften the harshest sun
BEFORE
The bag sits against the glass. Direct afternoon sun reaches the leaves, and checking the back of the bag is awkward.
AFTER
A gap allows access behind the bag. Shade falls on the crop during the hottest exposure, with open sides around the planting.
12. Tuck a Thyme Wedge Planter Outside the Balcony Door’s Swing

Open the balcony door fully before choosing this planter’s spot. The small wedge beside its swing may hold thyme without turning each trip outside into a sideways shuffle.
Choose a triangular planter that fits the unused corner, with enough root space for your thyme variety and a matching drip tray. This works best where the corner gets suitable sun.
- Mark the door’s full swing with removable tape.
- Check the route while carrying a watering can.
- Place the planter beyond both clearances.
Allow for stems to spread past the rim. Keep them trimmed away from the threshold, where trailing growth can catch shoes or get crushed beneath the door.
🚪 Check more than the pot’s outline
- Open every door or screen that uses this corner, including folding panels.
- Measure the planter with its tray fitted. Tray edges may stick out farther.
- Leave enough room to lift out the tray without blocking the doorway.
- Keep the door track, threshold, and any drainage openings free of soil and fallen leaves.
13. Combine a Balcony Seat and Nasturtium Planter in One Bench Unit

A bench with a built-in end planter gives seating and flowers one shared footprint. It can replace the separate chair and flowerpot that keep bumping into each other on a narrow balcony.
Choose an outdoor unit designed to support seated weight independently of its planting compartment. The soil liner should keep moisture away from the seat while allowing drainage into an accessible catcher.
Keep the flowers at the end: select a compact nasturtium and guide its growth toward the balcony interior, away from cushions and the walking route.
Position the bench against a suitable wall, away from the balcony guard. Count the bench, wet planting compartment, and occupants when checking the planned load.
🌼 One unit, separate working parts
14. Enclose a Blueberry Barrel in a Rigid Mesh Cage

Birds can reach balcony berries long before they reach your breakfast bowl. A rigid mesh cage around a compact blueberry gives the fruit a barrier without loose netting trailing across the balcony.
Choose a lightweight barrel-style planter and a cage that leaves space around the branches. The opening should face inward so you can pick berries without reaching through the railing.
- Use taut, securely fixed wildlife-safe mesh with no loose loops.
- Keep the cage clear of leaves and fruit.
- Fasten the frame so balcony gusts cannot tip or lift it.
Leave pollinator access while the plant flowers. Fit the barrier as fruit develops, checking first that no bird is inside.
🫐 Fit the cage around the harvest
Check branch clearance. Allow room for growth and gentle movement without leaves rubbing against the mesh.
Test the harvest opening. Make sure you can reach the back branches and open the door without striking the balcony rail.
Inspect after wind. Check fasteners, the latch, and mesh edges. Repair gaps or loose sections promptly.
15. Layer Spring Bulbs in One Deep Cylinder Beside the Balcony Chair

One deep planter can hold a sequence of spring flowers without taking another chair-sized patch of balcony floor. Choose bulbs with different flowering times, such as suitable early crocuses, dwarf daffodils, and later tulips.
Use a stable, broad-based cylinder with drainage holes and a fitted saucer. Check each bulb’s planting depth before choosing the container.
- Set the bulbs needing the greatest depth in the lower layer.
- Cover with potting mix, then add shallower layers.
- Offset bulbs so they do not sit directly above one another.
Keep the planter beyond the chair’s pull-out space. Choose bulbs suited to your climate, and leave their foliage until it naturally yellows after flowering.
🌷 PLAN A SEQUENCE, NOT A CROWD
Choose bulbs for different flowering windows and follow their spacing needs. Layering uses the container’s depth, but it does not remove the need for root room. Expect the display to change as earlier flowers fade and later ones open.
16. Give a Rosemary Box a Removable Rain Hood on an Uncovered Balcony

After several wet days, a rosemary box on an uncovered balcony may stay damp long after other containers begin drying. A small rain hood can limit extra water entering the mix while leaving the plant open to the air.
Choose a clear, sloped cover on a secure frame above the box. Keep it clear of the foliage, with open sides and a drip edge that directs water into an accessible catcher inside the balcony.
Watch where the rain goes: a hood should not send runoff over the railing or onto the walkway. Empty the catcher promptly, keep the planter’s drainage open, and remove the hood before strong winds.
🌿 Shelter without enclosing the plant
| Open-sided rain hood | Sealed cover |
|---|---|
| Leaves room for air to move around stems and across the soil surface. | Can trap moist air around the plant and slow drying. |
| Allows easy checks of the mix, drainage tray, and runoff catcher. | Must be opened to reach the plant and may hide pooling water. |
| Still needs checking when sunshine returns. A clear roof does not provide shade. | Can build up heat quickly in direct balcony sun. |
| Needs a planned runoff route. Wind-driven rain can still enter through open sides. | Does not solve runoff by itself. Water still flows off the outside of the cover. |
17. Start Seedlings in a Cloche Tray on a Foldaway Balcony Table

A temporary seed station lets you raise young plants without giving up balcony floor space all season. Set a seed tray inside a watertight base on a sturdy folding table in a bright, sheltered spot.
Use a clear cloche lid during germination only when it suits the seeds. Follow their temperature needs rather than assuming a sunny balcony is warm enough overnight.
- Lock the table fully open on a level surface.
- Keep the tray away from the table’s edge.
- Vent the lid and remove it as seedlings emerge.
Direct sun can overheat a closed cloche. Once the seedlings move into their growing containers, clean the tray and fold the table away.
🌱 Keep the nursery easy to manage
✅ Do this
Check the table’s capacity for the wet tray and watering supplies.
Remove standing water from the base after the mix has absorbed what it needs.
Give seedlings raised under cover a gradual introduction to stronger sun and balcony breezes.
🚫 Skip this
Leaving a closed cloche in direct sun while you are away.
Balancing the lid against the railing, where a gust could lift it.
Leaving seedlings outdoors through temperatures they cannot tolerate.
Conclusion
A balcony garden works better when you can still open the door, pull out a chair, and water without sending drips below.
You do not need to fill every gap at once.
Choose one of these balcony container garden ideas that solves your biggest frustration, then see how it fits your daily routine.
Watch the space through sunny afternoons, windy spells, and rainy days before adding more. Leave room for plants to grow and for yourself to enjoy them. A manageable garden gives you more time to notice the new leaves and first ripe fruit.
Save this list on Pinterest for your next balcony planting day.