
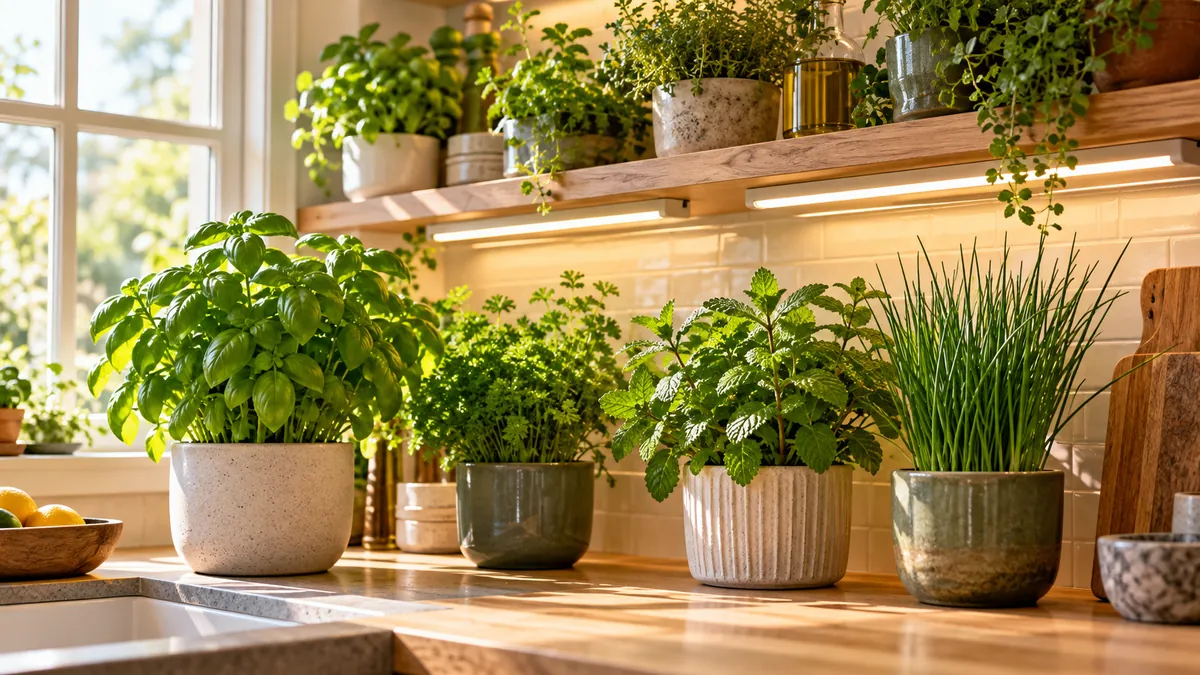
The basil on your kitchen counter keeps leaning toward the window, and the parsley barely replaces the leaves you snip for dinner. You water, move the pots, and wait. Still, the growth looks thin.
An indoor herb garden with grow lights can help when window light falls short. But buying a lamp is only part of the setup. The light needs to reach the leaves, the pots need room to drain, and the whole arrangement should fit somewhere you can actually use it. A crowded shelf beside the toaster can become another chore instead of a handy source of herbs.
These ideas focus on practical setups for real homes, including small counters, narrow shelves, and movable carts. You will find ways to position lights, manage different plant heights, and keep watering manageable. Start with a setup that suits your space and the herbs you cook with most. You can add more pots once you see how the first ones grow.
1. Start a Countertop Herb Garden Under a Freestanding Grow Light
Start where you will notice the plants every day.
A freestanding grow light keeps the setup together without needing a wall bracket. Choose a model intended for plants, with enough coverage for your pots and room to adjust its height.
- Give basil, parsley, and chives separate pots with drainage holes.
- Set the pots on a waterproof tray that lifts out for cleaning.
- Leave enough counter space to remove a pot without catching its leaves.
Position the fixture according to its growing guidance, then watch how new growth develops. Keep the watering jug nearby, but leave the tray empty of runoff.

Check the stand
A steady base and adjustable fixture leave room for taller growth.
Check the pots
Drainage holes let excess water escape. Decorative covers need emptying after watering.
Check the tray
Choose a watertight tray with a raised edge and enough space to lift each pot.
2. Fit a Narrow Herb Row Beneath a Cabinet-Mounted Grow Bar
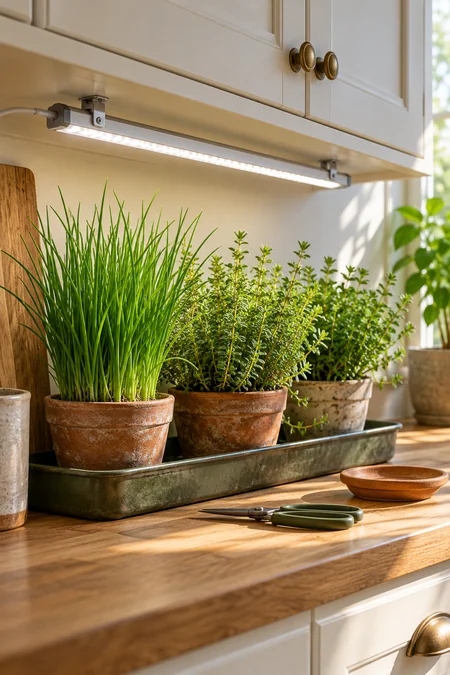
The strip of counter beneath an upper cabinet can hold a small herb row, provided the plants still have space to grow.
- Measure the gap between the cabinet and the tops of your pots, allowing for mature foliage and the fixture’s recommended clearance.
- Secure a plant-growing LED bar with mounting hardware suited to the cabinet and fixture.
- Arrange the pots in a single row within the light’s coverage.
Choose compact herbs such as chives and thyme for a low space. Keep this setup away from cooking heat and sink splashes. If the clearance is tight from the start, use a taller growing area.
✅ Check the cabinet space first
- The mounting surface can support the fixture using its approved hardware.
- Mature leaves will have clearance from the light and cabinet.
- The fixture’s growing coverage reaches the entire row.
- Each pot slides out without tipping or snagging foliage.
- The cable reaches a dry connection without crossing the food-preparation area.
3. Build a Tiered Herb Shelf with a Separate Light for Every Level
One lamp at the top of a shelf will not light the plants hidden beneath solid shelves.
Give each growing level its own fixture. An open rack with adjustable shelves makes it easier to leave room for both the pots and their mature leaves.
- Attach each grow bar above the plants it serves.
- Place taller herbs on a level with more headroom.
- Keep trays shallow enough that you can inspect and remove the pots.
Secure the rack as its manufacturer directs, and check its load limits before adding wet containers. A little empty shelf space makes watering and harvesting much less awkward.

✅ Give each level its own light
- Match each fixture to the shelf area below it.
- Leave access to adjust or remove the fixture.
- Keep tall foliage from shading neighboring pots.
🚫 Skip the top-light shortcut
- Solid shelves block light from reaching lower levels.
- Bright room lighting does not confirm adequate growing light.
- Crowding extra pots onto the edges can put them outside useful coverage.
4. Turn a Rolling Cart into a Movable Herb Station
A rolling cart lets you reclaim the counter without carrying every pot separately.
Choose a sturdy cart with locking wheels and a top shelf large enough for a waterproof tray. Attach a lightweight grow-light frame securely, keeping the load within the cart’s limits.
Make moving it a simple routine:
- Unplug the light and secure the loose cord.
- Check that pots and trays cannot slide.
- Move slowly across a clear, level floor, then lock the wheels.
Store supplies on the lower shelf without blocking access to the plants. The cart still needs a regular parking spot where its light can run undisturbed.
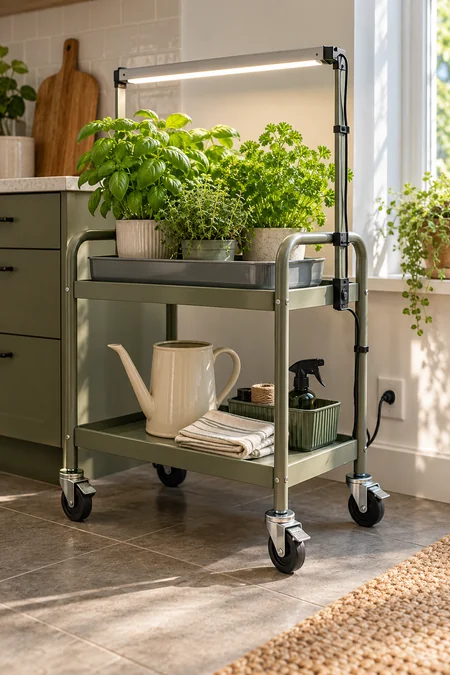
💡 Choose the parking spot before loading the cart
Look for a level floor, a dry power connection, and space outside the main walkway. Lock the wheels during everyday use. Avoid rolling a loaded cart over steps or high thresholds.
5. Add Supplemental Grow Lighting to a Windowsill Herb Garden
A bright-looking window does not always give herbs enough light for steady growth.
A grow light can support a windowsill garden when daylight is weak or short. Use a secure overhead fixture that reaches the full row, rather than shining sideways at the nearest pot.
- Keep leaves away from cold window glass.
- Leave access to window handles and blinds.
- Set a repeatable light schedule that includes a daily dark period.
Follow the fixture’s guidance for placement, then check new growth as the seasons change. More daylight may change how much supplemental lighting is useful. Avoid trapping the plants and electrical equipment behind a damp curtain.
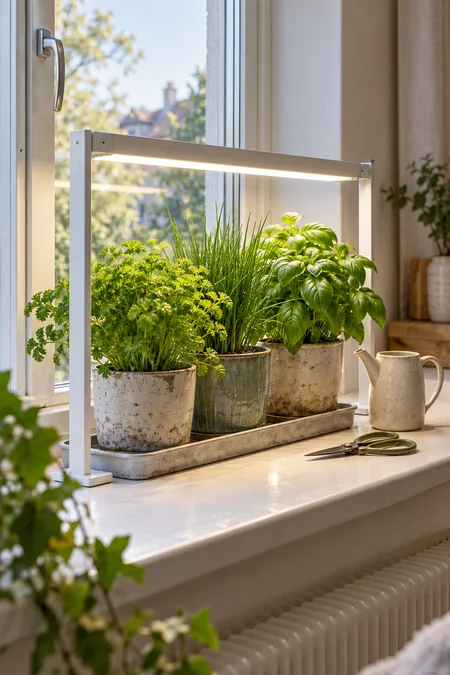
🪟 Window light alone
The amount reaching the leaves changes with the season, nearby shade, and window direction.
Check: Are new stems stretching toward the glass, or is growth slowing?
💡 Window plus grow light
An adjustable fixture adds light on a schedule while daylight still contributes.
Check: The whole row receives light, and the setup still allows a daily dark period.
6. Give One Frequently Used Herb Its Own Grow Bulb
If basil is the herb you reach for most, start with one plant and a light sized for it.
A plant-growing bulb in a compatible lamp can serve a single pot without taking over the counter. Check the bulb’s growing coverage and placement guidance before choosing the lamp.
- Use a stable base or a secure clamp.
- Confirm the socket and fixture ratings suit the bulb.
- Position the light above the foliage, with room to adjust it.
Keep the pot within the useful light footprint as its branches spread. A decorative shade should not block the light or restrict ventilation around the bulb.

| One-pot grow bulb | Fixture for several pots |
|---|---|
| Useful when one frequently harvested herb is your main focus. | Useful when you want several separate herbs in one growing area. |
| Check coverage against the plant’s mature width, not just its pot. | Check coverage against the full arrangement of leaves and pots. |
| Needs a compatible lamp that holds the bulb steadily above the plant. | Needs supports that keep the fixture level across the growing area. |
7. Make a Wall Shelf Herb Garden with Secure Overhead Lighting
A wall shelf can free up the counter, but wet pots weigh more than empty ones.
Choose a shelf and fixings suited to the wall and the full planted load. Mount the grow bar securely above the growing area, leaving space for mature leaves and access to the pots.
Plan the setup in this order:
- Confirm the shelf support and load limit.
- Fit a watertight tray within the shelf edges.
- Position the light using its placement guidance.
Keep the shelf low enough to inspect the soil without stretching. If removing a watered pot feels awkward, the shelf is too high for comfortable daily care.

Support the full load
Count pots, wet growing mix, plants, trays, and any equipment supported by the shelf.
Protect the surface
Use a removable watertight tray. Check beneath it occasionally for trapped moisture.
Secure the light
Use suitable brackets and cable clips, leaving access for adjustment and removal.
8. Set Up a Small Hydroponic Herb Garden with Room to Grow
You do not need to fill every planting opening on day one.
A countertop hydroponic garden holds roots in a water-based growing system beneath a built-in light. Choose herbs suited to the unit’s available height and spacing, then follow its planting and feeding instructions.
- Cover unused openings with the supplied opaque caps.
- Keep the reservoir lid accessible for checks and cleaning.
- Use nutrients intended for edible hydroponic crops, following the product directions.
Basil can spread beyond its planting position, so leave room for its branches. Clear-looking water does not tell you whether the nutrient balance is right. Follow the system’s water-change and monitoring guidance.

✅ Before filling the planting deck
- Check the mature size of each herb against the unit’s growing space.
- Make sure the light can adjust as plants become taller.
- Keep access to the fill opening and removable reservoir parts.
- Have suitable nutrients and any monitoring supplies the system requires.
- Fit opaque caps over unused planting openings.
- Leave space around the unit so it can be emptied and cleaned.
9. Match the Grow Light’s Coverage to the Whole Herb Tray
A tray can fit beneath a lamp while its outer plants still receive much less light.
Check the fixture’s recommended growing area at the height you plan to use. Arrange the plants by the width of their leaves, not just the space their pots occupy.
- Keep mature canopies within the stated coverage.
- Leave gaps so taller plants do not shade shorter neighbors.
- Reduce the number of pots if the growing area becomes crowded.
Raising a fixture may spread light farther, but it also changes how much reaches the leaves. Do not assume that a wider-looking glow means useful growing coverage has increased.
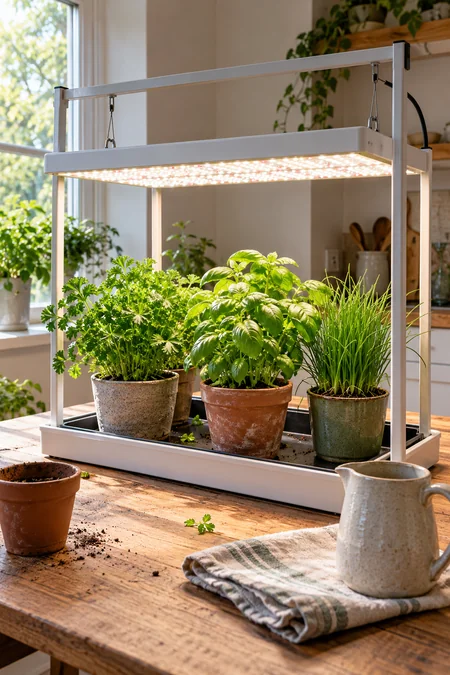
✅ Plan around growing coverage
- Use the manufacturer’s coverage guidance at the intended mounting height.
- Allow room for leaves to spread inside that area.
- Check the edge plants as well as the plants beneath the center.
🚫 Skip these shortcuts
- Judging growing coverage only by visible brightness.
- Adding pots wherever a corner of the tray remains empty.
- Raising the lamp without checking its placement guidance again.
10. Put the Grow Lights on a Repeatable Timer Schedule
Forgetting the lamp until bedtime makes the growing routine harder to keep consistent.
A timer can give the herbs a regular light period and a daily dark period. Choose a schedule using the needs of your herbs, the fixture’s guidance, and any daylight the plants receive.
Before relying on the timer:
- Confirm that it is rated for the connected equipment.
- Check that the light turns back on when power returns.
- Watch a complete on-and-off cycle.
Some lights with electronic controls do not restart automatically after an external timer cuts power. Test yours first, and check the clock or settings again after a power outage.
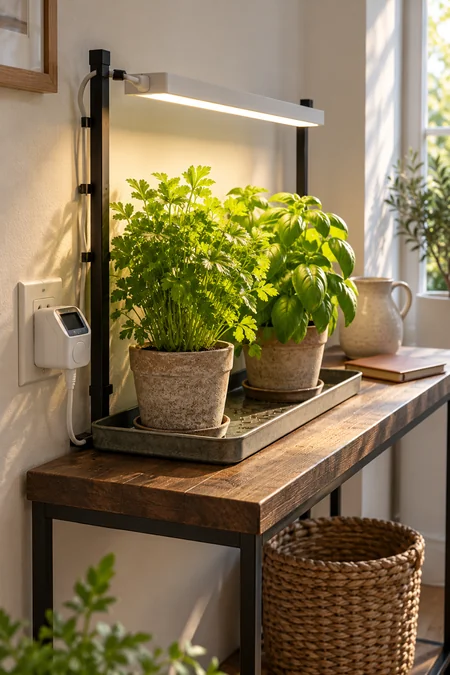
Set, test, then check again
- Choose the daily window. Use suitable guidance for your herbs and fixture. Include a dark period rather than leaving the light on continuously.
- Program the timer. Set its clock and switching times, then select the automatic mode described in its instructions.
- Verify both changes. Confirm that the fixture actually switches off and restarts at the chosen times.
- Recheck after interruptions. A power loss or changed setting may affect the schedule. Review it when seasonal daylight changes, too.
11. Use an Adjustable Light Frame as Herbs Grow Taller
The gap above a young basil plant can shrink quickly as new stems reach upward.
An adjustable frame lets you change the fixture’s position without moving the whole garden. Choose a stand with secure height settings and enough adjustment range for the herbs you plan to grow.
- Check the gap above the tallest leaves.
- Follow the fixture’s placement guidance rather than using one distance for every light.
- Secure both sides after changing the height.
Keep leaves from touching the fixture. If taller plants force the light too far above shorter neighbors, separate the plants by height instead of raising the lamp for everyone.

🌱 Earlier: a shorter canopy
Position the fixture using its guidance for the plants you are growing.
Check: The frame has room for later adjustment, and its supports are locked.
🌿 Later: taller leaves
Recheck the distance from the fixture to the highest leaves, then adjust if needed.
Check: Both sides are secure, the fixture is level, and shorter plants still receive suitable light.
12. Raise Short Herb Pots on Stable, Washable Risers
Short herbs can sit well below their taller neighbors, even when the pots share one tray.
A broad, washable riser can lift a small pot toward the light without changing the fixture’s position. Use a purpose-made plant riser that supports the entire pot base and stays steady when wet.
Check the arrangement before leaving it in place:
- Set the riser flat inside a waterproof tray.
- Confirm that the drainage holes remain open.
- Check the new leaf-to-light distance.
Avoid stacks of books, loose saucers, or narrow blocks. Recheck the setup as plants grow, and remove the riser when the extra height is no longer useful.
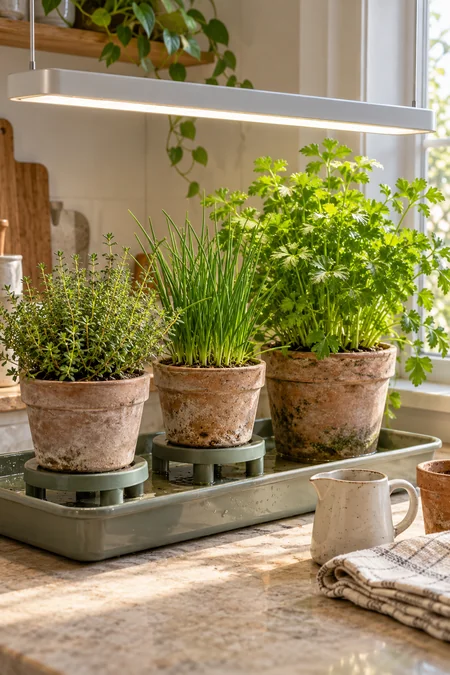
💡 Similar height does not mean identical needs
A riser changes the distance between the leaves and the light. It does not make every herb need the same lighting or watering. Group plants with suitable growing needs, and check each pot separately.
13. Give Tall Herbs a Separate Growing Bay
A tall basil plant should not decide the lamp height for every pot on the shelf.
Reserve a separate bay with its own adjustable light for herbs that outgrow the main arrangement. This gives you room to manage their height without leaving shorter plants far below a shared fixture.
- Choose a space with headroom for both foliage and lighting.
- Keep the mature canopy inside the light’s growing coverage.
- Leave access to turn, water, and harvest the plant.
Regular harvesting can help manage suitable herbs, but it cannot fix a cramped shelf. Move the plant before its stems press against the light or shade the neighboring pots.

Mixed heights under one fixture
- The tallest plant limits how low the light can sit.
- Broad upper leaves may shade smaller plants.
- Every height adjustment affects the whole group.
A separate tall-plant bay
- The tall plant gets its own light adjustment.
- Shorter herbs keep a suitable fixture position.
- Each growing area can be checked independently.
14. Plan Pot Spacing Around Mature Leaves
The empty gaps between young herbs are useful growing space.
Before adding another pot, consider how wide the existing plants may become. A setup that looks sparse at first can feel crowded once basil branches out or parsley fills its container.
Leave room for more than the pot itself:
- Leaves should not be pressed into neighboring foliage.
- Each plant needs access to the overhead light.
- You should be able to check the soil and lift out a pot.
Review the arrangement after a flush of growth. Move an extra plant to another lighted spot if needed, rather than squeezing it against the tray edge.

✅ The mature-plant spacing check
- Can you see where one plant’s foliage ends and the next begins?
- Are shorter plants clear of broad leaves above them?
- Can you inspect the soil without pushing stems aside?
- Can each pot slide out without snagging neighboring leaves?
- Does the full canopy still fit within the light’s growing coverage?
- Is there somewhere suitable to move a plant if the group becomes crowded?
15. Pair a Lighted Herb Shelf with a Removable Drainage Tray
A removable tray makes the damp part of indoor gardening easier to manage.
Choose a watertight tray with a raised edge, sized to fit fully on the shelf. It should catch small spills without becoming a permanent pool beneath the pots.
- Water each herb according to its needs.
- Let excess water drain, using the sink when practical.
- Empty collected runoff before returning the setup to its usual position.
Keep electrical connections away from the watering area. Lift and clean the tray regularly, and check the shelf beneath it for trapped moisture. If the full tray is heavy, remove the pots before carrying it.

💧 Follow the water through the setup
1. Out of the pot
Drainage holes let excess water leave the growing mix. Keep those openings clear.
2. Into the tray
The tray temporarily catches runoff and small spills. Check it after watering.
3. Away from the roots
Empty collected water so ordinary draining pots are not left soaking in it.
This routine is for ordinary pots with drainage holes. Purpose-built self-watering containers use a different reservoir arrangement.
16. Keep Grow-Light Cords Clear of the Watering Area
A loose cable across the tray turns a simple watering job into an awkward one.
Route the grow-light cable along a fixed support, keeping plugs, timers, and connections away from places where water collects. Leave enough slack for normal light adjustments without creating loops that hang among the pots.
- Use cable clips suited to the shelf or frame.
- Keep connections visible and accessible.
- Remove pots for watering when that makes the setup easier to manage.
Check the route whenever you move the fixture. A cable that was loose yesterday may pull tight after you raise the light. Keep the equipment’s instructions with your gardening supplies.

✅ Check the cable route
- Cables follow a fixed support instead of crossing the watering tray.
- Plugs, timers, and connections stay away from splashes and collected water.
- Clips hold cables without crushing or sharply bending them.
- The fixture can adjust without pulling on its plug or connection.
- No cable passes beneath a pot, tray, or rolling wheel.
- The power connection remains easy to reach without moving plants.
17. Keep an Open Herb Shelf with Room for Gentle Air Movement
An enclosed cabinet may look tidy, but its doors can trap warmth and moisture around the plants.
An open shelf makes it easier to inspect leaves and allows room air to move through the growing area. Keep foliage from pressing against walls, shelf panels, or neighboring plants.
Start with the layout:
- Leave the front and sides open.
- Space pots so leaves are not packed together.
- If the air remains still, consider a small fan on a gentle setting.
Avoid a strong stream aimed at one plant all day. Air movement can change how quickly pots dry, so check the growing mix rather than watering by habit.

✅ Leave room around the plants
- Keep the growing shelf open to the room.
- Leave gaps between leafy canopies.
- Use gentle air movement if needed, then check how the plants respond.
🚫 Avoid a crowded enclosure
- Do not pack plants behind closed glass doors without a ventilation plan.
- Keep foliage away from heating vents and strong drafts.
- Do not use a fan as a substitute for checking drainage and watering.
18. Give Rosemary and Thyme Separate Pots for Easier Watering
Rosemary and thyme can share a growing area without sharing the same pot.
Individual containers let you check the moisture around each plant and water only the one that needs it. This matters when their sizes, pot materials, or growing mixes differ.
- Use containers with drainage holes and a well-draining potting mix.
- Check each pot before watering instead of treating the tray as one planter.
- Keep both plants within suitable grow-light coverage.
Do not assume that a dry-looking surface means the whole pot is dry. Check below the surface and notice the pot’s weight. Separate pots also make it easier to move a plant that outgrows the arrangement.
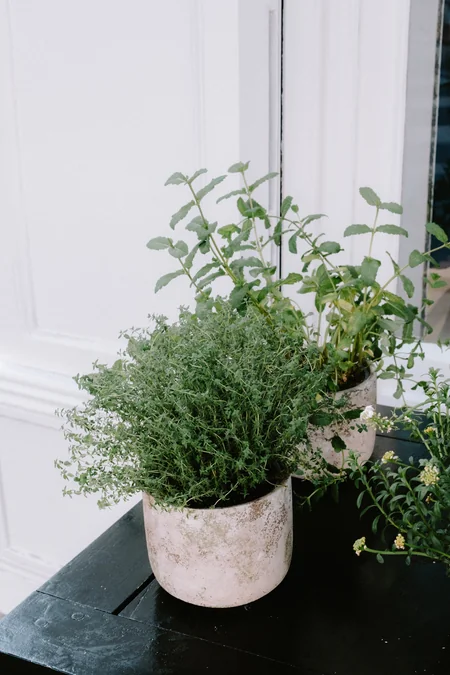
| Separate pots | One shared planter |
|---|---|
| Check moisture and water each plant independently. | The plants share growing mix, making separate watering less practical. |
| Move or repot one herb without disturbing the other. | Removing one established plant may disturb neighboring roots. |
| Adjust each plant’s position as its canopy changes. | Reposition the entire planter to change its relationship to the light. |
19. Grow Mint in Its Own Lighted Container
Mint earns its own pot because its spreading growth can crowd a shared planter.
Choose a container with drainage and room for the root ball to develop. Position it beneath suitable grow lighting, leaving space around the stems so harvesting does not disturb nearby herbs.
Keep the setup easy to manage:
- Check moisture regularly instead of letting the pot repeatedly dry out completely.
- Trim usable stems to manage spreading growth.
- Inspect the roots when growth slows or watering becomes difficult.
A separate container keeps mint out of neighboring root space, but it still needs attention. If the pot becomes crowded with roots, divide or repot the plant rather than squeezing in more water.
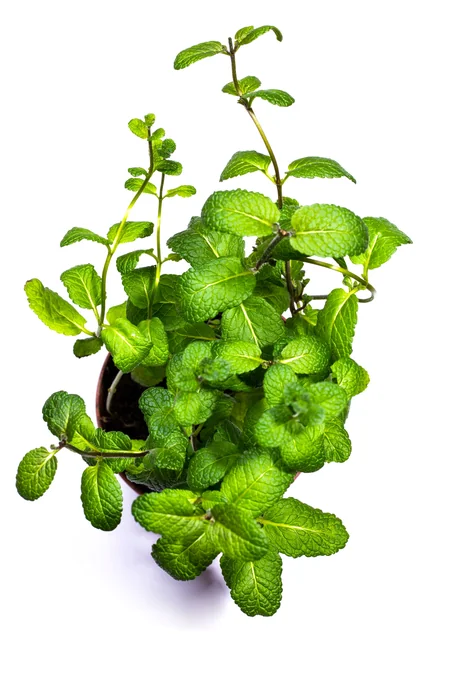
Root space
Start with a pot suited to the root ball. Check for crowding as the plant develops.
Drainage
Keep drainage holes clear and empty runoff. Moist growing mix should not mean a waterlogged pot.
Harvest access
Leave room around the canopy so you can reach stems without crushing neighboring leaves.
20. Set Up a Small Grow-Light Nursery for Herb Cuttings
A few basil cuttings can become replacement plants without filling another shelf with seed trays.
Use healthy, nonflowering stems from a plant you have checked for pests. Basil is a useful starting choice for rooting in water, though other herbs may need a different approach.
- Make a clean cut below a leaf node and remove leaves that would sit underwater.
- Place the stems in clean water with their upper leaves above the rim.
- Give them suitable light without excessive heat.
Refresh the water regularly. Once several roots have developed, move the cuttings gently into moist potting mix and watch them closely as they settle in.
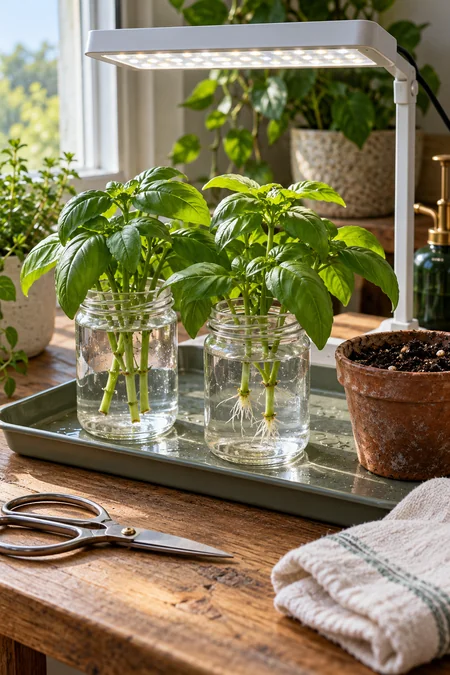
Basil cutting nursery: prepare, root, pot
- Prepare clean containers. Use washed jars and clean cutting tools. Keep the nursery separate from any plant showing pests or disease.
- Keep leaves above water. Submerge the lower stem and exposed node, with no leaves resting below the waterline.
- Check the stems and water. Refresh the water regularly, clean the container if needed, and remove cuttings with soft, rotting stems.
- Move rooted cuttings into pots. Plant gently in moist potting mix with drainage. Avoid letting the mix dry out while the new plants establish.
21. Reserve One Lighted Tray for Starting Herb Seeds
A small seed tray gives young herbs their own space before they join the larger pots.
Start with clean containers, drainage holes, and a seed-starting mix. Follow each seed packet for sowing depth and germination conditions, since basil and parsley do not need identical treatment.
- Keep the mix moist without leaving the tray waterlogged.
- Check daily for emerging seedlings.
- Adjust the grow light using its guidance for young plants.
If you use a humidity cover, remove it as directed once seedlings emerge so moisture does not remain trapped around them. Move crowded seedlings into suitable individual pots when they are ready, rather than leaving them tangled in tiny cells.
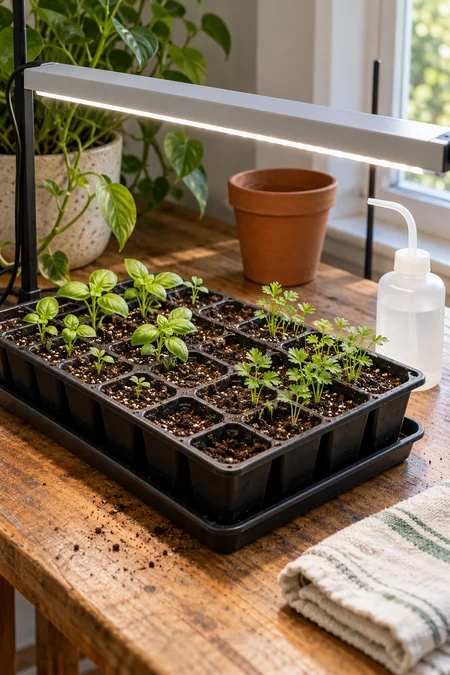
At sowing
Follow the packet’s depth and temperature guidance. Keep a record of what you sowed and when.
After emergence
Check light placement, moisture, and ventilation. Do not leave seedlings crowded beneath a closed humidity cover.
Before moving up
Look for true leaves and developing roots. Handle seedlings gently and use transplant guidance suited to the herb.
22. Sow Cilantro in Separate Batches for Replacement Plants
Cilantro will not stay leafy forever, even beneath a grow light.
Instead of relying on one aging plant, sow another pot while your current batch is still useful. Cilantro can move into flowering, especially in warm conditions, so a replacement pot gives you another chance at tender leaves.
Keep the batches separate:
- Sow into a draining container with room for root growth.
- Keep the newest pot moist during germination.
- Move growing seedlings into suitable light without letting older plants shade them.
Choose when to sow again based on growth and how much you harvest. A fixed calendar cannot guarantee an uninterrupted supply in every indoor setup.
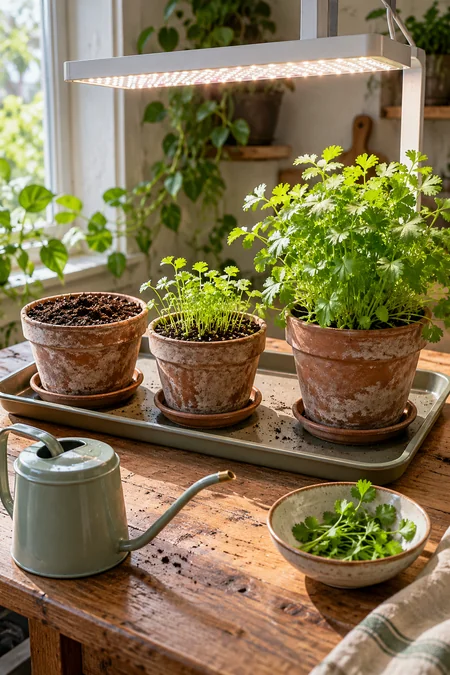
Keep a replacement pot moving through the stages
- Newly sown pot. Follow the seed packet for depth and germination conditions. Record the sowing date.
- Young growing pot. Check moisture and light placement. Thin crowded seedlings according to the packet guidance.
- Harvest pot. Take modest amounts while leaving enough foliage for continued growth.
- Older or flowering pot. Let its condition guide replacement. Repeated cutting will not return a flowering plant to its earlier leafy stage.
23. Leave Space for Basil to Branch After Harvesting
Basil needs room beside its stems, not just space above its tallest leaves.
Once a plant is established, harvesting a stem just above a healthy leaf pair can encourage growth from the buds below the cut. Keep enough foliage on the plant to support recovery.
- Use clean scissors for a neat cut.
- Choose a stem with healthy leaves remaining below your cut.
- Leave space around the plant for side shoots to develop.
Check the light coverage as the canopy widens. A basil plant that fit beneath a narrow bulb when young may need a broader growing area after repeated harvesting.

🌿 Read the stem from top to bottom
Upper stem and leaves
This is the portion you plan to harvest.
✂️ Cut the stem just above a healthy leaf pair.
Leaf pair and its growing buds
Keep these attached. Side shoots can develop from buds where the leaves join the stem.
Lower leaves and rooted stem
Leave enough healthy foliage to support the plant after harvesting.
24. Create a Separate Lighted Check-In Spot for New Herbs
A new herb plant deserves a close look before it joins your established pots.
Set aside a separate lighted spot where you can inspect incoming plants and watch for problems. Putting the new pot at the far end of the same tray offers little separation.
Check more than the top leaves:
- Look beneath leaves and around stem joints.
- Inspect the soil surface and drainage holes.
- Watch for insects, webbing, sticky residue, or damaged growth.
Keep the newcomer’s tray and tools separate while you assess it. If you find a problem, identify it before choosing a treatment, especially on herbs you plan to eat.

✅ New-herb inspection checklist
- Leaf undersides: Look for insects, eggs, pale speckling, or fine webbing.
- Stems and joints: Check for clusters, bumps, cottony material, or sticky residue.
- Growing mix: Notice persistent wetness, unusual odors, or small flying insects.
- Pot and drainage: Check that water can escape and the container is not damaged.
- New growth: Watch for fresh distortion or damage over time.
- Before moving: Recheck the plant. One clean inspection does not rule out a hidden problem.
25. Make a Grow-Light Adjustment Station for Troubleshooting Herbs
When an herb struggles, changing everything at once makes the cause harder to understand.
Keep a small notebook beside the garden to record light settings, watering, and changes in growth. A room thermometer can help you notice warmth near the fixture or a cold window.
- Describe what you see before deciding what caused it.
- Check light placement, growing-mix moisture, drainage, and temperature.
- Make one considered adjustment when practical, then watch the new growth.
Remove an obvious problem promptly, such as standing runoff. Judge recovery by the plant’s overall condition and developing leaves. Old damage may remain even after the growing conditions improve.

🔎 Observe first, then choose a check
Long, leaning stems
Check: Light placement, daily operation, coverage, and shading from neighboring plants.
Record: How the next leaves and stems develop after an adjustment.
Drooping or yellowing
Check: Moisture below the surface, drainage, temperature, and signs of pests before adding water.
Record: Whether symptoms affect older leaves, new growth, or the whole plant.
Pale or damaged upper leaves
Check: Fixture clearance, heat, recent changes, watering, and pest damage.
Record: Whether damage is concentrated nearest the light or appears elsewhere too.
These observations guide your checks. A leaf symptom alone does not identify the cause.
Start with a Setup You Can Keep Up With
An indoor herb garden with grow lights does not need to fill a whole shelving unit. Start with a few herbs you use often, a light suited to their growing area, and pots you can water and drain easily.
Leave room for the plants to grow, check each pot separately, and adjust the setup as you learn. A small garden that fits your routine is easier to care for than a crowded collection you struggle to reach.
Save this list to your Pinterest gardening board so you can return to the layouts and care ideas when you plan your next herb-growing space.