

Your balcony gets plenty of daylight, but the sun barely touches the floor. Does that mean a garden is out of reach? Learning how to garden on a shady balcony starts with finding out what kind of shade you have. A spot beside an open railing can offer very different growing conditions from a corner tucked behind a solid wall.
The most useful first purchase may be no purchase at all. Spend a day watching the light before bringing home plants. That small pause helps you avoid filling a dim corner with plants that need hours of sun, or buying large pots before checking where they can safely sit.
This guide will help you set up a small container garden with plants suited to your space, proper drainage, and a watering routine based on the soil. Plan for 1–2 hours of active setup once your supplies are ready, plus time to observe the balcony. Start with 2–3 pots so you can learn how each one behaves. You can add more after you see what grows well.
Your starter garden at a glance
Light observation over 1–2 days, plus shopping and setup
About 1–2 hours for a small starter garden
Beginner · Start with 2–3 pots
Allow extra time if building questions or weather delay your checks.
What you need
For planning
- A notebook and pencil, or a phone notes app
- A clock or phone for recording sunlight
- A tape measure
- Your building’s balcony guidance, if applicable
For planting
- 2–3 small plants matched to your light and climate
- Pots with drainage holes, sized for those plants
- Saucers or trays to collect runoff for prompt emptying
- Container potting mix suited to your chosen plants
- A small trowel or a scoop
- A watering can or a jug, plus access to water
Choose the plants before buying pot sizes and potting mix. Keep nursery labels for their care instructions.
The plan from start to planted
- Check your balcony’s limits before buying supplies.
- Map the light that reaches your balcony.
- Choose plants that match your recorded light.
- Select containers with drainage holes.
- Position your pots in suitable growing spots.
- Fill your containers with potting mix.
- Plant each starter at its original soil level.
- Water the newly planted pots thoroughly.
- Check soil moisture before watering again.
Check your balcony’s limits before buying supplies
Wet potting mix adds weight, and a narrow balcony can fill up fast. Measure the floor space available while keeping the door, drains, and walking route clear. Check your building’s rules on planters, railing attachments, and runoff. If permitted loads are unclear, ask the building manager before choosing heavy containers. A balcony’s appearance cannot tell you how much weight it can safely hold.
BEFORE YOU SHOP
Give every pot a suitable place
- Space: Record the usable floor dimensions.
- Access: Keep doors, drains, and the walking route clear.
- Weight: Confirm limits before planning heavy pots or grouped containers.
- Runoff: Plan to catch drainage without leaving pots standing in water.
- Attachments: Check permission and suitable fixings before using railing planters.
Keep this note: Usable space ______ · Building questions ______ · Drain location ______

Map the light that reaches your balcony
A bright-looking balcony may receive little direct sun. On 1 clear day, check the future plant spots about every 2 hours, from morning until evening. Record sunbeams separately from daylight in shade. Note when direct sun starts and stops wherever possible. If the day stays cloudy, repeat the check in clearer weather before buying plants.
FOLLOW THE LIGHT
Record each planting spot separately
Where do sunbeams land?
Time: ______
Spot: ______
Does the overhead cover block the sun?
Time: ______
Spot: ______
Does direct sun reach the railing or wall?
Time: ______
Spot: ______
Keep checking about every 2 hours. These three cards group your notes; add the checks between them.
- Direct sun: Sunlight falls directly on that spot.
- Bright shade: The spot receives open daylight without direct sun.
- Deep shade: Walls or overhead cover block much of the available daylight.
Note approximate direct-sun hours and how sheltered each spot feels. Recheck as the seasons change.
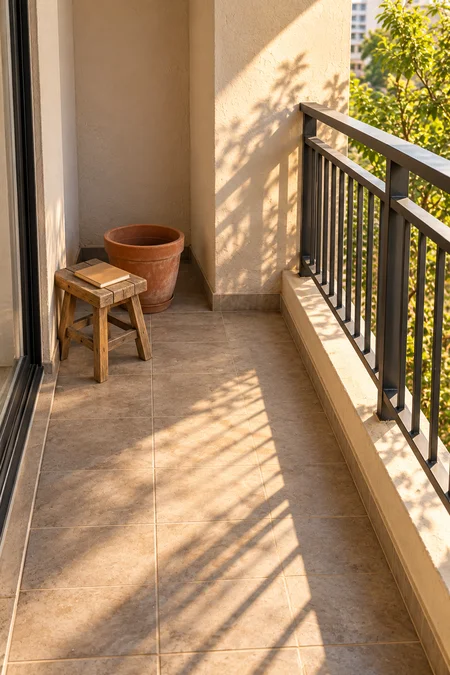
Choose plants that match your recorded light
Your light notes are more useful than a display of flowers at the nursery. Start with 2–3 small plants, using their labels to check light needs and mature size. Among shade tolerant balcony plants, choose types suited to your local temperatures, too. A plant sold for shade may still struggle in a very dark recess.
Bring your notes to the nursery and ask which choices fit that exposure. For a first attempt, repeating one suitable plant in separate pots makes care easier to compare.
MATCH BEFORE YOU BUY
A short plant-selection filter
Look for plants labelled for shade. Check that they suit outdoor conditions and your local temperatures.
Compare your recorded hours and sun timing with the plant’s label. Afternoon exposure can be hotter than morning exposure.
Ask about that exact exposure before buying. Shade tolerance does not mean a plant can grow without enough light.
Match the goal, too
- Leaves: Start by considering suitable foliage plants.
- Flowers: Confirm the light needed for flowering, not only survival.
- Food: Check the crop’s light needs and likely harvest before buying.
Final label check: Light · Temperature range · Mature size · Water needs

Select containers with drainage holes
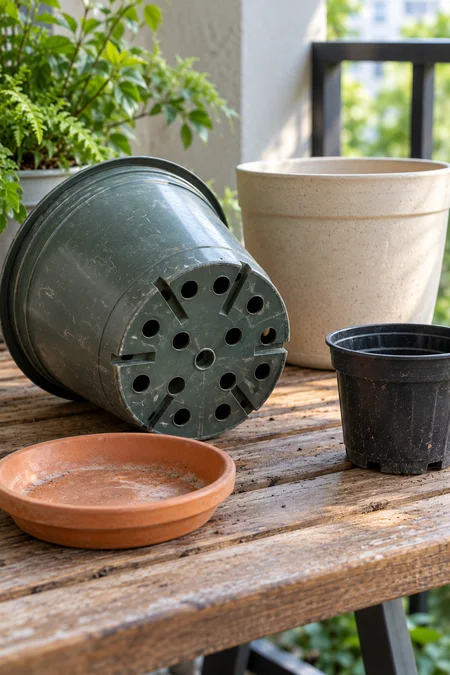
If you fall for a decorative pot, look underneath before buying it. Water needs a way out. Choose a planting pot with open drainage holes and enough room for the roots. For many small foliage starters, a pot about 1–2 inches wider than the nursery pot is a reasonable first move; check the plant’s needs before sizing up further.
An oversized pot holds extra wet mix around a small root ball. A hole-free decorative cover can still work if the inner pot drains separately and you empty the cover.
CHECK THE UNDERSIDE
Pick a pot that lets water leave
Planting pot
- Open drainage holes in the base
- Room for the root ball without a large ring of spare mix
- A stable base and manageable weight
Saucer or decorative cover
- Space to catch runoff
- Access for emptying after watering
- No water left around the inner pot’s base
Position your pots in suitable growing spots
2–3 empty pots are much easier to rearrange than filled ones. Use your light map to place them where the chosen plants can grow. Leave room for their mature spread and for reaching each saucer. Keep containers on a stable surface, away from the railing edge and out of the door’s swing.
ARRANGE WHILE EMPTY
Give the plants room to grow
Use your light notes to identify suitable spots. Keep pots securely inside the balcony.
Space pots using the plants’ mature widths. Allow leaves room beyond today’s nursery size.
Leave access to every pot, the drain, and the doorway.
Check the full door swing. Avoid pressing foliage against the wall or crowding plants into a dim recess.
Wind check: A sheltered position may suit tender leaves, but confirm it still receives enough light. This layout is a guide, not a scale drawing.

Fill your containers with potting mix
Use container potting mix suited to your plants; soil dug from the garden can become too dense in a pot. Follow the bag’s instructions if the mix needs dampening before use.
- Add a base layer of mix with a trowel or scoop.
- Rest the plant, still in its nursery pot, on that layer to check the height.
- Adjust the layer so the existing soil surface will sit about 1 inch below the new pot’s rim.
Lift the nursery pot out. Leave the center open for the root ball; filling to the top creates extra work.
SET THE PLANTING HEIGHT
Build from the bottom up
Plan for about 1 inch between the rim and finished soil surface.
Keep this area open until planting. Use the nursery pot to check the height.
Adjust the depth to support the plant at the right level.
At the base: Drainage holes stay open. No gravel layer needed.
The spaces above are a planting guide, not exact proportions. Add mix around the root ball during the next step.

Plant each starter at its original soil level
The soil line in the nursery pot is your guide. Squeeze the pot’s sides, tip it gently, and support the root ball as it slides out. Avoid pulling on the stems. If roots circle tightly around the outside, gently loosen those outer roots.
Set the plant on the prepared mix. Keep its old soil surface level with the new mix, about 1 inch below the rim. Add mix around the sides and press lightly to close large gaps. Leave the base of the stems uncovered; do not pack the mix hard.
KEEP THE SAME SOIL LINE
Set the roots in, not the stems
The top of the original root ball meets the surface of the fresh potting mix. Keep about 1 inch of watering space below the rim.
Fresh mix covers the stem bases or crown.
Raise the root ball by adding mix beneath it.
The root ball sticks above the surrounding mix.
Remove some mix beneath it before filling the sides.
Heads up: Soil piled against the crown—the point where stems emerge—can hold moisture there and encourage rot.

Water the newly planted pots thoroughly
Pour slowly across the mix until water drains from the base. Pause if water pools on top, then resume once it soaks in. This first watering helps moisten the root ball and settle the mix around it. Let the pot finish draining, then empty its saucer or cover pot. A shallow splash can leave the center dry.
THE FIRST WATERING
Wet the mix, then let it drain
- Pour slowly over the surface. Move the stream around the pot instead of pouring into one spot.
- Pause if water pools. Allow it to soak in before continuing.
- Watch for drainage below. If none appears, check that the holes are open rather than continuing to flood the pot.
- Empty the collected runoff. Keep it off neighboring balconies and leave no standing water around the pot base.
There is no single cup measurement for every pot. Container size, mix, and starting moisture change how much water is needed.

Check soil moisture before watering again
During the first week, check each pot daily without assuming it needs water. Feel the mix about 1 inch below the surface, near the root ball, and compare it with the plant’s care label. Damp mix may need more time; a dry surface alone is not a reliable signal.
Plants that prefer steady moisture need watering sooner than those that tolerate some drying. Wind can dry a shaded pot, while cool weather can keep another wet. Check pots separately, and skip watering when the mix is still wetter than that plant needs.
CHECK FIRST, WATER SECOND
Let the mix guide the next watering
Feel about 1 inch below the surface near the root ball. Use the care label to judge when that plant needs water.
Wait. Check that runoff is not trapped and the drainage holes are clear.
Usually wait and check again. Keep the plant’s preferred moisture level in mind.
Water slowly and let it drain. Do not wait for moisture-loving plants to dry out completely.
Heads up: Drooping leaves can occur in wet soil as well as dry soil. Check the mix before adding more water.
Small daily habit: Note which pots dry first. Adjust how often you check as the weather changes; avoid watering every pot on the same fixed schedule.

Troubleshoot common shady balcony problems
Check the soil, drainage, and recent weather before changing your care routine. The same symptom can have more than one cause.
LOOK BEFORE YOU REACT
Find the next useful check
| If this happens | Try this |
|---|---|
| The mix stays wet between checks | Empty any trapped runoff and check the drainage holes. Pause watering while the mix is too wet for that plant. An oversized pot or dense mix may also slow drying. |
| Leaves droop | Check below the surface first. If the root area is dry, water slowly and drain. If it is wet, avoid adding more water and check drainage instead. |
| New growth looks thin and stretched | Compare the spot with the plant’s light needs. If it is too dim, move the pot toward brighter daylight without suddenly exposing shade-grown leaves to strong sun. |
| Leaf edges turn brown | Look for drying wind, missed watering, or new direct-sun exposure. Check moisture before watering; brown edges alone do not tell you which problem is present. |
| The plant grows leaves but few flowers | Check its flowering season and light needs. A plant may survive where it cannot flower well. Extra fertilizer cannot replace missing light. |
Keep a small record: Note what you changed and the date. Watch new growth as well as existing leaves; a brown patch will not turn green again.
Answer your shady balcony gardening questions
BEGINNER QUESTIONS
What to know before adding more pots
Can I grow plants if my balcony gets no direct sun?
Some shade-tolerant foliage plants can grow with bright outdoor daylight and no direct sun. A deeply enclosed corner may still be too dim, so use the brightest suitable spot and ask about the specific plant before buying.
Which plants for shady balcony gardens should I consider?
Small hosta varieties and suitable outdoor ferns are options for foliage; begonias can provide flowers in partial shade during warm weather. Check the variety’s mature size, light needs, and local temperature limits rather than choosing by plant name alone. A fern sold as an indoor plant may not tolerate your outdoor winter.
Can I grow vegetables or herbs in shade?
Leaf lettuce and parsley are worth considering if the balcony receives some direct sun and otherwise bright daylight. Expect slower growth or smaller harvests than in a sunnier spot. Deep shade is a poor place to plan a productive edible garden.
When should I start using fertilizer?
Read the potting-mix bag first: it may already contain fertilizer, with guidance on when feeding should begin. After that, choose a feed suited to the plant and follow the label’s dose and timing during active growth. Do not add extra feed to fix soggy roots or poor light.
Does balcony garden shade stay the same all year?
The sun’s angle changes through the year, and nearby trees may gain or lose leaves. Recheck your light map when the seasons change, especially if sunlight begins reaching a previously shaded pot. Check each plant’s cold tolerance before winter; a roof overhead does not guarantee frost protection.
How often should I water a shady balcony garden?
There is no reliable schedule for every pot. Check daily while learning your setup, then water according to the mix’s moisture and the plant’s needs. Adjust your checks when wind, rain, heat, or cool weather changes how quickly the pots dry.
Keep this shady balcony garden checklist nearby
SAVE FOR PLANTING DAY
Your shady balcony quick reference
What you need
Plan: Light notes, clock or phone, tape measure, and any building guidance.
Plant: 2–3 suitable starters, pots with drainage holes, saucers, container potting mix, a trowel or scoop, and a watering can or jug with water.
Nine actions in order
- Check the balcony: Confirm space, permitted loads, access, and runoff arrangements.
- Map the light: Record direct sun and shade across a clear day.
- Choose the plants: Match light, local temperatures, and mature size.
- Select the pots: Look for drainage holes and room for the roots.
- Position the pots: Use suitable light and keep the walking route clear.
- Add the base mix: Leave space for the root ball and watering gap.
- Plant at the same depth: Keep the original soil line level with the new mix.
- Water thoroughly: Let excess water drain, then empty the saucers.
- Check before watering again: Judge each pot by moisture and plant needs.
Keep the finished soil surface about 1 inch below the rim, with stem bases uncovered.
Check daily during the first week. A daily check does not mean a daily drink.
Keep learning: Note which pot dries first, watch new growth, and recheck the light as the seasons change.
Your first pots are planted, with room to grow and a clear way for extra water to drain.
You now know how to garden on a shady balcony by choosing for the light you have and checking what each plant needs.
Watch those starter pots before adding more; their new growth will help you decide what belongs in the next container.
Save this guide to your Pinterest gardening board so the checklist is close by on planting day.