
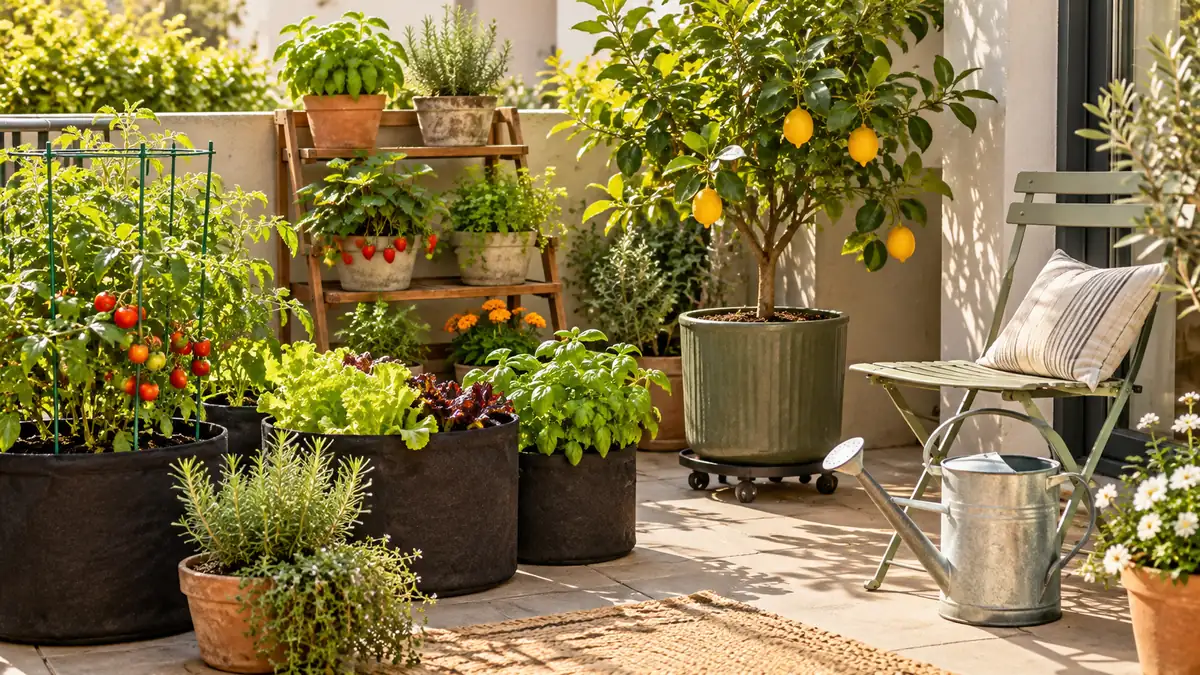
The sunniest spot in your rental might be a narrow balcony, a patch of paving, or the kitchen window above the sink. You want something growing there, but digging beds and drilling hooks may not be options. And anything you plant now needs a sensible way to leave with you later.
These renter friendly garden ideas focus on setups you can lift, roll, fold, or take apart. There are small food gardens, flower displays, and useful ways to fit plants into awkward corners. Each idea includes a practical detail that helps it work beyond the photo, such as catching drainage, reaching pots for watering, or keeping a support inside its own planter.
Start with the light you actually have and the space you can comfortably spare. Check your rental rules before choosing a setup, and confirm any balcony weight limits before adding large containers. Keep doors and walking routes clear, too. You do not need to try everything here. One manageable setup gives you room to learn what grows well and what fits your daily routine.
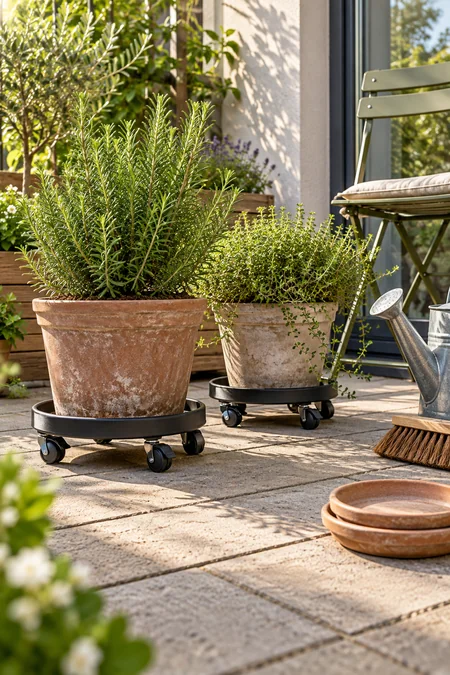
1. Put a Small Patio Garden on Locking Plant Caddies
A large pot can turn the sunny corner into a spot you cannot sweep. Set it on a sturdy plant caddy before filling it, and you can shift it aside when leaves collect underneath.
- Choose a caddy that supports the whole pot base.
- Match its load rating to the filled, watered container.
- Lock the wheels once the pot is in place.
Keep movement on a level, clear surface. Small wheels can catch in deck gaps or at door tracks. A caddy helps with short moves around a patio, but carrying the pot down stairs is still a separate job.
🛞 Match the surface
Look for outdoor wheels suited to your paving or decking. Test an empty caddy over joints first.
💧 Catch the runoff
Use an accessible saucer where drips would cause trouble. Empty it after watering.
✔ Keep wheels clear
Brush away grit and fallen leaves before rolling. Check that every brake still holds.
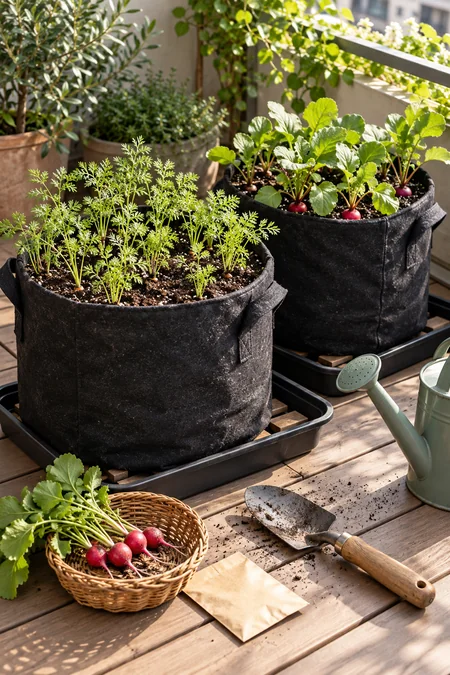
2. Grow Root Vegetables in Fabric Bags You Can Empty and Fold
Fabric grow bags give you a vegetable patch that packs flat after the season. Radishes or short-rooted carrot varieties are useful starting points when you do not have a garden bed.
Choose a bag deep enough for the crop, then fill it with container potting mix. Sow in its final position and thin crowded seedlings so the roots have room to develop.
Plan for moving day: wet soil is heavy, even in a bag with handles. Harvest and empty the bag before carrying it far. Check moisture often during warm weather, and lift bags occasionally to clean and dry the surface beneath them.
🌱 Gather before sowing
- A grow bag whose depth suits the root length of your chosen variety.
- Fresh container potting mix, rather than dense soil dug from a yard.
- A removable tray where runoff needs catching, plus low supports that keep the bag above collected water.
- A watering can with a gentle rose so you do not wash seeds into a corner.
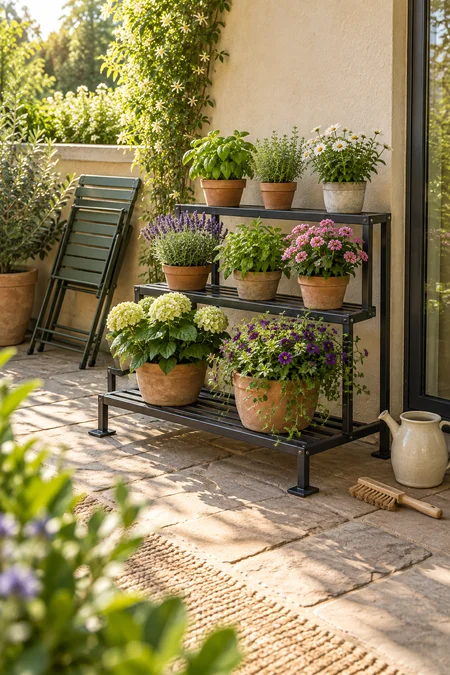
3. Fit More Pots on a Freestanding Stepped Plant Stand
Give each row of plants its own patch of light with a low, stepped stand. The stair-like shape makes pots easier to reach than a deep cluster tucked against a wall.
Choose an outdoor stand designed to stand securely without wall fixings. Set it on level ground, with heavier pots on the lowest tier and smaller ones above. Leave gaps so taller leaves do not shade everything behind them.
Before filling the shelves: check their load limits and make sure each pot base fits fully. Keep the stand away from balcony edges and climbing routes. A narrow walkway should still feel like a walkway.
✔ Leave room for care
Allow enough space to lift each pot off its shelf.
Check whether water from the top tier drips onto plants or surfaces below.
🚫 Skip these shortcuts
Do not balance extra boards across shelves to squeeze in more pots.
Avoid furniture that needs wall anchoring if you cannot install the required fixings.
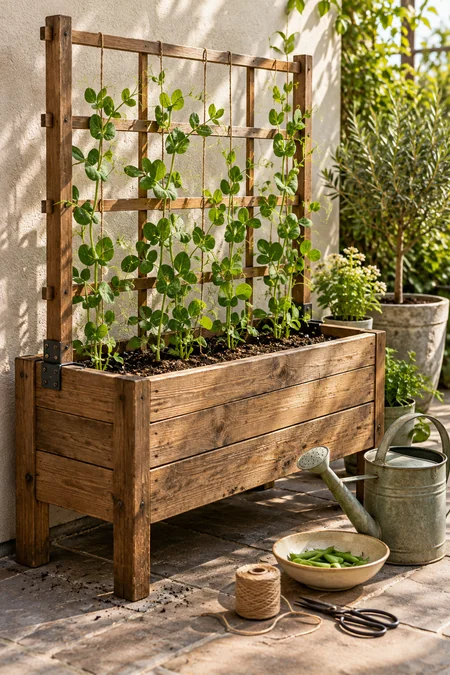
4. Train Climbing Vegetables Up a Trellis Inside Their Planter
Fit the trellis before you sow, so you do not push supports through established roots later. A container with its own support lets peas or climbing beans grow upward without attaching anything to a fence.
Choose a sturdy planter and a trellis sized for the crop. The support should belong to the planter, with no need to lean against the property.
- Keep shoots within reach for tying and harvesting.
- Leave space behind the foliage for airflow.
- Use soft ties where stems need gentle guidance.
Tall vines catch wind. Start with a shorter support in a sheltered spot, and check it as the plants fill out.
🌱 Assemble before planting
- Place the empty planter in its sheltered growing spot, leaving access for a watering can.
- Secure the trellis using the planter’s intended fittings, or a support system designed for that container.
- Add potting mix, check that the support stays firm, then sow according to the seed packet.
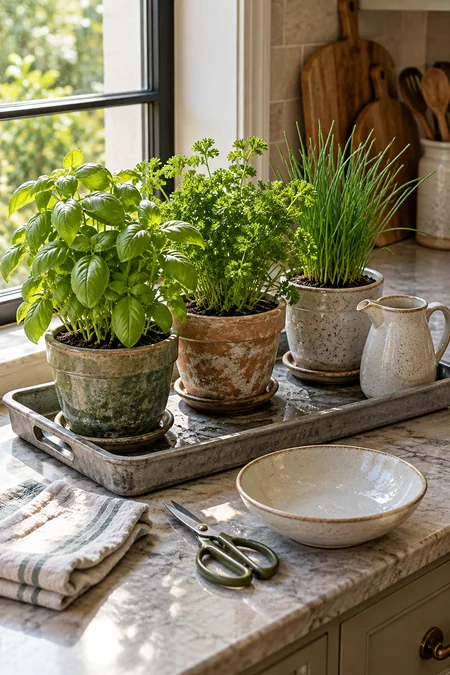
5. Keep Kitchen Herbs Together on a Removable Window Tray
A few herbs beside the kitchen window put fresh leaves close to the chopping board. Keep each plant in its own draining pot, then group the pots on a removable waterproof tray.
Basil, parsley, and chives can make a useful cooking collection if the window provides enough light. Give each pot room, and check its soil separately rather than watering the whole tray on a schedule.
Make cleanup easy: carry small pots to the sink for watering, let them drain, and return them to the tray. Wipe underneath regularly. If stems stretch toward the glass and growth stays weak, consider supplemental grow lighting.
6. Plant a Tabletop Salad Box Near the Kitchen Door
A handful of lettuce is easier to remember when it grows beside the door you use every day. Place a draining planter on a sturdy outdoor table where you can reach the leaves without bending.
Choose loose-leaf lettuce suited to your season, and leave growing room between plants.
- Use a container deep enough for the variety.
- Check that the table can carry the planter when wet.
- Catch runoff where it could stain the tabletop or drip below.
Lettuce often struggles in strong summer heat. A spot with morning sun and afternoon shade may suit it better during warm weather.
🥬 Pick a little, leave the center
Harvest a few outer leaves from each established loose-leaf lettuce plant. Leave the central growing point and plenty of healthy foliage. When plants send up flower stalks and leaves turn bitter, start a fresh sowing when the weather suits lettuce again.

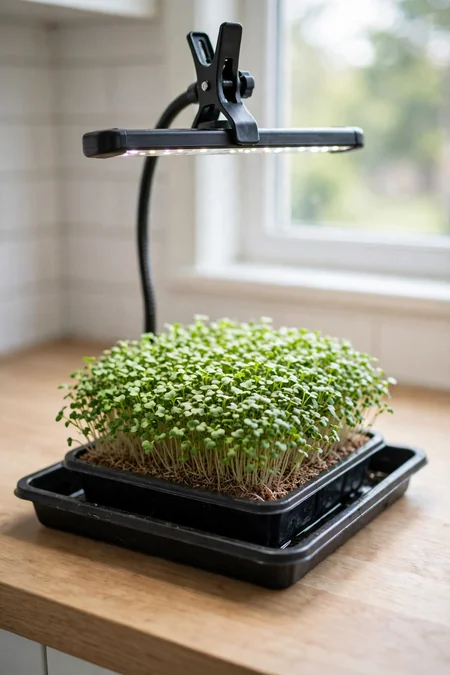
7. Grow Microgreens on a Small Indoor Tray
You do not need room for full-sized vegetables to grow something for your sandwich. Microgreens are young edible seedlings harvested above the growing mix, so a small tray can be a useful indoor garden.
Start with seed sold for edible microgreens, such as radish or broccoli. Use a clean draining tray, fresh seed-starting mix, and strong light once the seedlings emerge. Sow evenly rather than piling seeds into thick patches.
Keep the setup open: remove the germination cover after emergence and avoid leaving the mix waterlogged. A waterproof tray underneath protects the counter. Most microgreens are grown as a single-cut crop, then sown again.
🌱 Sow
Follow the seed supplier’s directions for soaking and covering. These steps vary by crop.
☀ Grow
Watch for pale, leaning stems. Improve the light if seedlings stretch toward the window.
✂ Harvest
Cut with clean scissors above the mix at the crop’s recommended stage. Wash the tray before starting again.
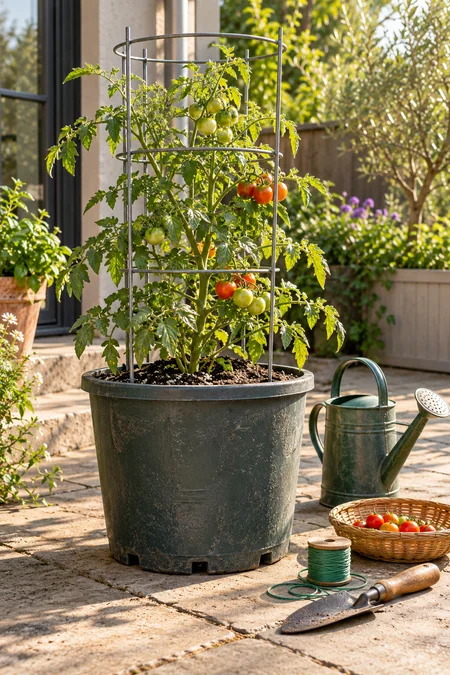
8. Grow a Compact Tomato in a Pot with Its Own Cage
Choose the tomato variety before buying its pot. A compact patio or dwarf type is easier to fit into a rental garden than a vigorous vine that soon reaches beyond its support.
Set the container in a sunny spot and install a suitable cage at planting time. Give the plant enough root space for its mature size, using the variety’s container guidance.
- Water the potting mix rather than splashing the leaves.
- Check moisture often as the plant grows.
- Feed according to the fertilizer label.
Leave room to reach the back of the cage. The ripe tomato you cannot see is often the one you miss.
🍅 Check the setup before planting
- The variety is described as compact or suitable for containers. Small fruit alone does not mean a small plant.
- The pot has open drainage holes and enough space to anchor the cage.
- The cage openings let you reach fruit without forcing branches aside.
- You can reach the soil with a watering can once the foliage fills out.
9. Use a Freestanding Strawberry Tower for a Narrow Sunny Spot
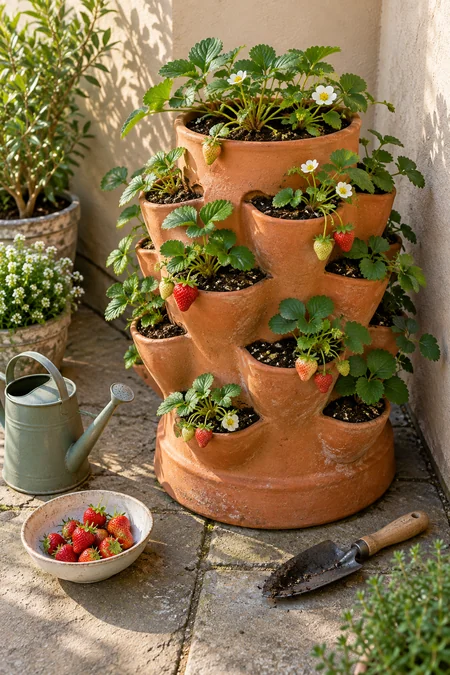
Strawberry leaves spilling from planting pockets can soften a bare patio corner without taking over the floor. Choose a low, broad-based tower designed to stand on its own, with enough root space in each pocket.
Set it in a sunny, sheltered position before filling it. Plant with each crown, where leaves meet roots, at the soil surface rather than buried.
Check more than the top: planting pockets can dry at different rates, and watering the upper tier may not wet every root ball. Feel the mix in several pockets before watering. Keep the tower modest enough that you can reach every plant without tipping it.
✔ Keep the tower manageable
Check which pockets receive sun and whether upper leaves shade the plants below.
Remove unwanted runners so trailing new plants do not crowd neighboring pockets.
🚫 Avoid awkward fixes
Do not stack extra tiers beyond the planter’s intended design.
Do not assume the tower is easy to lift once the mix is wet. Plan to empty it for a larger move.
10. Try a Self-Watering Planter Where Pots Dry Out Quickly
A self-watering planter stores water beneath the growing mix, which draws moisture upward through a wick or similar system. It can reduce how often you need to water some container plants, but the reservoir still needs checking.
Choose a design with an accessible fill point and overflow outlet. Follow its setup directions, including any initial watering from above while young roots establish.
- Keep the overflow clear.
- Check the reservoir during hot or windy weather.
- Use the growing mix recommended for the planter.
Lettuce and other plants that like steady moisture are useful candidates. Herbs that prefer drier roots may suit an ordinary draining pot better.
| Reservoir planter | Ordinary draining pot |
|---|---|
| Stores a water supply below the mix. | Lets excess water leave through drainage holes. |
| Needs checks of the reservoir, soil moisture, and overflow. | Needs soil checks and emptying of any saucer after watering. |
| Drain the reservoir before moving to reduce weight and spills. | Let watering drain through before moving. Wet mix still adds weight. |

11. Make a Shady Seating Corner with Potted Ferns and Foliage
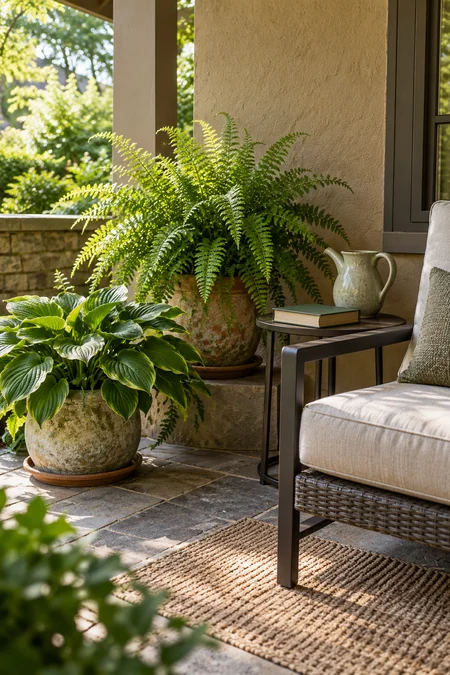
That cool corner beside your chair may suit leafy plants better than tomatoes or sun-loving flowers. Build a small group with a shade-tolerant fern and a broad-leaved plant, such as a hosta suited to your climate.
Keep them in separate pots so you can adjust watering and move individual plants as the light changes.
- Match each plant to the actual shade level.
- Leave room for fronds to spread without brushing the chair.
- Use draining pots and check beneath them for trapped moisture.
Shelter does not always mean damp soil. A roof overhang can block rain, leaving pots dry even after a wet afternoon.
☀ Match the light
Watch for a brief patch of strong afternoon sun. A shaded spot can still get hot light later in the day.
💧 Match the moisture
Check each pot separately. Different leaf sizes and pot materials can change how quickly the mix dries.
🍂 Match the season
Check winter needs before buying. Hostas lose their leaves for winter, and some ferns need frost protection.
12. Plant a Portable Flower Patch for Visiting Pollinators
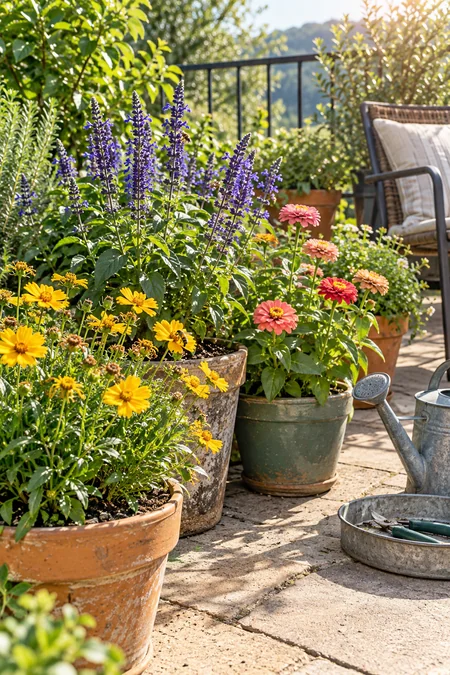
Flower pots can offer nectar and pollen without turning the lawn into a bed. Group plants with similar light and watering needs, choosing flowers that suit your region and the size of your containers.
Look for a mix that blooms at different points in the growing season. Locally native plants can be useful choices, but check their mature size before bringing them home.
Choose flowers visitors can reach: open flower shapes often give insects easier access than tightly packed double blooms. Set the group where you can watch it from your chair, while keeping busy doorways clear. Visiting insects need room to come and go.
🐝 Check before choosing flowers
- The plant suits your local growing conditions and is not invasive in your area.
- Its mature roots and stems fit the container space you have.
- Its flowering season adds something beyond the plants already in your group.
- You can care for it without routine pesticide spraying. Inspect problems first, and avoid spraying open blooms or visiting insects.
13. Grow Spring Bulbs in Pots You Can Move After Flowering
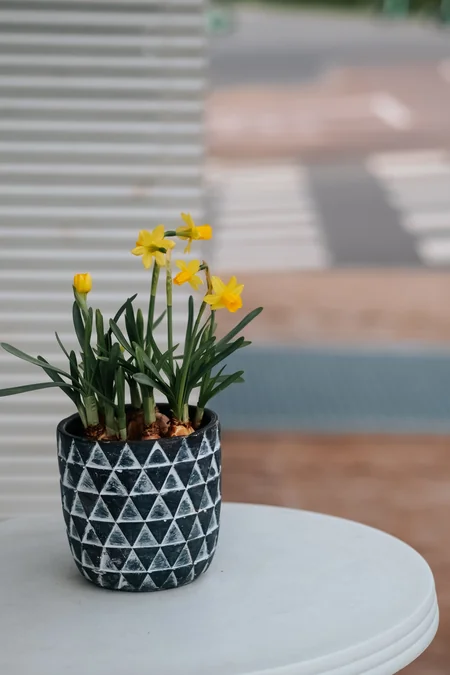
A pot of small daffodils can mark the start of spring beside your door, then move to a quieter corner once the flowers fade. The useful part is being able to change the display without digging up the bulbs.
Choose bulbs suited to your climate and follow their planting depth and seasonal timing. Many spring bulbs need a cold period, so warm-climate gardeners may need specially prepared bulbs.
- Use a draining pot with room below the bulbs for roots.
- Keep the mix from staying waterlogged.
- Leave the foliage growing after flowering.
Move the pot somewhere it still receives suitable light. Fading leaves are feeding the bulbs for later growth.
🌱 Before growth
Choose the bulb’s winter location before planting. A container may need protection that bulbs in the ground would not.
🌼 During flowering
Bring the display into view and check moisture as growth picks up. A pot under cover may miss the rain.
🍃 After the flowers
Remove spent daffodil flowers, but let leaves yellow naturally. Do not tie or braid the foliage.
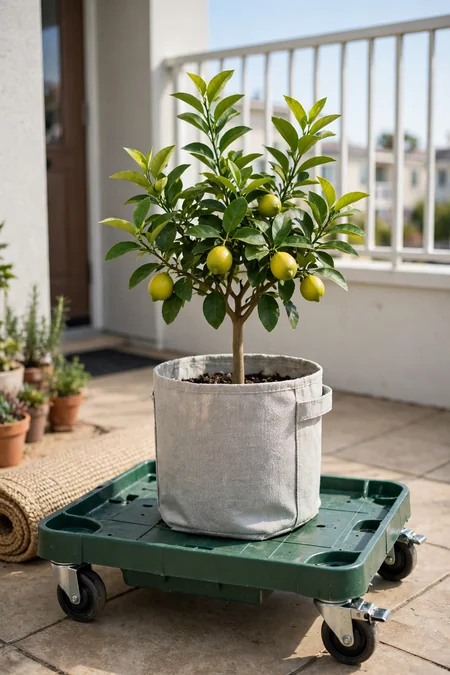
14. Keep a Small Fruit Tree in Its Own Movable Container
Start with the tree’s adult size, not the slim sapling on the nursery bench. A fruit tree sold for container growing can add height to a patio, but even a small tree becomes heavy once its pot is filled and watered.
Choose a variety and rootstock suited to your climate, available sun, and space. Ask about pollination needs, too. Some trees need a compatible partner nearby to produce fruit.
Plan the route home and out again: measure doorways and consider steps before choosing the pot. A suitable plant caddy helps on level paving. Winter shelter and future repotting also need a place in your plan.
🌳 Small tree, separate questions
A dwarf label describes size, not every growing need. Check mature height, pollination, winter care in a pot, and any chilling requirement. The last one means the cool winter conditions some fruit trees need for normal flowering.
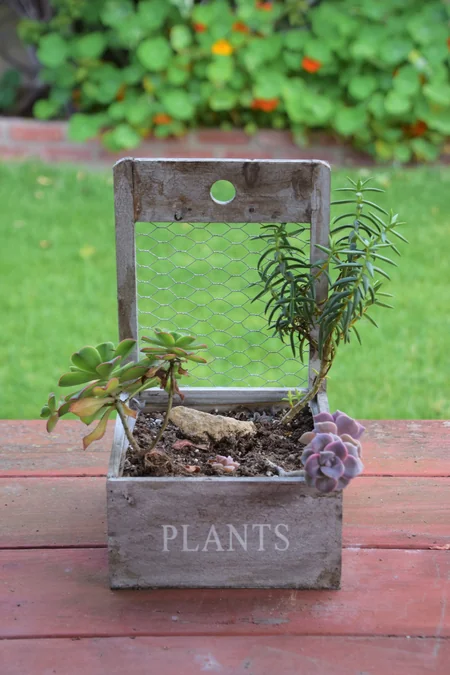
15. Make a Sunny Tabletop Garden with Hardy Succulents
Keep a succulent garden low and wide so you can enjoy the leaf shapes without blocking the table. Hardy hens-and-chicks and suitable low-growing sedums can share a draining container when their light and watering needs match.
Choose plants that tolerate your local winter, and use a gritty mix made for succulents. Leave gaps around the rosettes rather than packing the pot edge to edge.
- Water the mix thoroughly when needed, then let it dry.
- Keep drainage holes open.
- Check that nearby containers do not drip into the display.
Cold tolerance varies, especially in pots. A sheltered position can help with excess rain, but it does not make a tender plant hardy.
✔ Leave a path for water
Use a container with drainage holes and empty any saucer after watering or rain.
Keep decorative grit light enough that you can still check the growing mix beneath it.
🚫 Skip trapped moisture
Avoid a sealed bowl, even if it has a layer of pebbles at the bottom.
Do not group dry-loving succulents with plants that need constantly moist soil.
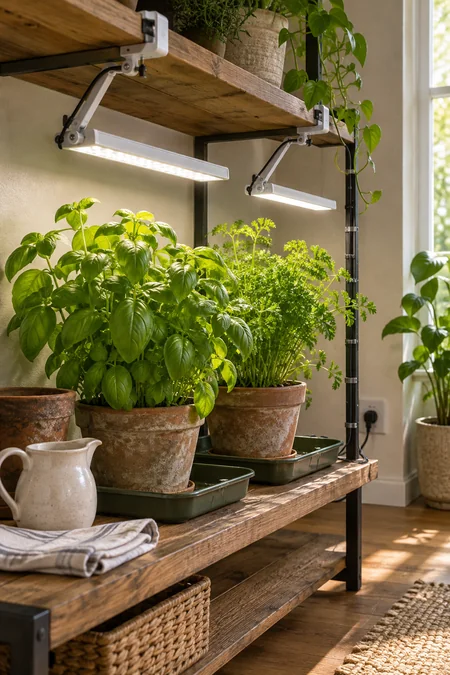
16. Set Up an Indoor Plant Shelf with Clip-On Grow Lights
A dim window does not have to decide where your indoor garden lives. A low, stable shelf with clip-on grow lights can hold a small collection of herbs or leafy plants without drilling into the wall.
Choose lights intended for growing plants, with clamps that fit the shelf securely. Keep the foliage within their coverage area, and follow the maker’s guidance for distance and daily use.
Leave room to grow: check that you can raise or reposition the lights as stems get taller. Put pots in removable waterproof trays and keep electrical connections away from watering areas. Water small pots at the sink when practical.
💡 Check the shelf before adding plants
- Choose a unit designed to stand securely without wall anchoring, and check its shelf load limits.
- Make sure each clamp grips a solid edge and does not crush a thin shelf panel.
- Keep cords out of walking routes and leave enough slack for adjusting the lights.
- Use a timer if helpful. Plants need a regular dark period as well as light.
17. Hang a Flower Basket from a Purpose-Built Freestanding Frame
A hanging basket does not have to start with a hook in the ceiling. A purpose-built freestanding frame can hold a modest flower basket in a sheltered patio corner, provided the whole setup is designed for outdoor use.
Choose a frame with a broad base and a stated hanging-load limit. Count the basket, wet growing mix, and plants together when checking that limit.
- Keep the basket within easy watering reach.
- Follow the frame’s instructions for any required ballast.
- Leave room for the basket to move without hitting furniture.
A light decorative stand may not suit a heavy basket. Take the basket down before strong winds arrive.

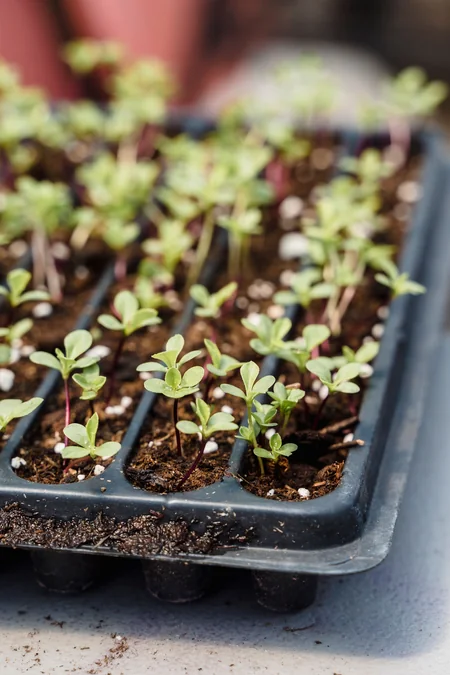
18. Start Seeds in a Tray That Packs Away Between Seasons
Start with a small seed tray that fits the plants you can actually keep. It is easy to sow far more seedlings than a rental patio can hold.
Use clean cells with drainage and fresh seed-starting mix. Follow the packet for sowing depth, timing, and any special germination needs. Once seedlings emerge, remove the cover if you used one and provide strong light.
Leave space for the next step: seedlings will need larger pots or their final containers. Keep a little room beside the tray for potting them on. After planting out, wash and dry the empty tray before stacking it away for another season.
🌱 Give each seedling a next step
- Sow only what you have space to grow on. Keep a note of the variety and sowing date.
- Thin crowded cells as the crop requires. Snipping unwanted seedlings can avoid disturbing nearby roots.
- Before moving indoor seedlings outside, gradually introduce them to outdoor light and weather. Match planting time to the crop’s temperature needs.
19. Root Suitable Herb Cuttings in a Small Propagation Station
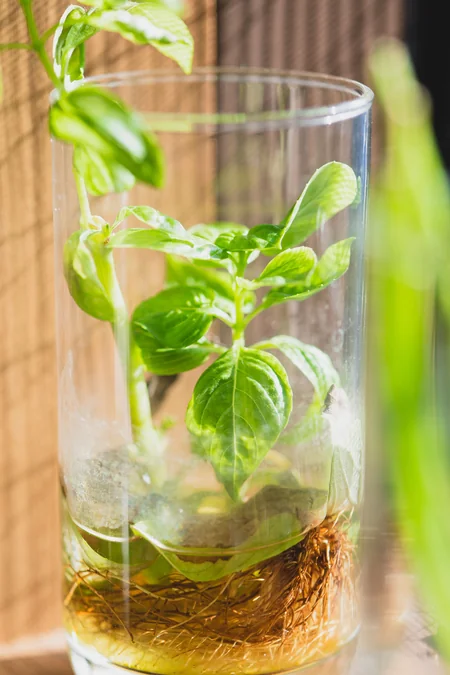
Fine white roots appearing in a jar make a small kitchen garden interesting long before there is anything to harvest. Basil is a useful herb to try because healthy stem cuttings can root in water.
Take a nonflowering shoot from a healthy plant, cutting just below a leaf joint. Remove lower leaves and place the bare lower stem in a clean jar of water.
- Keep remaining leaves above the water.
- Place the jar in bright light, away from harsh direct sun.
- Refresh the water regularly and clean the jar if it becomes slimy.
Once roots develop, move the cutting into potting mix. Treat it gently while it adjusts.
🌿 Choose
Use clean scissors and an undamaged stem. Remove flower buds so the cutting can focus on new growth.
🔍 Watch
Check the stem as well as the roots. Discard cuttings with soft, rotting stems instead of crowding them into the pot.
🪴 Settle in
Use a small draining pot, handle roots gently, and keep the mix lightly moist while the cutting establishes.
20. Grow a Small Cut-Flower Patch in a Deep Trough Planter
A few stems for a bud vase can come from a planter beside your chair. Choose flowers that suit containers and still produce stems long enough for the small arrangements you enjoy.
A deep, draining trough gives roots more room than a shallow display box. Compact zinnias can work in a sunny, warm-season spot, but check the variety’s height and spacing before planting.
Leave room to reach the stems: place the trough where you can cut flowers without leaning over other pots. Add any needed supports early, keeping them inside the container. For a small space, aim for occasional little bouquets rather than a constant supply of large arrangements.
🌻 Match the flower to the vase
The shortest bedding varieties may offer little stem to cut. Choose a manageable plant height with usable stems, then pair it with a small vase. Cut with clean snips and place harvested stems in clean water promptly.

21. Make a Foldaway Potting Station with a Table and Mixing Tray
Potting on the kitchen counter often leaves soil beside the kettle. Give the job a temporary home with a sturdy folding table and a deep mixing tray.
Set the table on level ground, lock its legs, and keep heavy bags of mix on the floor. The tray catches loose soil while you fill small pots.
- Keep tools together in a washable tub.
- Brush spilled mix into the tray before wiping down.
- Let everything dry before packing it away.
Choose a table you can carry and store without blocking the hallway. Your workbench only needs to stay out while you use it.
Before packing away
Check the tray corners and table hinges for trapped soil.
Move plants to their growing spots and empty the work surface before folding the legs.
After cleanup
Nest dry tools and empty pots inside the tray or tub.
Store the folded table where it cannot tip into a walkway. Keep potting mix closed and dry.

22. Water a Small Pot Group with a Removable Reservoir Kit
A reservoir watering kit can serve several pots without a permanent hose connection. Unlike a self-watering planter, it sends water through small tubes to separate containers, making it useful when you already have pots you want to keep.
Choose a kit designed for your indoor or outdoor setting. Follow its directions for reservoir height, tubing, and setup, since gravity-fed and pumped systems work differently.
Test it while you are home: watch several watering cycles and check moisture in every pot. Adjust the flow where the kit allows, and group plants with similar needs. Keep tubing out of walking routes and plan for runoff. The kit still needs refilling, cleaning, and checks for blocked outlets.
💧 Check the whole watering route
- Use compatible tubing and outlets. A loose joint can send water somewhere other than the pot.
- Keep the reservoir covered as directed and leave its refill point easy to reach.
- Confirm that water stops when the system should stop. Follow any instructions for preventing unwanted siphoning.
- Check tray capacity during a test run. A shallow tray may not contain a leak.
- Before time away, arrange a backup check if needed. Weather and plant growth can change water demand.

23. Refresh a Planter Display with Lift-Out Nursery Pots
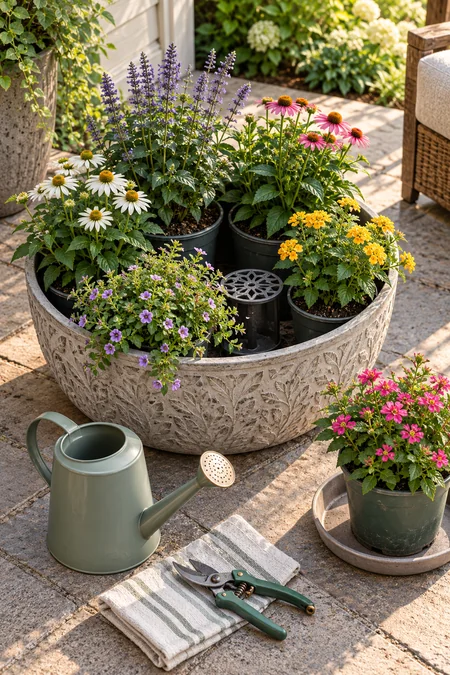
Keep plants in their own nursery pots inside a roomy outer planter, and you can change the display without digging through tangled roots. A fading seasonal flower can move out while the rest of the group stays in place.
Choose an outer container that leaves room to grip each inner pot. Use stable, purpose-made risers if needed, keeping drainage holes clear and the nursery-pot rims easy to reach.
- Lift pots out for watering and let them drain before returning.
- Empty water that collects inside the outer planter.
- Repot plants when their roots outgrow their nursery containers.
The outer planter provides the look. Each inner pot keeps its own care routine.
🌻 Changing the display
Choose replacement plants that suit the same light conditions.
Leave leaves and stems untangled so one pot can come out without damaging its neighbors.
🪴 Caring for each plant
Check moisture inside each nursery pot rather than judging the group by its appearance.
After rain, check the outer planter for hidden water beneath the pots.
A rental garden can start with one useful corner and a few plants you have time to care for. Choose the renter friendly garden ideas that fit your light, your routine, and the way you expect to move them later.
Give your first setup time before adding more. Notice which pots dry quickly, which plants crowd their neighbors, and whether watering feels manageable. Those small observations will help you shape a garden that works in your home now and can adapt when your address changes.
Save this list to your gardening board on Pinterest so you can return to it when you are ready to try another idea.