
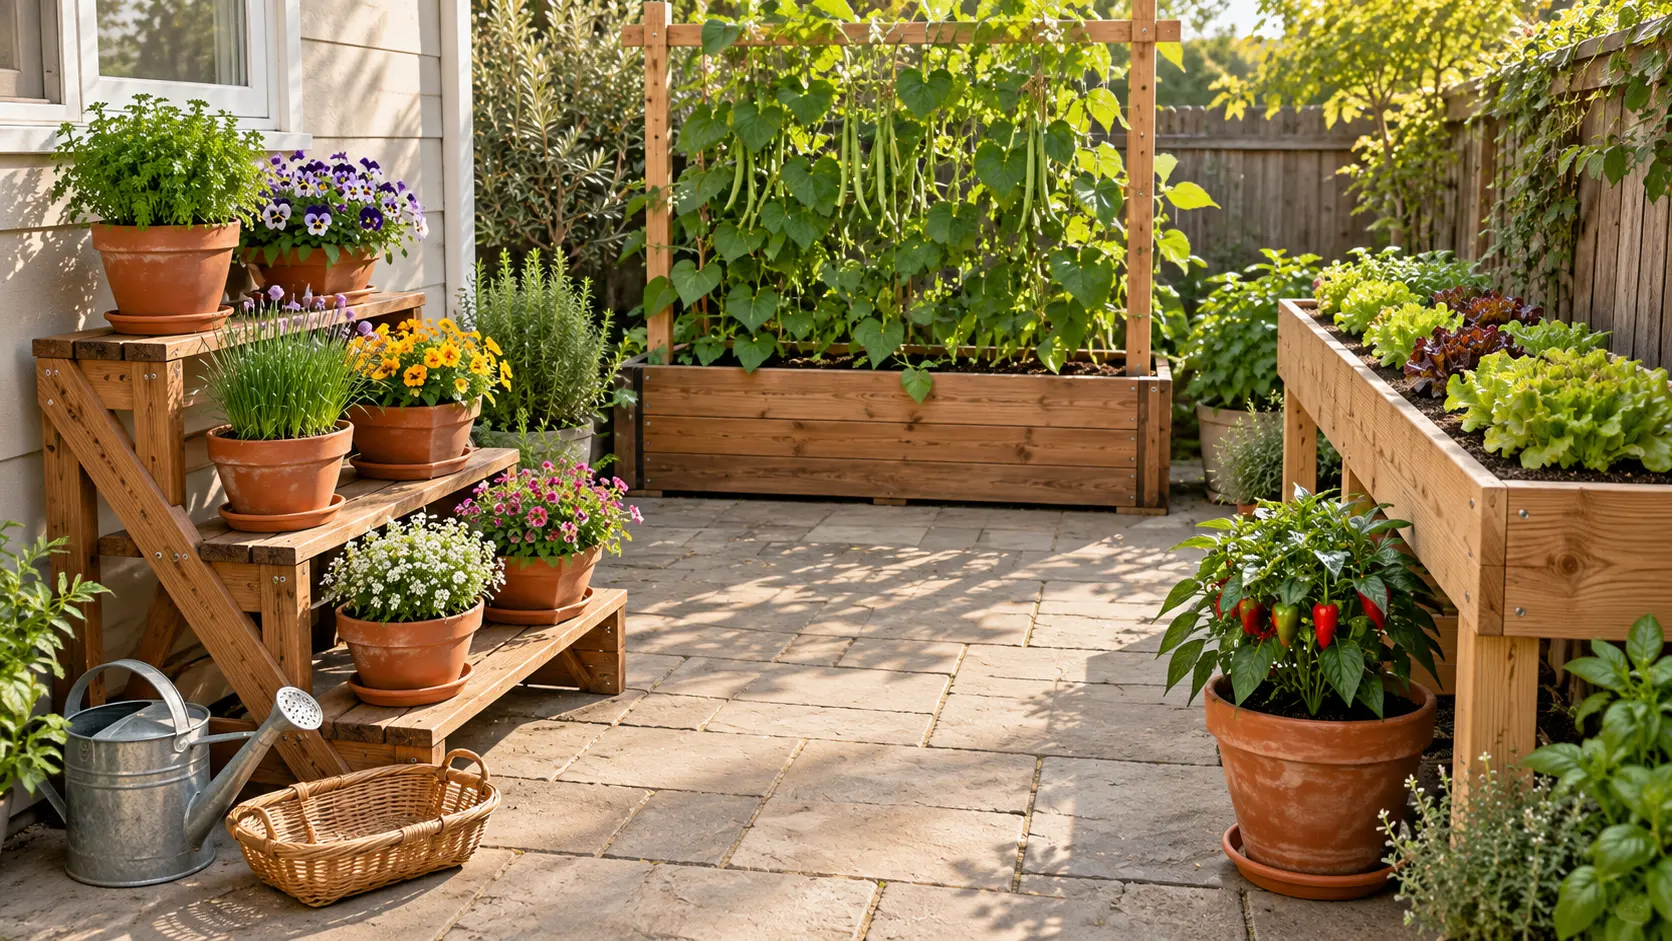
A few pots can fill a patio before you have even planted everything you want to grow. The watering can ends up behind the chair, the herbs crowd the doorway, and that sunny corner still feels wasted. A small garden needs a little planning before it needs another container.
These DIY container garden ideas help you find room above the floor, arrange pots where you can reach them, and make watering less awkward. Some projects use a simple shelf or stand. Others give climbing plants somewhere to grow or turn separate pots into an easier setup to manage.
You do not need to build every project or buy matching containers. Start with the spot that causes the most trouble, whether that is a narrow balcony, a bare fence, or a collection of pots you keep stepping around. Check the light, leave a clear walking path, and choose one idea that suits the plants you actually want. A container garden earns its space when you can enjoy it without moving half the patio first.
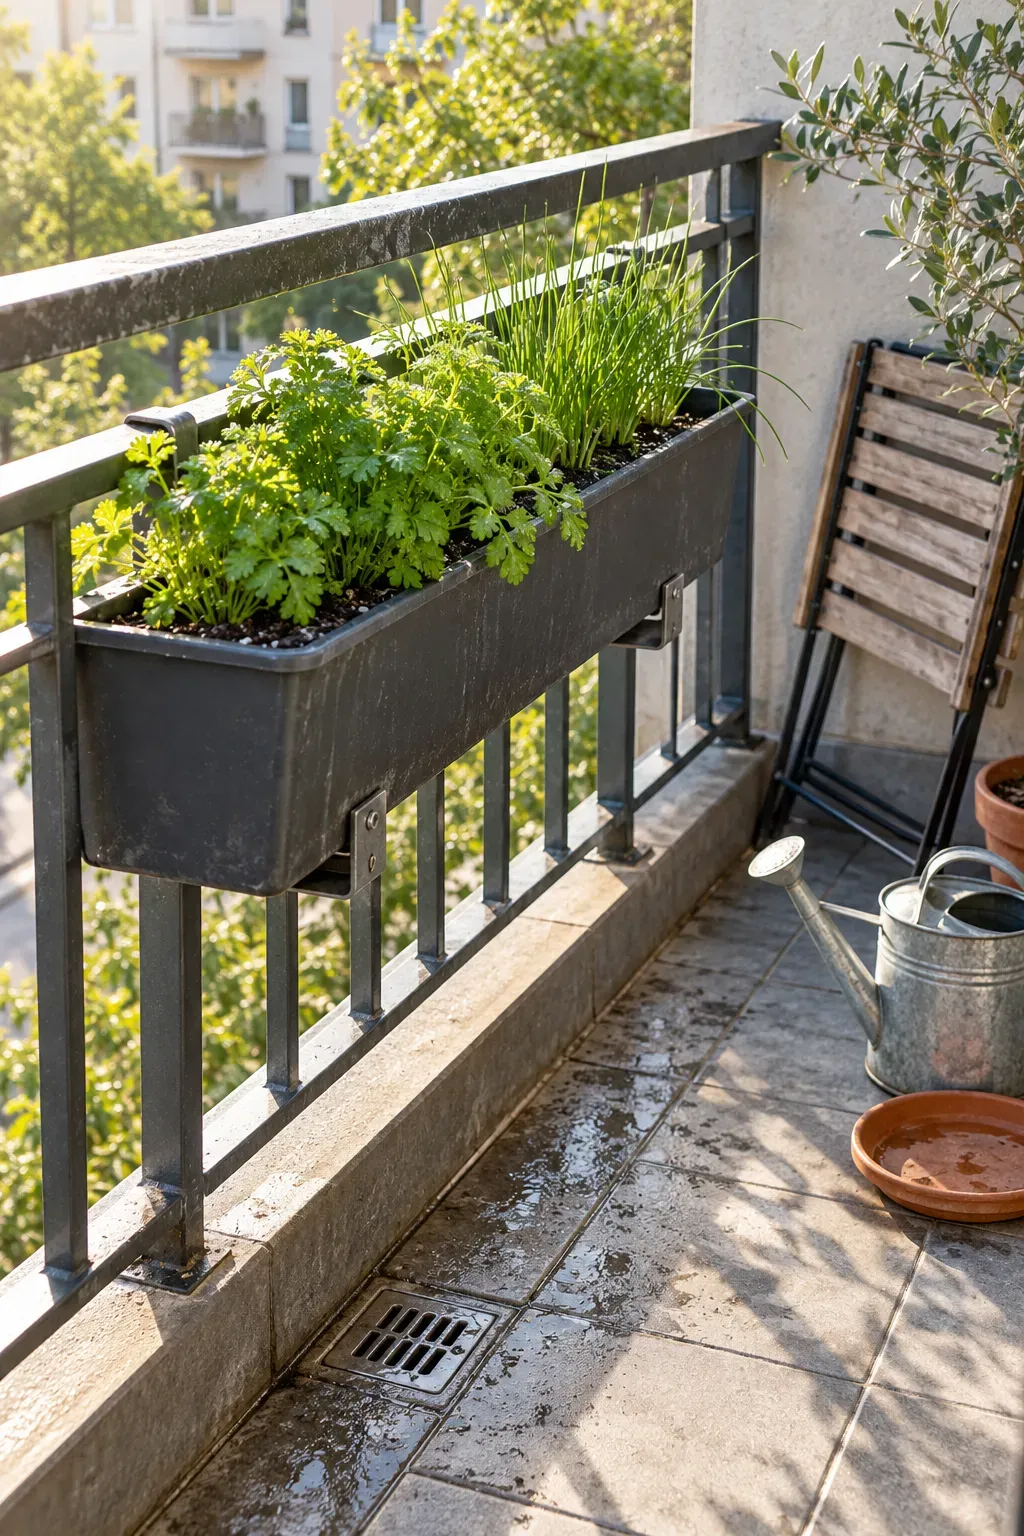
1. Hang a Planter Trough on the Inside of a Balcony Railing
Floor space disappears quickly when every plant needs its own pot. A railing trough moves a small planting area up beside you and leaves the ground easier to sweep.
Choose a planter with brackets made for your railing shape. Check your building rules and the rated support capacity, including wet soil and mature plants.
- Keep the trough on the balcony’s inside edge.
- Choose compact plants suited to its depth and available light.
- Leave enough room to reach the soil with a watering spout.
Plan where excess water will go before filling the trough. The balcony below should not become its drip tray.
✅ Do this
Place the empty trough first. Check that its brackets sit correctly and that nearby doors still open fully.
🚫 Skip this
Do not support a filled trough with string, decorative hooks, or brackets that do not fit the railing.
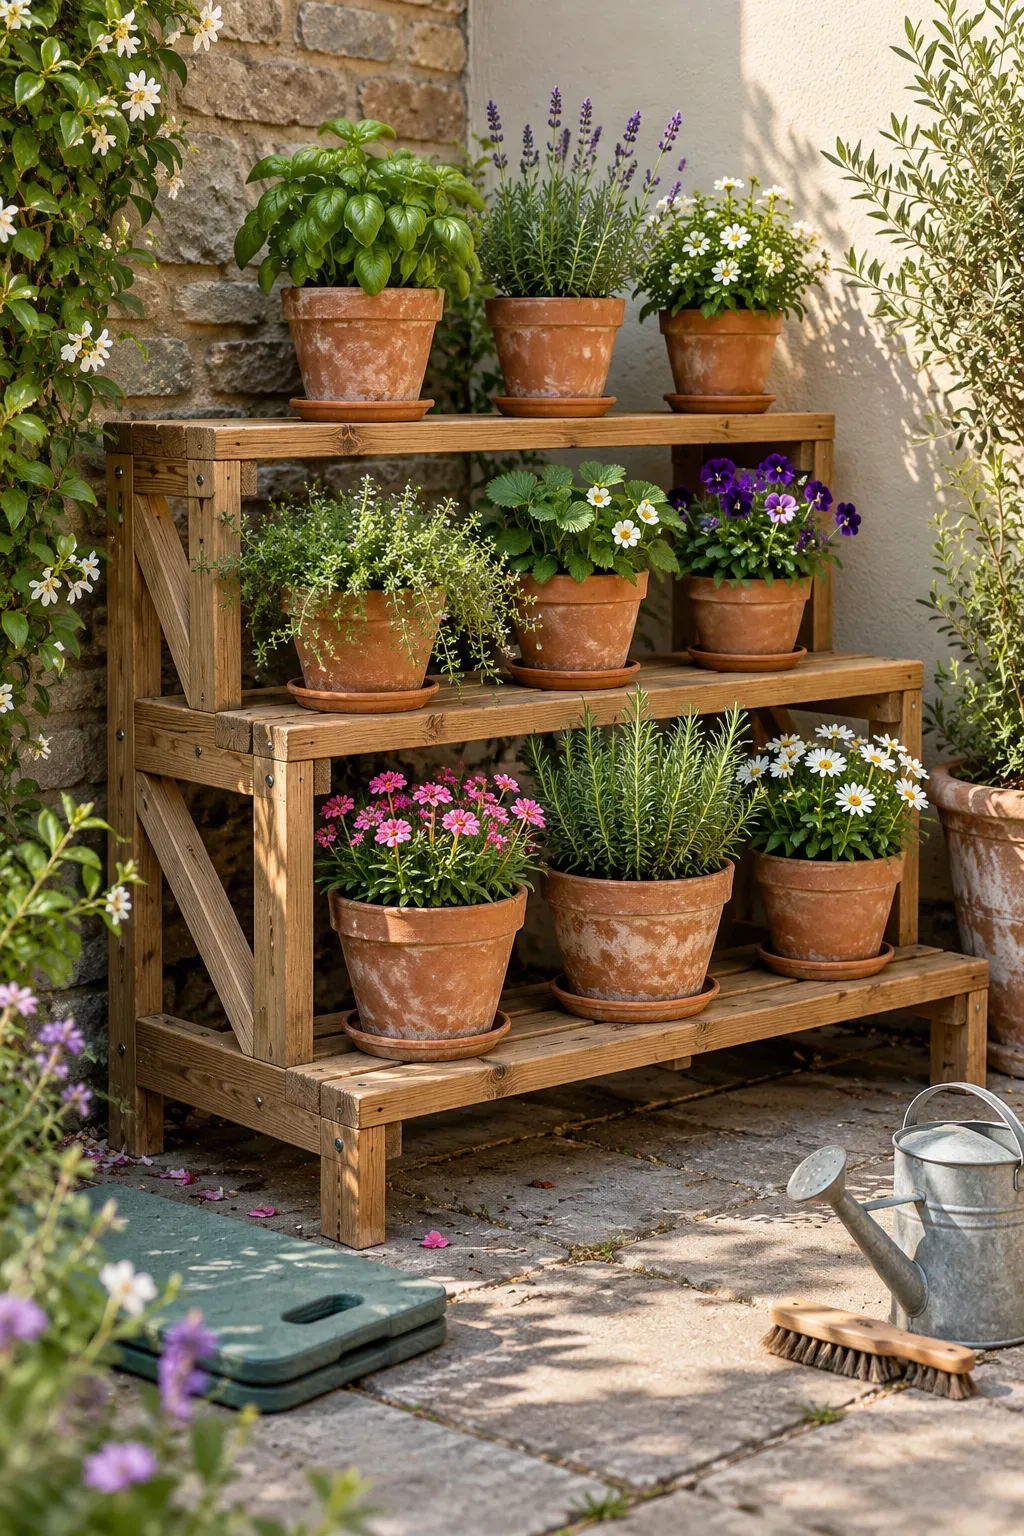
2. Build a Stepped Plant Stand for an Empty Corner
The pot at the back should not disappear behind everything else.
A stepped corner stand brings smaller containers into view and keeps their rims within reach. Plan each shelf around the pots you already own, including their saucers. Leave room above the foliage instead of measuring only the bare containers.
Before choosing a design, gather:
- The width of each pot and saucer.
- The height of the plants you want to display.
- The space needed to reach the back row.
Use sound outdoor-suitable materials and a braced design that can support filled pots. Keep heavier containers low, and protect the walking route beside the stand.
Plan the stand before cutting
- Mark the stand’s footprint on the ground and check the space beside it.
- Choose a suitable braced construction plan, then size the shelves for your pots.
- Set the finished stand on a level base and check its stability before adding plants.
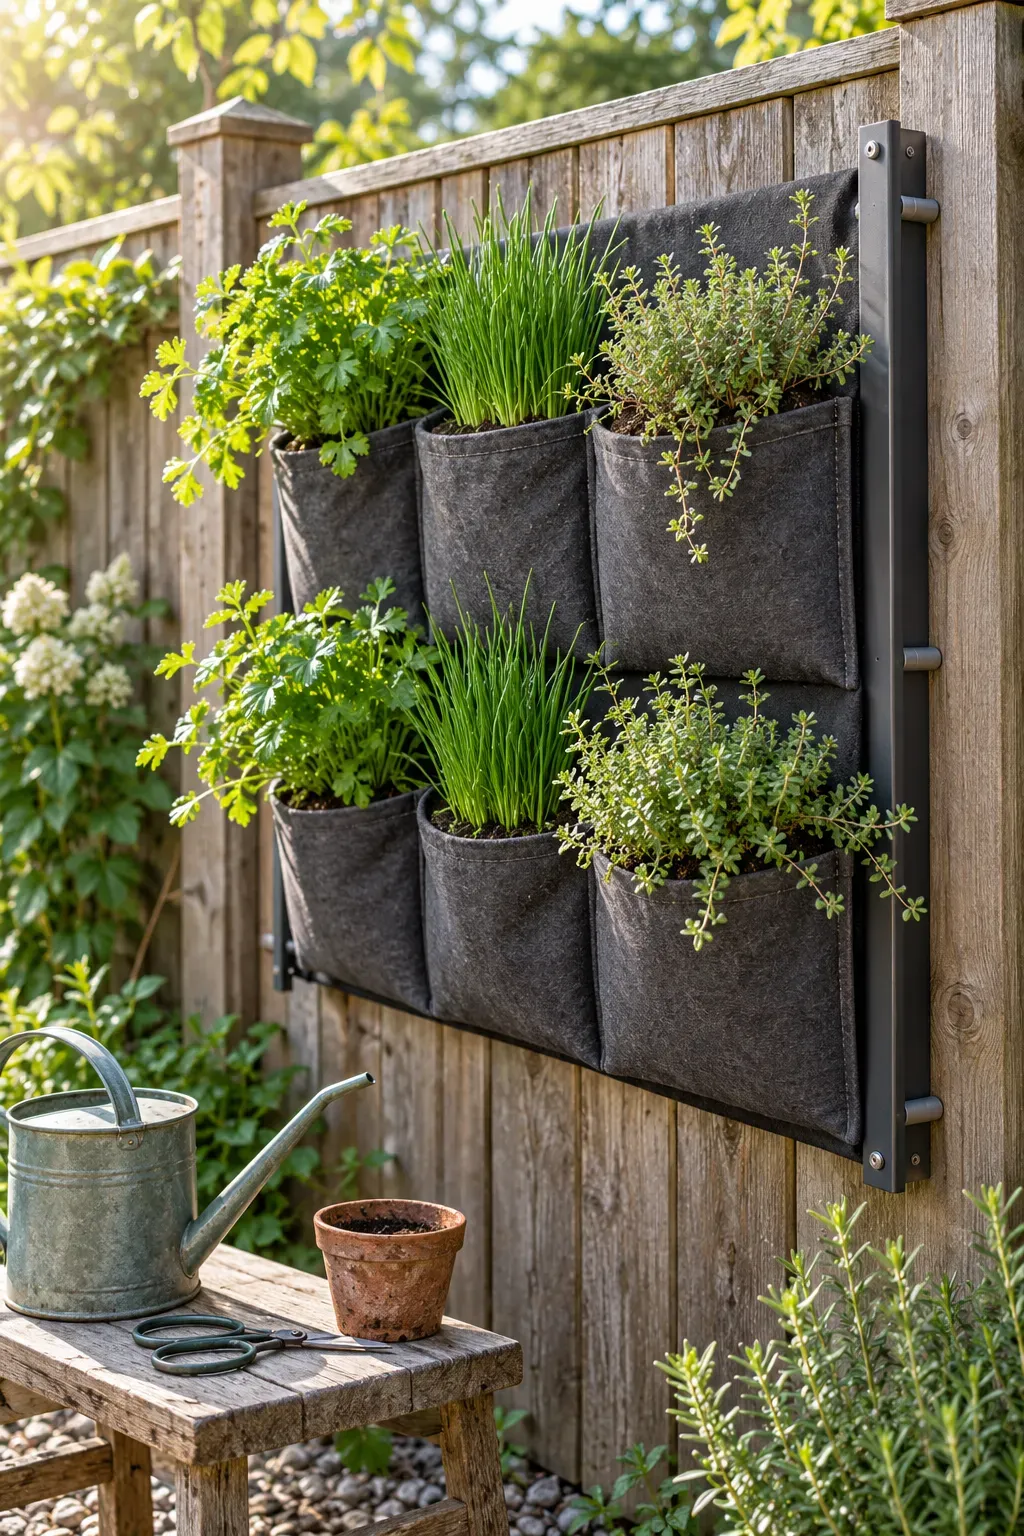
3. Turn a Blank Fence Panel Into a Pocket Herb Garden
A bare fence can hold a useful patch of herbs, but the weight needs proper support. Attach a purpose-made planting pocket system to suitable structural supports, following its mounting instructions.
Protect the fence from trapped moisture with an appropriate backing and air gap. Keep the bottom pockets clear of the ground so you can see where water drains.
Choose the planting layout around access:
- Put frequently snipped herbs within easy reach.
- Match each plant to the pocket’s root space and light.
- Leave room for leaves to spread without covering neighboring pockets.
Check moisture in different rows. One damp pocket does not tell you what is happening in the others.
🧱 Support
Check the wet weight of the complete system before choosing its fixing points.
💧 Drainage
Keep the drainage route clear of stored tools and anything that needs to stay dry.
🌿 Access
Leave space to remove a plant without pulling apart the whole display.
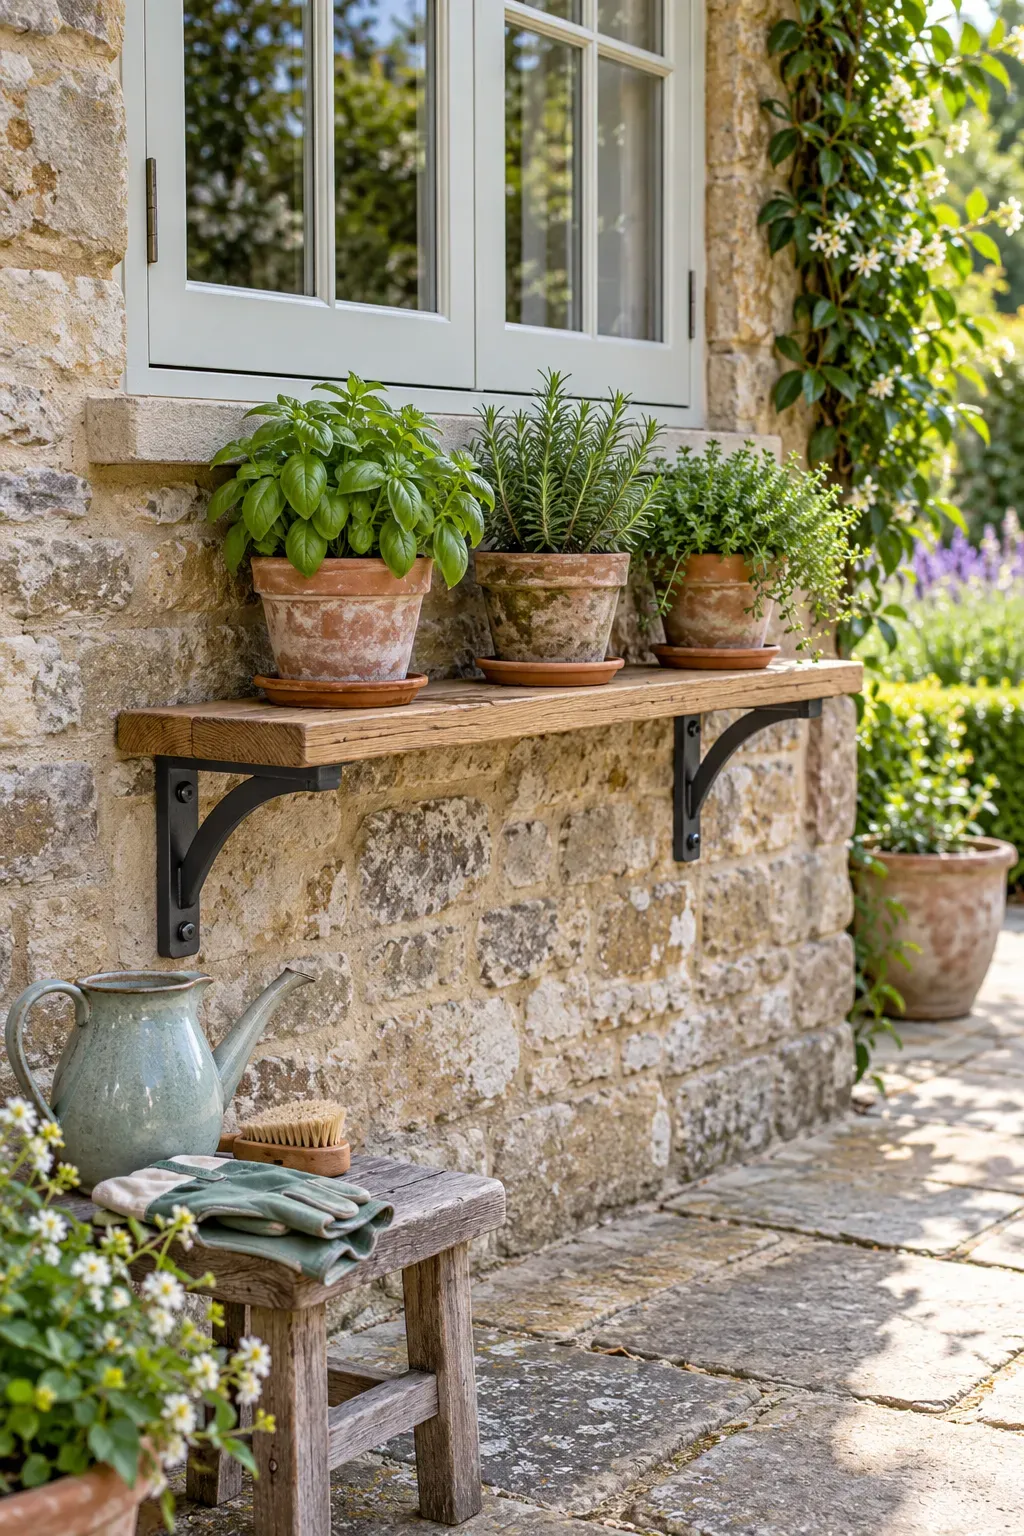
4. Fit a Narrow Plant Shelf Below an Outdoor Window
Set the pots below the window, then check what happens when it opens.
A narrow outdoor shelf can hold a few small containers without taking over the paving beneath it. Position it where watering and lifting pots feel comfortable. Keep it clear of vents, drainage openings, and any window needed for escape.
Think of the shelf as a small working ledge:
- Choose brackets and fixings suited to the wall and loaded shelf.
- Keep each pot’s base fully supported.
- Use removable saucers and empty collected water.
Obtain permission before drilling where needed. A removable pot arrangement makes cleaning the sill much less awkward.
📌 Check the spot first
- Watch the light at different times before choosing plants.
- Allow for full pot saucers when measuring shelf depth.
- Choose another location if falling pots could reach a walkway below.
- Make sure the pots can be reached without leaning out of the window.
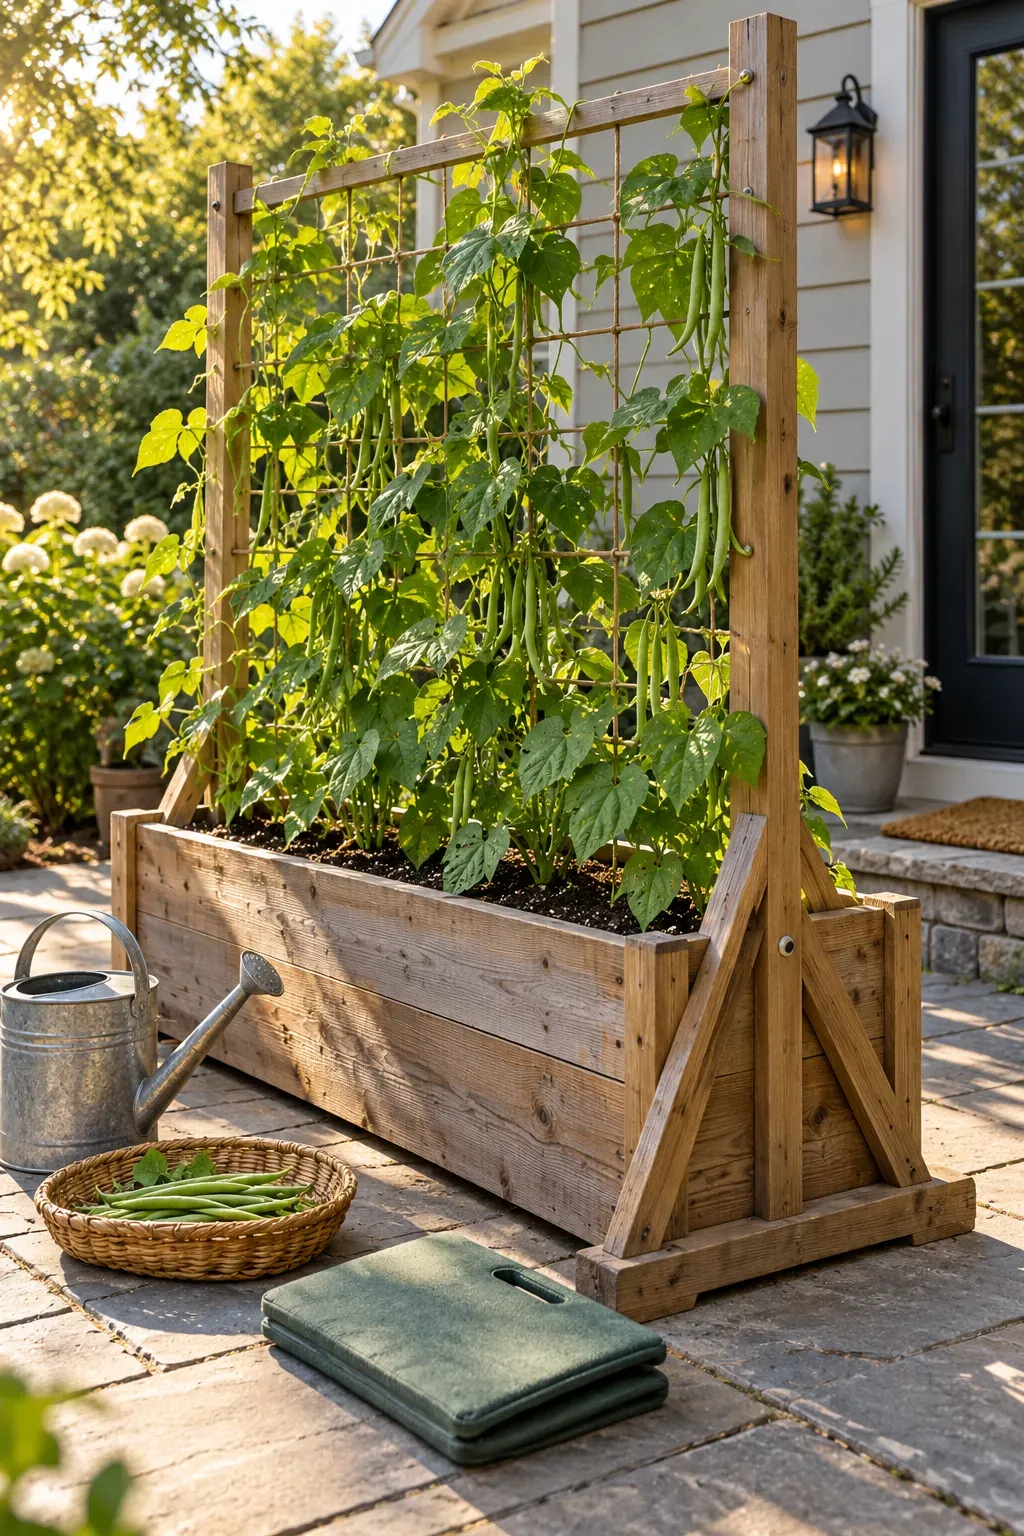
5. Add a Freestanding Trellis to a Deep Bean Planter
Bean vines need somewhere to go before they start winding around the nearest chair.
Choose climbing beans rather than a bush variety, then pair them with a roomy planter and a sturdy freestanding trellis. Follow the seed packet’s spacing advice instead of filling every gap with another seed.
Install the support before planting, while you can still reach the whole container.
- Place the trellis where mature foliage will not block a doorway.
- Keep the planter accessible for watering.
- Arrange the growing area so you can reach pods from more than one side.
The trellis needs to remain steady as the vines fill out, especially in an exposed spot.
✅ Do this
Choose a trellis designed for climbing crops. Check its joints and secure it according to its construction or mounting plan.
🚫 Skip this
Avoid a tall, loose frame balanced in a small lightweight pot. Wet soil alone is not a substitute for a stable support.
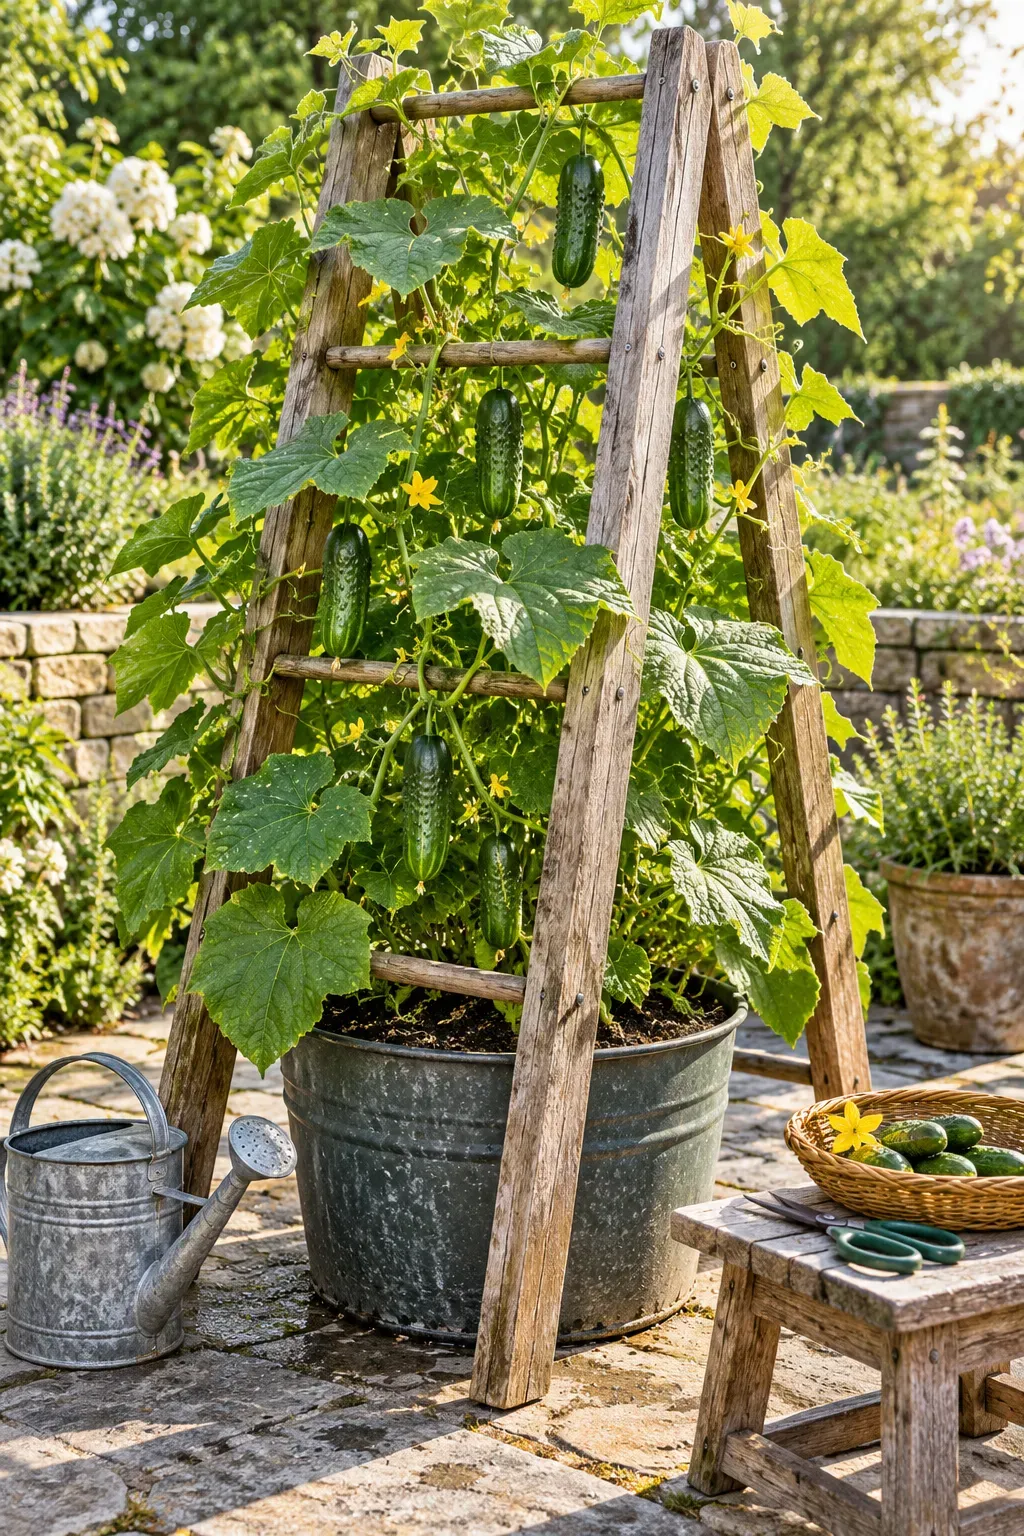
6. Train a Suitable Cucumber Variety Up a Container A-Frame
A cucumber vine sprawled across the patio makes every watering trip a small obstacle course. Give a vining variety an A-frame to climb, and keep the container where you can reach both sides.
Choose a roomy pot with drainage holes and a frame that stands securely around it. Check the variety’s growing instructions before deciding how many plants to add.
- Position the frame before planting.
- Guide young growth toward the lower supports without pulling the stems.
- Keep developing fruit where you can spot and reach it.
Leave space behind the frame. Cucumbers tucked among the back leaves are easy to miss until they become much larger.
💡 Leave a watering gap
Keep one part of the pot’s rim clear so a narrow watering spout can reach the soil without pushing through stems. Check that the frame does not block this opening.
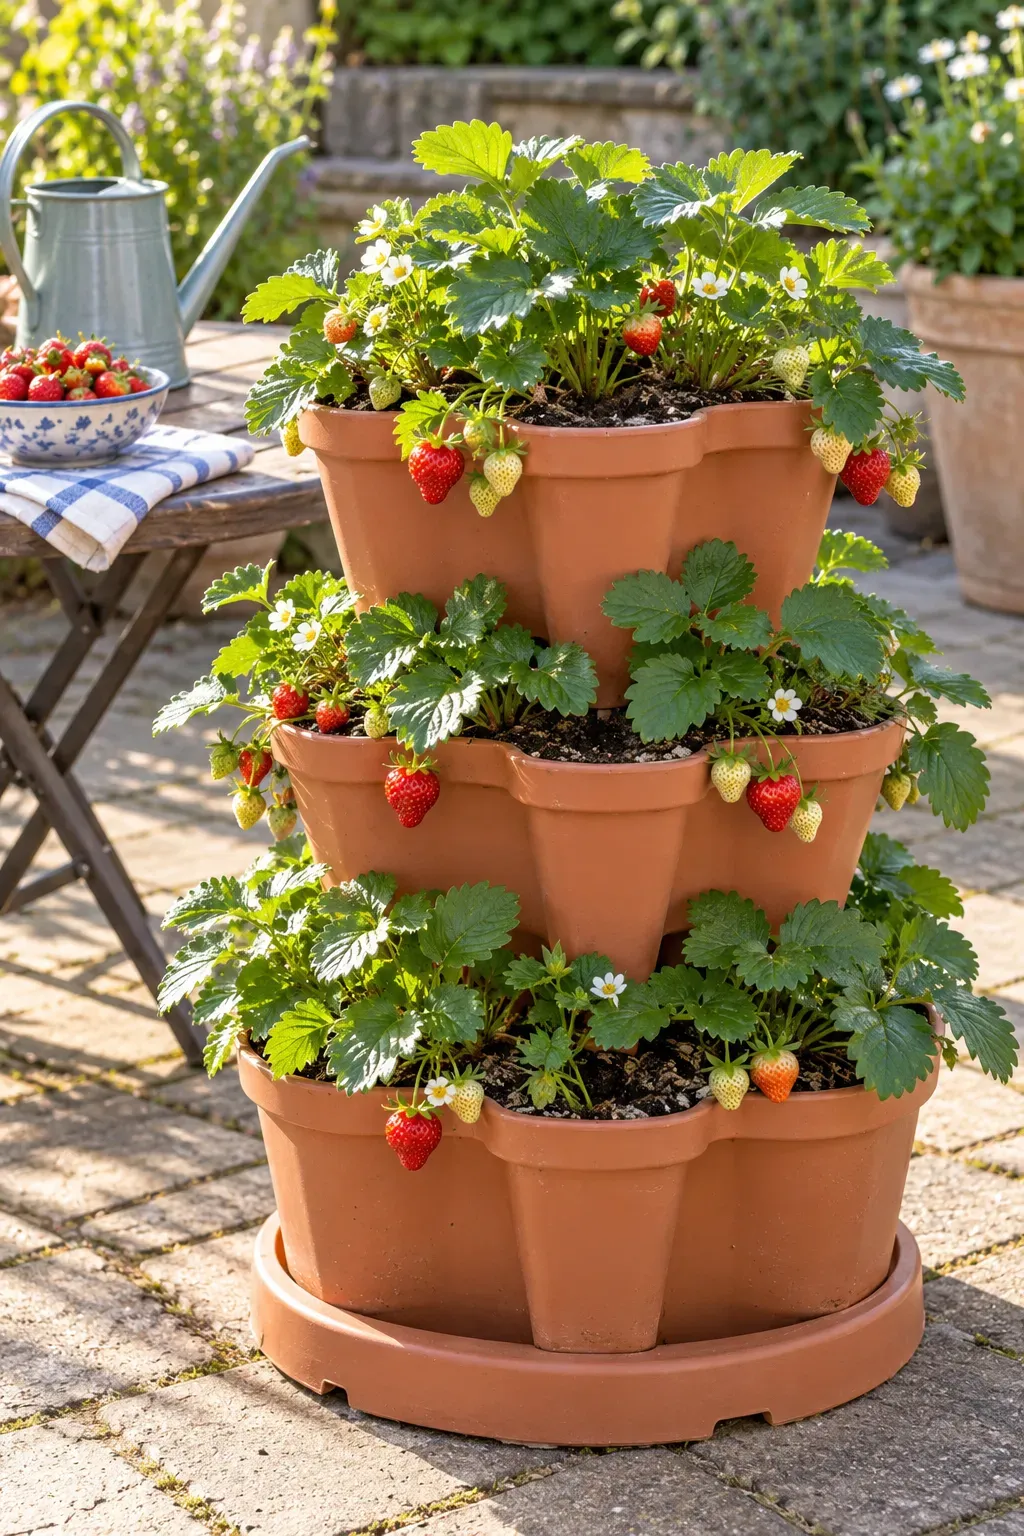
7. Make a Strawberry Tower From Purpose-Built Stacking Pots
Strawberries spilling over separate planting pockets can turn a small patch of paving into a useful growing spot. Start with containers designed to stack together, then assemble them on a firm, level base.
Keep the tower low enough to reach its top comfortably. Follow the planter’s stacking limit, and leave each strawberry crown at soil level rather than burying it.
Before filling the pockets, check:
- Which sides receive light during the day.
- Whether each planting pocket has enough root space.
- How water moves through the assembled containers.
Feel the soil in several pockets when checking moisture. Water reaching the bottom does not mean every pocket has been evenly watered.
☀️ Light
Check the back of the tower as well as the front. Nearby walls can leave some pockets shaded.
💧 Water
Leave access for the watering spout at each level, even after the leaves grow larger.
🧱 Stability
Choose the final location before filling. Follow the planter instructions if the assembled tower needs moving.
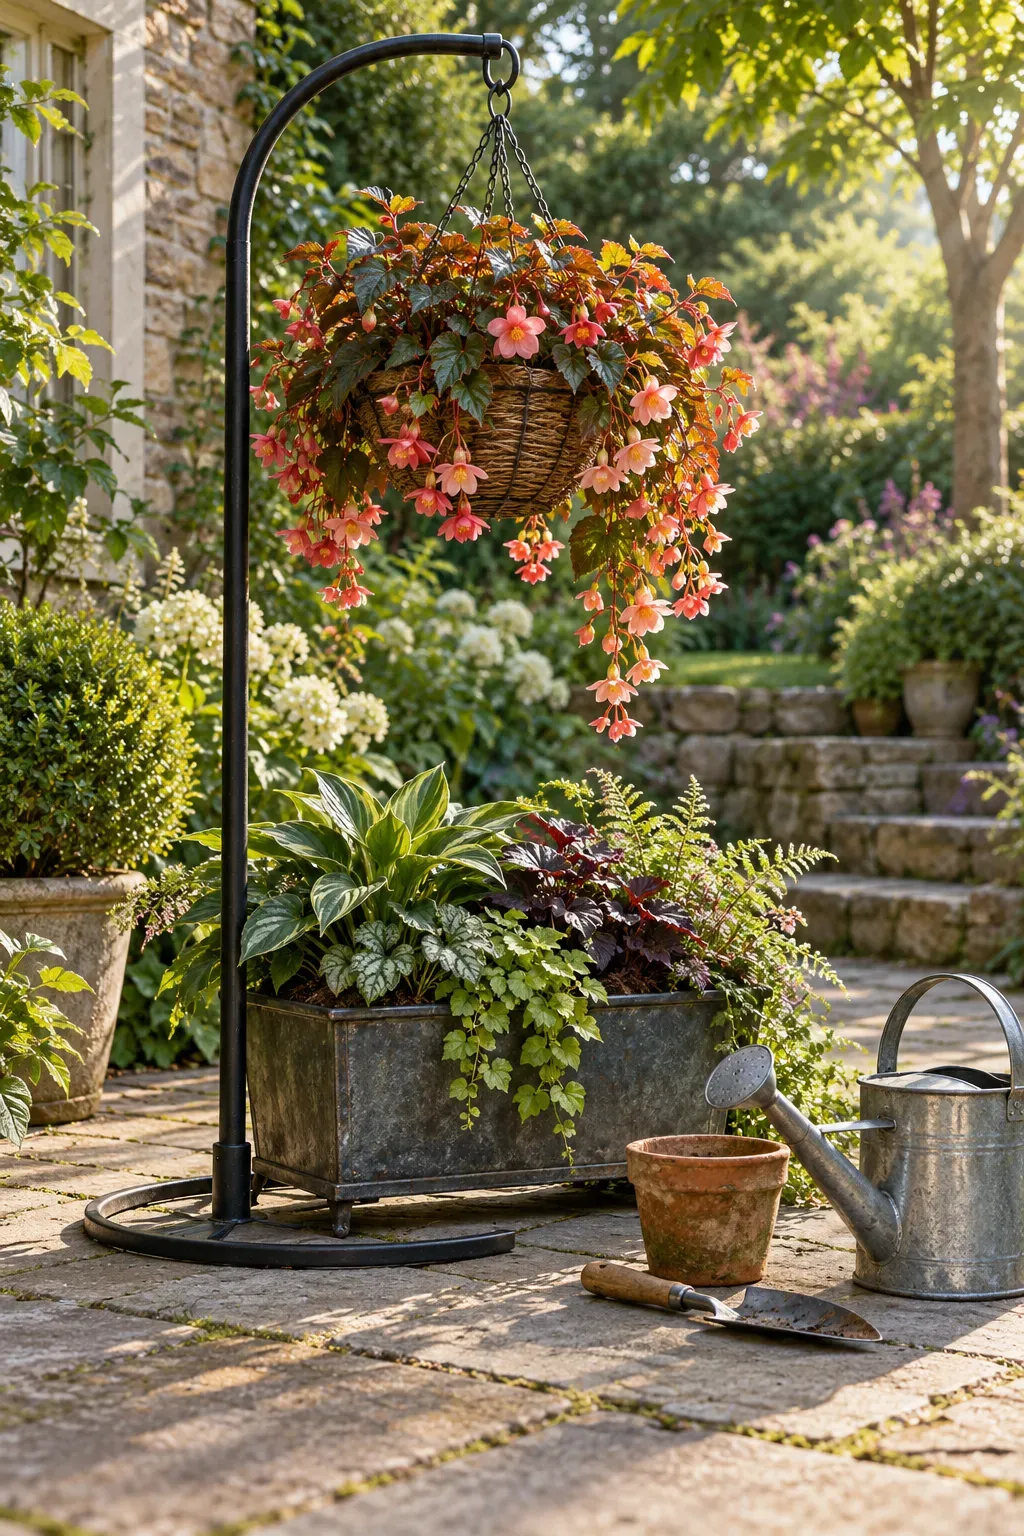
8. Build a Hanging Basket Station Above a Low Planter
Use the space above a low container, but leave yourself room to garden underneath it.
A sturdy freestanding basket stand can hold a hanging planter over a shorter planting box. Choose a stand rated for the basket’s filled, watered weight, and place the whole arrangement away from the walking path.
Work from the bottom upward:
- Set the lower planter where you can reach its soil.
- Hang the basket with room for its mature trailing growth.
- Choose the lower plants for the light they will actually receive.
Check the arrangement again as the basket fills out. What starts as a small leafy fringe can eventually shade most of the box below.
📌 Check the complete arrangement
- Allow room for the basket to move without hitting glass or a wall.
- Keep the upper basket reachable without climbing on furniture.
- Check the lower planter’s moisture separately, even when water drips from above.
- Leave the stand’s feet clear so nobody catches a foot beneath the plants.
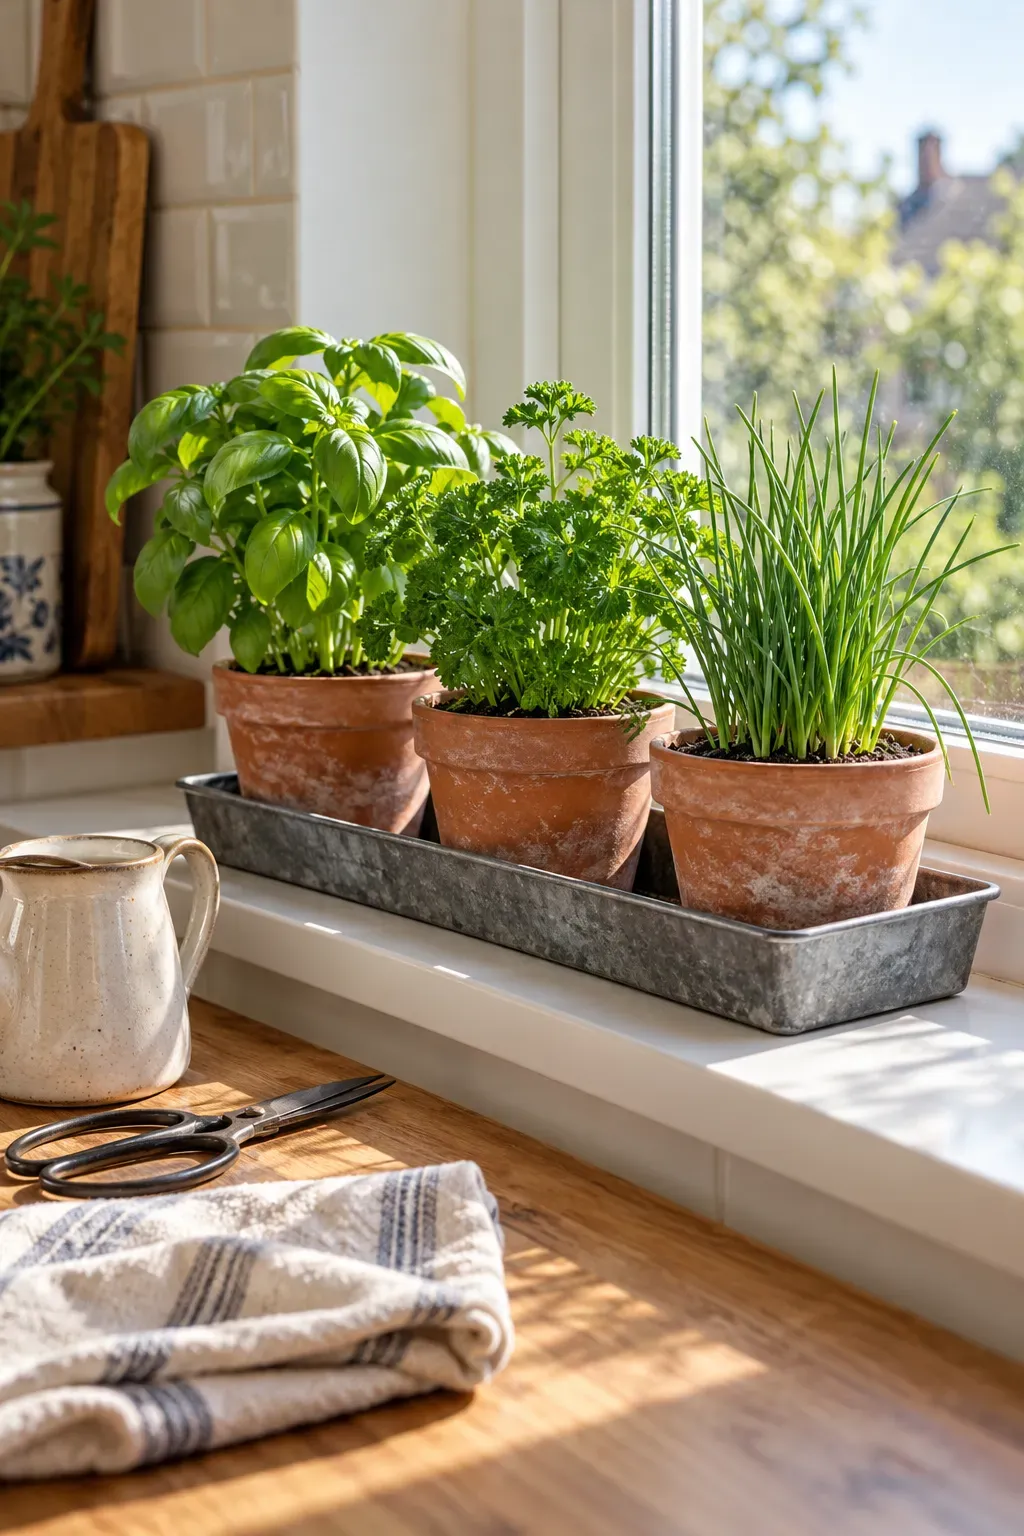
9. Turn a Sunny Windowsill Into a Lift-Out Herb Tray
The ring beneath a herb pot usually appears just when you finally move it. A waterproof tray makes that small windowsill garden easier to lift, clean, and rearrange.
Use separate pots with drainage holes inside a tray that fits fully on the sill. Choose herbs for the window’s light, and leave their leaves clear of the glass.
Keep the setup easy to manage:
- Water each pot according to its needs.
- Let excess water drain before returning it to the tray.
- Lift pots out individually if the full tray feels heavy.
The shared tray keeps the group tidy, while separate pots let you replace one struggling plant without disturbing the others.
BEFORE
Loose pots and mismatched saucers make wiping the sill a small moving job. Water marks hide behind the containers.
AFTER
A removable tray groups the pots and catches stray drips. Lift it periodically to check and dry the surface underneath.
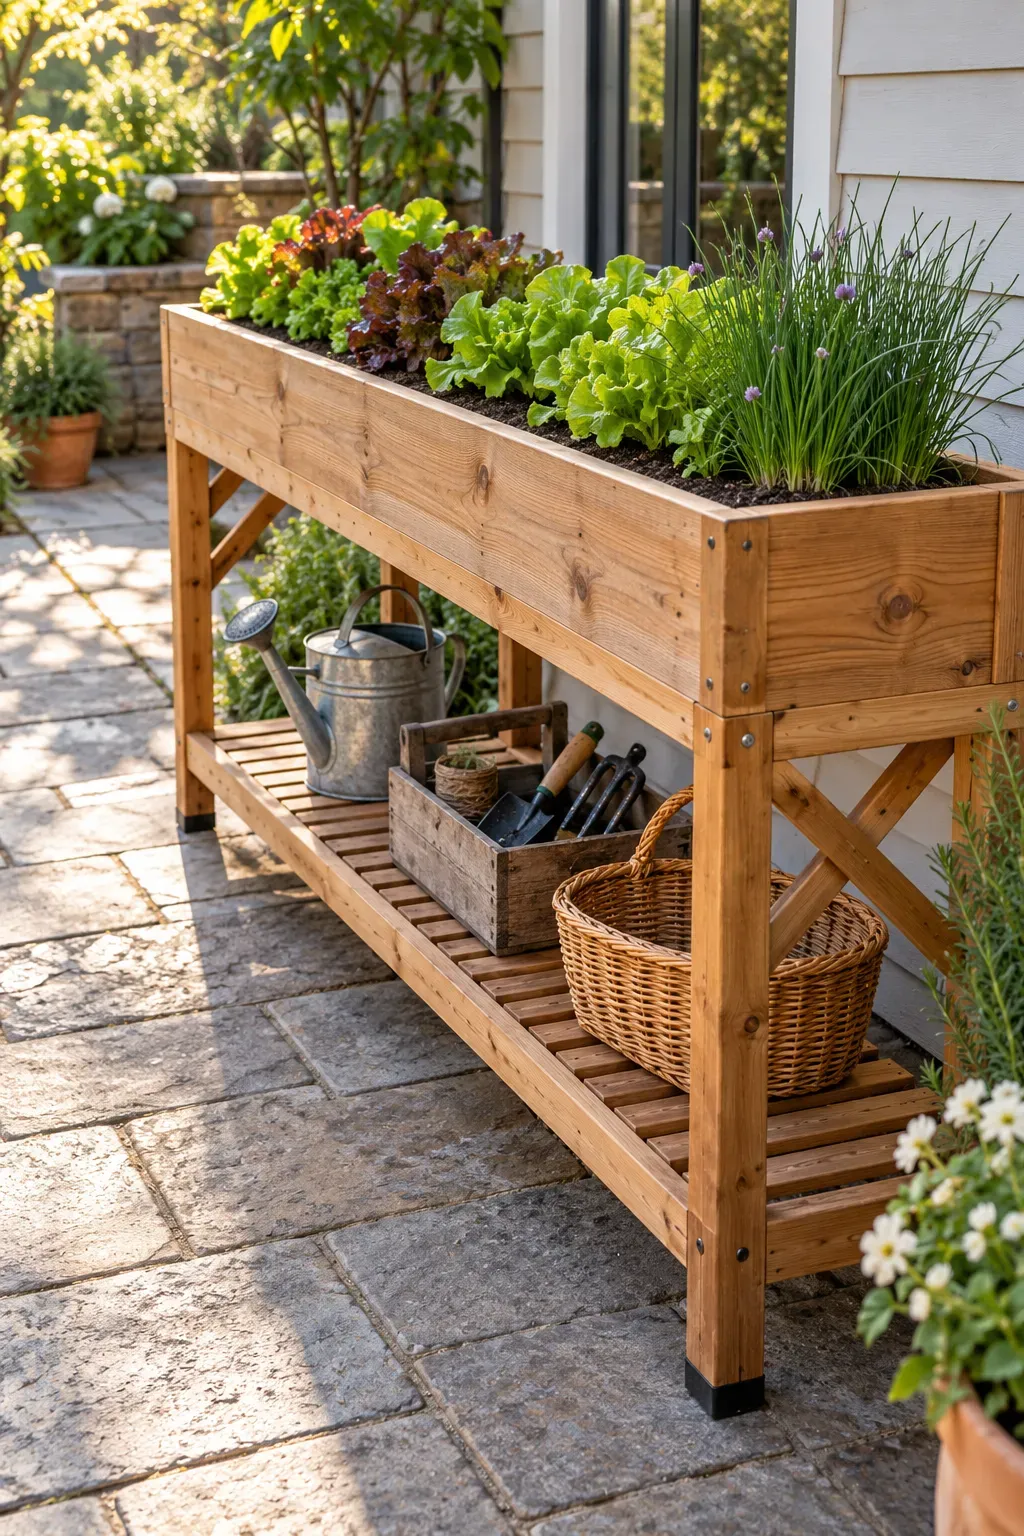
10. Build a Slim Planter Bench With an Open Storage Shelf
Keep the growing space above and the everyday tools below. A slim planter bench combines a raised planting box with an open shelf, giving a narrow patio edge two useful jobs.
Choose a braced outdoor construction plan that accounts for the weight of wet potting mix. Set the planter height for comfortable access, and keep the lower shelf clear of its drainage outlets.
Give the shelf a small, practical role:
- Store a watering can where its handle is easy to grab.
- Keep hand tools in a removable tray.
- Leave a clear space for an empty harvest basket.
Store seeds and moisture-sensitive supplies indoors. This is a planting bench, not a seat.
Plan around how you will use it
- Mark the footprint and check that you can pass comfortably while carrying a filled watering can.
- Choose a suitable construction plan and make the planting box no wider than you can comfortably reach across.
- Position the lower shelf around the tools you need and the planter’s drainage route.
- Set the finished bench on a firm, level surface before filling the planting box.
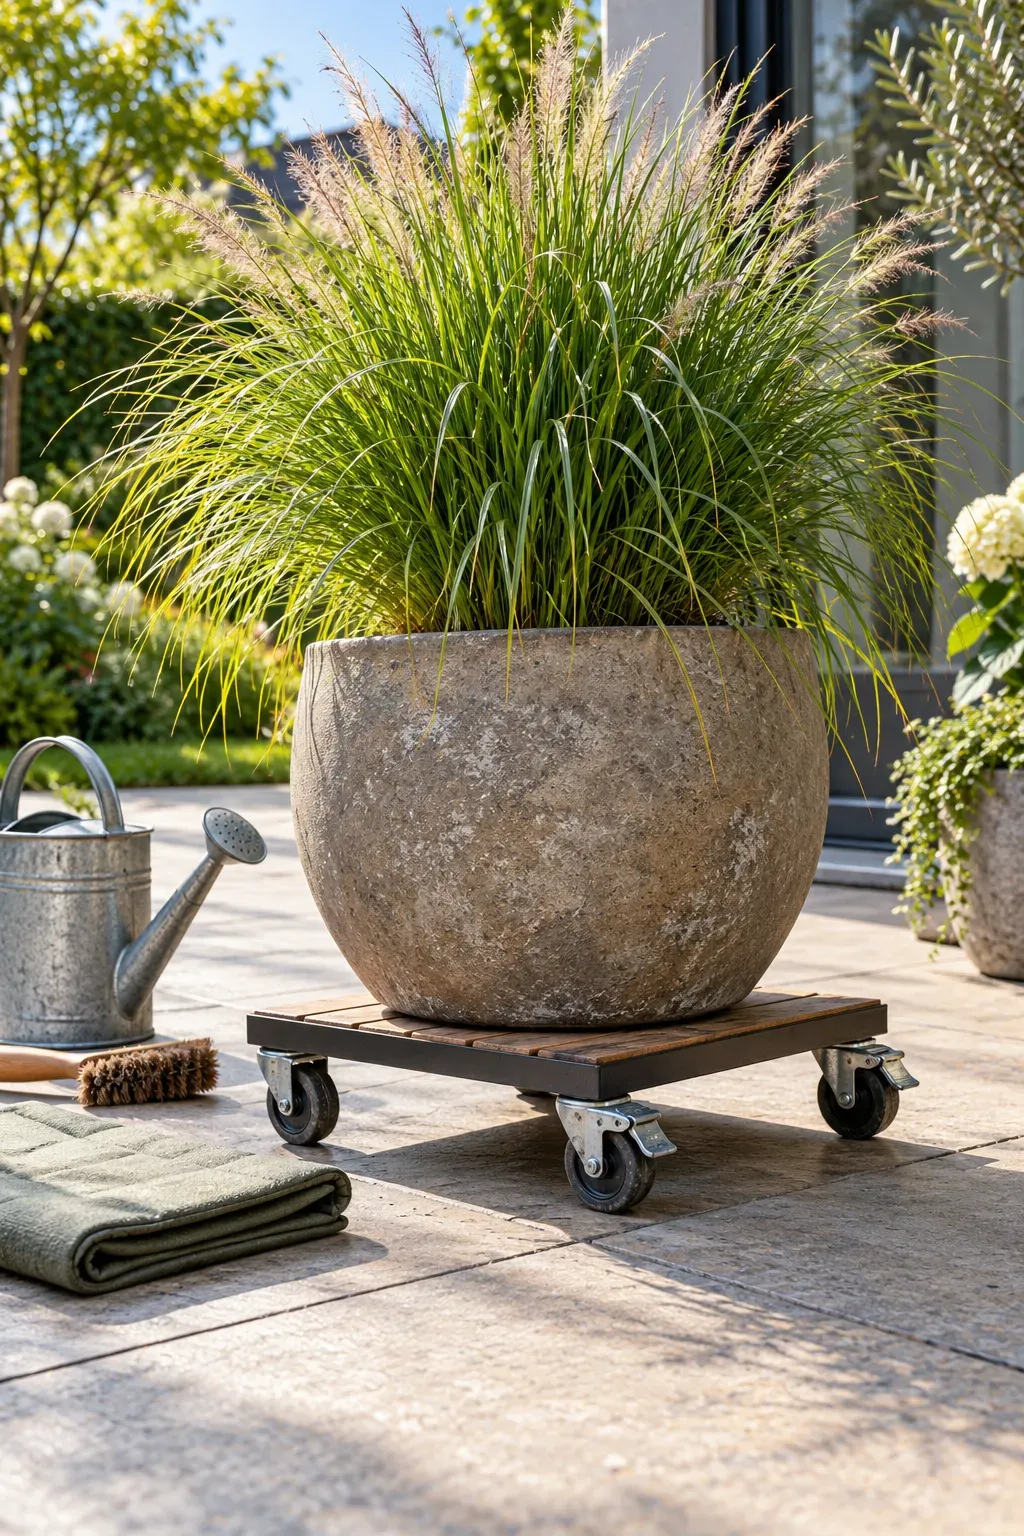
11. Put a Large Patio Planter on a Locking Wheeled Base
Move the pot without emptying half of it first. A sturdy wheeled base lets you shift a large container for cleaning or seasonal rearranging on a suitable level surface.
Choose a base rated for the planter’s total weight, including wet soil and mature growth. Its platform should fully support the pot, with locking wheels you can reach.
Before setting it up:
- Check the route for cracks, steps, and narrow gaps.
- Keep drainage holes clear of the platform.
- Make sure the container sits securely without overhanging.
Move the planter slowly, then lock the wheels. Tall, top-heavy plants need particular care because their weight is less stable when moving.
✅ Do this
Check whether the listed weight rating applies to the complete platform. Choose wheels suited to the surface where the planter will move.
🚫 Skip this
Do not use the wheeled base on steps or sloping ground. Stop if a wheel catches instead of pulling harder on the plant or pot rim.
12. Convert a Suitable Food-Safe Bucket Into a Self-Watering Planter
A water reservoir gives a bucket planter another job beneath the roots. Start with a clean food-safe bucket that has never held chemicals, and follow a tested self-watering bucket design.
The setup needs a supported planting chamber, a wick that reaches the reservoir, a filling tube, and an overflow outlet that keeps the water below the main root zone.
Keep the assembly accessible:
- Leave the filling tube above the soil.
- Keep the overflow opening unobstructed.
- Use a potting mix suited to the chosen design.
Water the planting mix from above when establishing the container. Check both soil moisture and reservoir level while learning how the system behaves in your conditions.

📌 Check the working parts
- A sound container with a known food-safe history.
- A supported insert that keeps the main planting mix above the reservoir.
- A wick or wicking chamber that maintains contact with the water.
- An accessible filling tube with a removable cover.
- An overflow outlet positioned to preserve the design’s air gap.
- A way to check the water level without dismantling the planter.
13. Run a Small Drip-Watering Line Through a Group of Pots
The farthest pot often gets watered last, after the hose has caught on a chair leg. A small drip line can make a container group easier to manage without threading a watering can between every plant.
Start with a container-watering kit suited to your water source. Arrange the main line along the back of the group, then secure individual emitters at the soil surface.
Treat the first watering as a check:
- Watch whether every outlet delivers water.
- Check moisture in each pot.
- Adjust the setup for different containers and plants.
A timer cannot tell you whether a tube has slipped out. Keep the outlets visible enough to inspect.
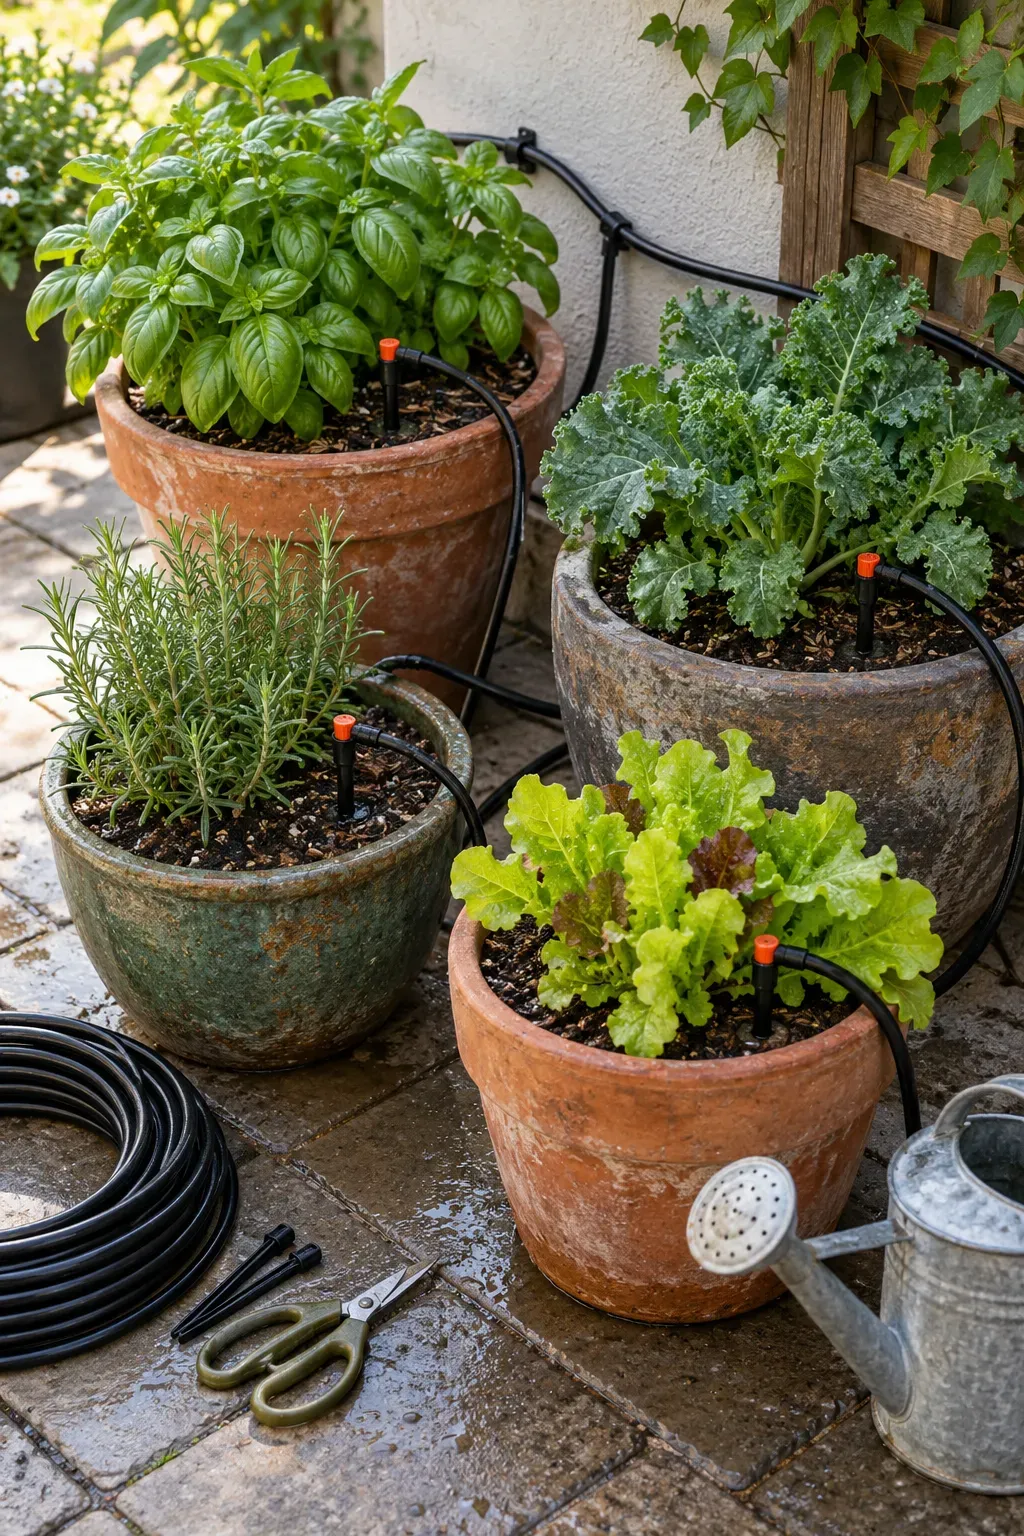
🚰 Supply
Use the filter, pressure control, and connection parts specified for your kit and water source.
💧 Emitters
Secure each outlet inside its container. Leave enough tubing slack to lift a pot slightly for cleaning.
🌿 Moisture
Recheck the pots after weather changes. A schedule that suited a cool week may need adjusting later.
14. Build a Removable Watering Tray for Small Nursery Pots
Group small nursery pots in a shallow waterproof tray that you can empty easily. It gives loose seedlings one manageable place to sit and provides a way to water suitable pots from below.
Choose containers with drainage holes and keep their bases in contact with the tray. Avoid packing them so tightly that leaves overlap and hide the soil.
Keep the tray useful between waterings:
- Leave space to lift each pot by its sides.
- Remove fallen leaves and loose growing mix.
- Keep plants with similar watering needs together.
Lift the pots out to drain after watering. The tray should not become a permanent pool beneath the seedlings.
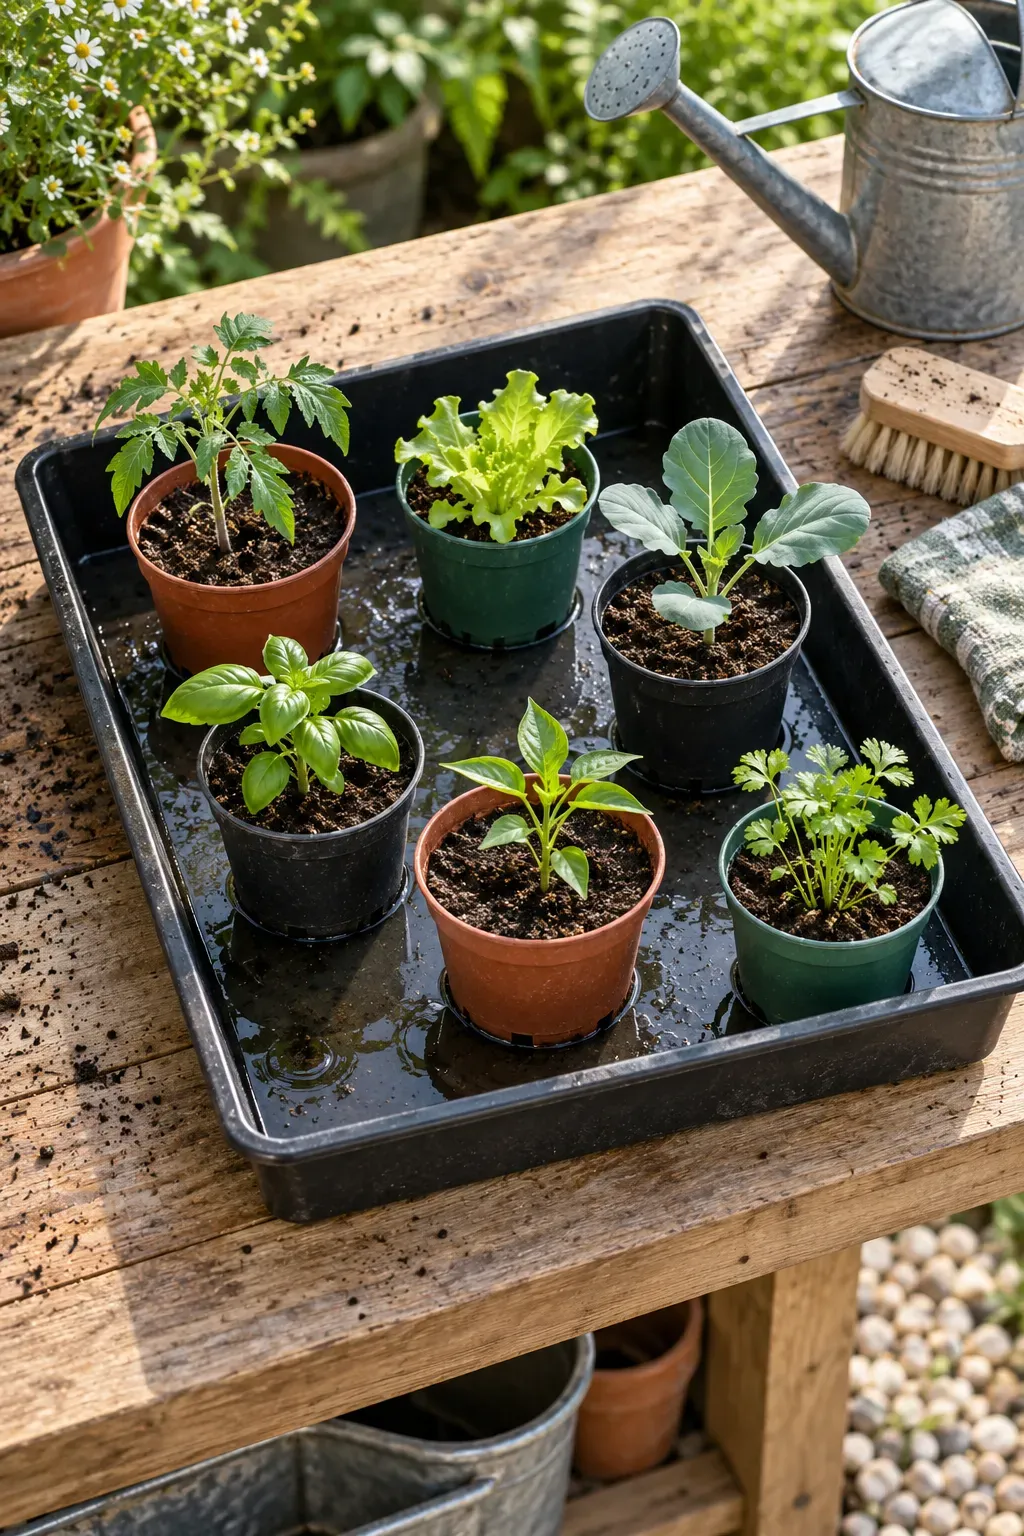
A simple watering routine
- Place pots that need watering in a clean tray and add a shallow layer of water.
- Watch the growing mix and check moisture. Do not assume every pot absorbs water at the same rate.
- Remove the pots once the mix is moistened and allow excess water to drain.
- Empty and clean the tray before returning the drained pots.
15. Make a Two-Row Lettuce Station With Lift-Out Planter Boxes
Fresh seedlings and harvest-ready lettuce do not have to compete in the same crowded box. Separate removable planters let you keep batches at different stages in one tidy station.
Build or adapt a sturdy low stand that supports two rows of planting boxes. Leave each box easy to lift, with its drainage holes clear and room for mature leaves.
Use the rows to organize the next planting:
- Keep an established batch in one row.
- Start a later sowing in another box.
- Replace a finished batch without disturbing the others.
Follow the variety’s spacing advice as seedlings grow. Extra boxes help you organize the crop, but they do not replace thinning.

BEFORE
One large box holds plants at mixed stages. Clearing finished lettuce means working around seedlings that still need space.
AFTER
Separate boxes let you remove one finished batch, refresh its growing mix, and replant while neighboring boxes stay in place.
16. Pair an Upright Crop With a Compatible Low-Growing Companion
Look at the space around a plant’s mature shape before adding another crop. A roomy container may hold an upright vegetable and a smaller companion, provided both have enough root space, suitable light, and similar watering needs.
For example, a compact pepper plant could share a sufficiently large container with a few spring onions near the edge. Follow the spacing guidance for both crops.
Before combining plants, check:
- How wide each will grow.
- Whether the taller plant will shade the smaller one.
- Whether you can still reach the soil.
Leave open space around stems. The planting should have room to develop without needing constant trimming just to fit.

💡 Make the smaller crop removable
When space is uncertain, place the smaller crop in its own pot beside the main container. You can rearrange the pair as they grow without disturbing established roots.
17. Build a Divided Herb Box With Separate Pots Inside
One tidy herb box does not need one shared patch of soil. A simple outer box can group individual pots while letting you water, replace, and rearrange them separately.
Measure the pots before building the surround. Leave enough clearance to lift each one by its sides, and give the outer box drainage so water cannot collect beneath them.
Set up the box around your habits:
- Keep often-used herbs near the front.
- Group pots with similar light needs.
- Leave the pot rims visible for checking moisture.
Mint can have its own removable container, while other herbs stay in theirs. Check beneath the pots occasionally for roots escaping through drainage holes.
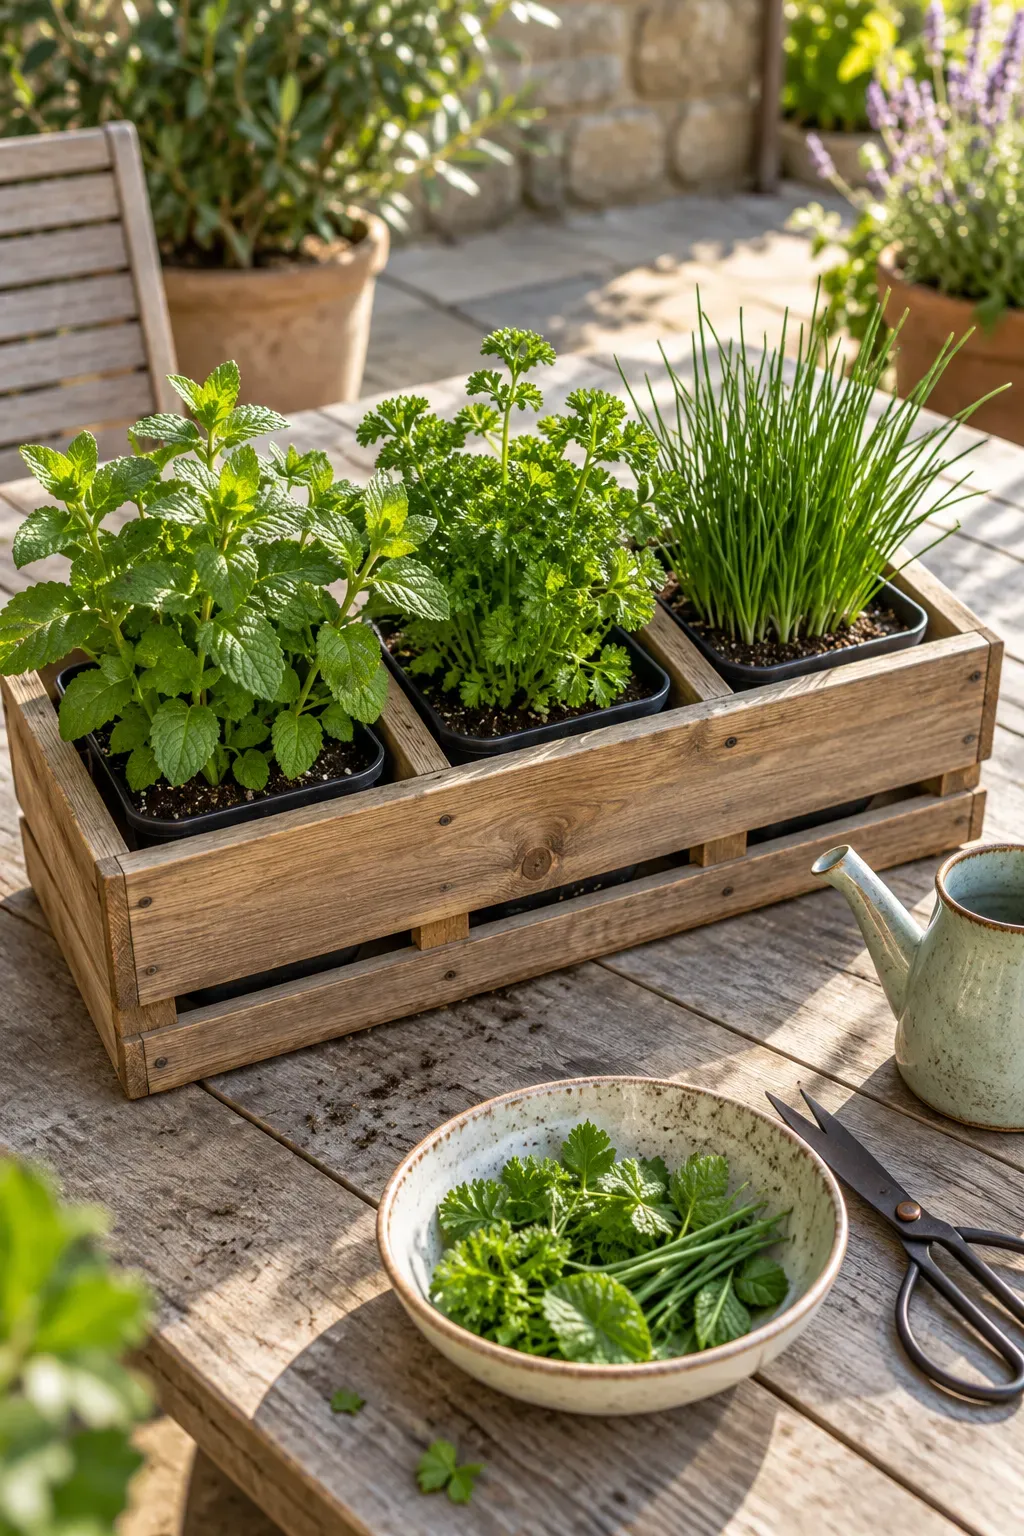
✅ Do this
Check moisture in each inner pot. Lift one out when it needs closer attention, cleaning, or replacement.
🚫 Skip this
Do not fill the gaps between pots with soil or bury their rims. That makes removal harder and can hide pooled water.
18. Set Up a Seedling Shelf That Converts to Summer Herb Storage
The shelf that holds spring seedlings can keep working after they move into larger containers. Build it around removable trays so it can later hold individual herb pots.
Choose a sturdy outdoor shelving design with enough clearance for growing plants. Check the light on each level, since an upper shelf can shade the one below.
As the season changes:
- Remove empty seed trays and clean the shelves.
- Replace crowded groups with fewer, larger herb pots.
- Adjust removable shelves where the design allows.
Keep heavy pots on lower levels and secure the unit as its design requires. A shelf beside the back door is useful only if the door still opens freely.
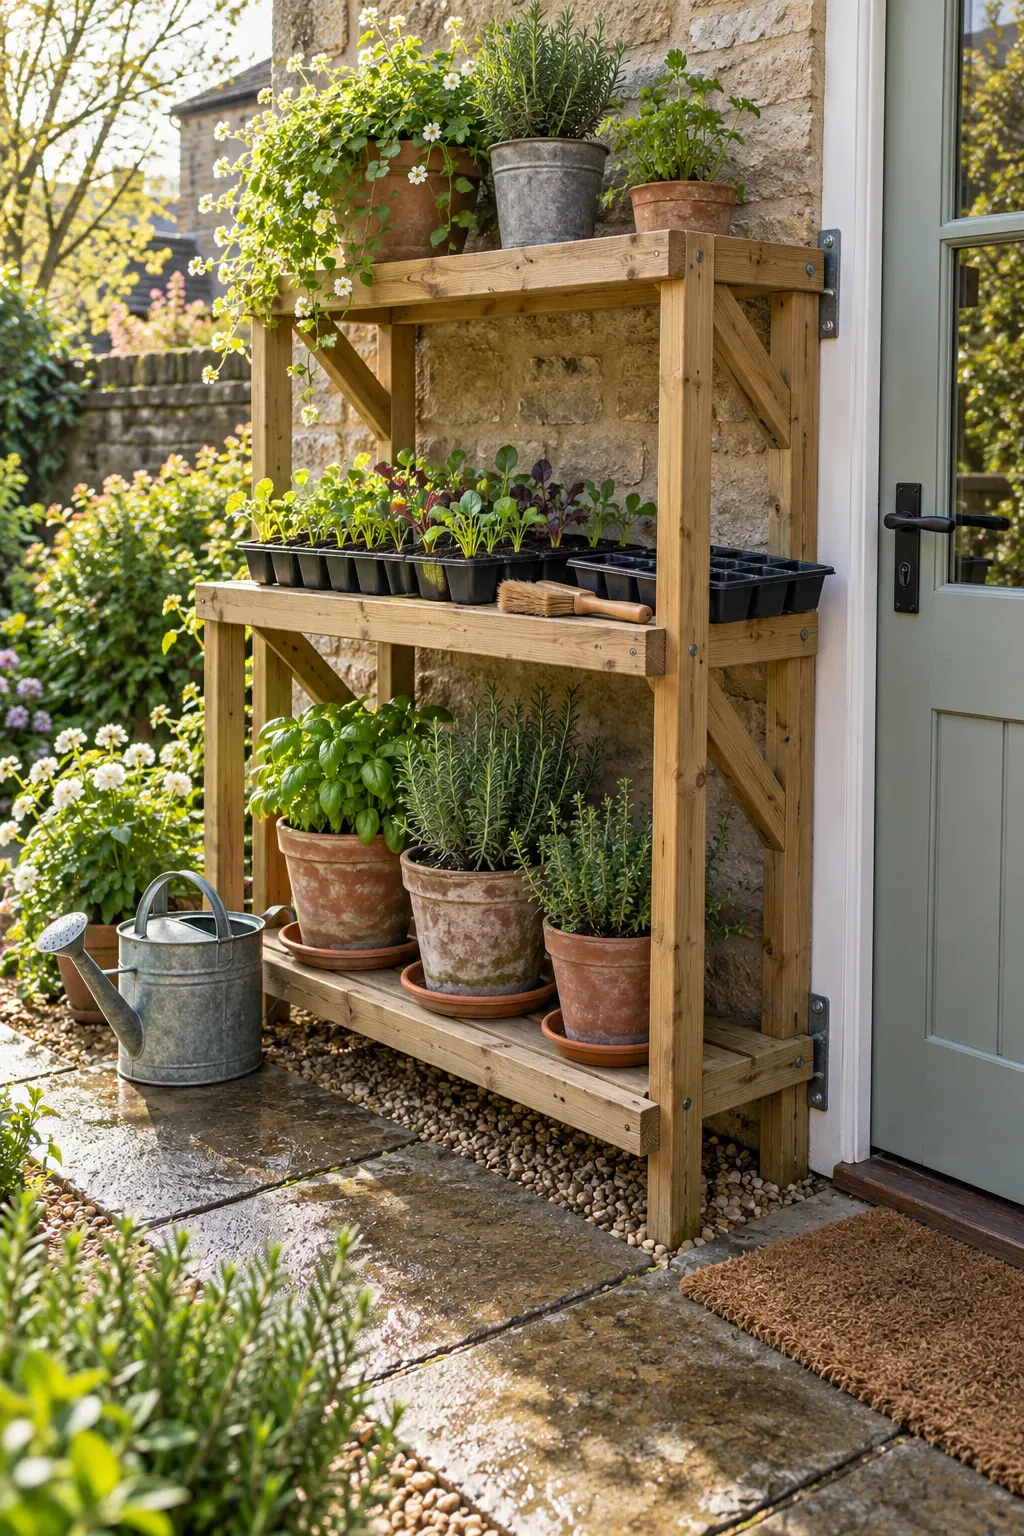
| Spring seedlings | Summer herbs |
|---|---|
| Small pots grouped in removable trays. | Separate pots with room for mature leaves. |
| Space to inspect young growth closely. | Space to reach stems for regular picking. |
| Move plants on when they outgrow their starting pots. | Recheck shelf clearance as herbs fill out. |
19. Turn a Food-Safe Storage Tote Into a Movable Potato Container
A roomy storage tote can become a potato container if its material, depth, and condition suit the job. Choose an opaque food-safe tote with a known history, and add drainage before filling it.
Place it in its growing position while empty. Filled totes can be heavy, and their handles may not be designed for lifting wet soil.
Plan for access from the start:
- Use seed potatoes intended for planting.
- Follow planting and spacing guidance for the variety.
- Leave room to add growing mix as needed to keep developing tubers covered.
If moving the planted tote matters, place it on a suitable rated wheeled platform before filling.
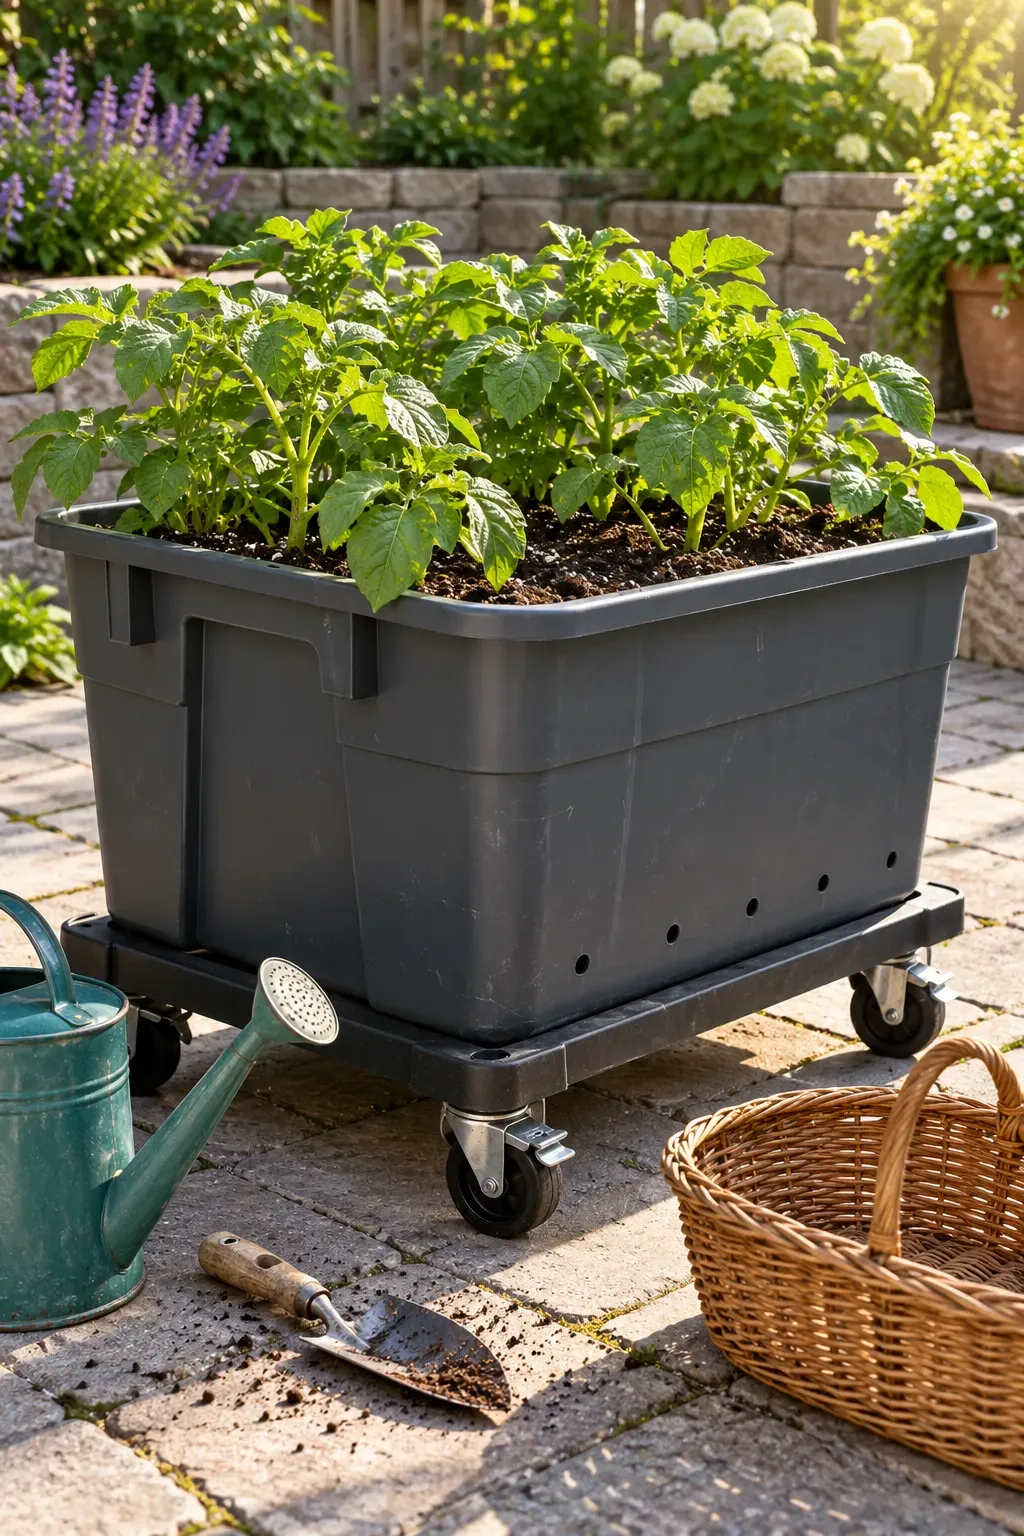
🪴 Container
Check the material and condition. Replace cracked or brittle plastic before planting.
💧 Drainage
Keep drainage outlets clear of the supporting platform and check them after positioning.
🧺 Harvest space
Leave room beside the tote for a groundsheet and basket when it is time to empty the container.
20. Make a Deep Root-Crop Box for a Narrow Sunny Spot
Depth can be more useful than a wide footprint when you want to grow root crops. A narrow planting box can fit along a sunny patio edge while leaving the walkway open.
Choose the crop first, then match the usable soil depth to its variety. Account for the base and the watering space below the rim when measuring the box.
Before sowing, check:
- The container has drainage holes.
- The growing mix is loose and suitable for containers.
- The box can be reached along its full length.
- Seedlings will have their recommended spacing after thinning.
A short-rooted carrot variety may suit a smaller setup than a long-rooted one.
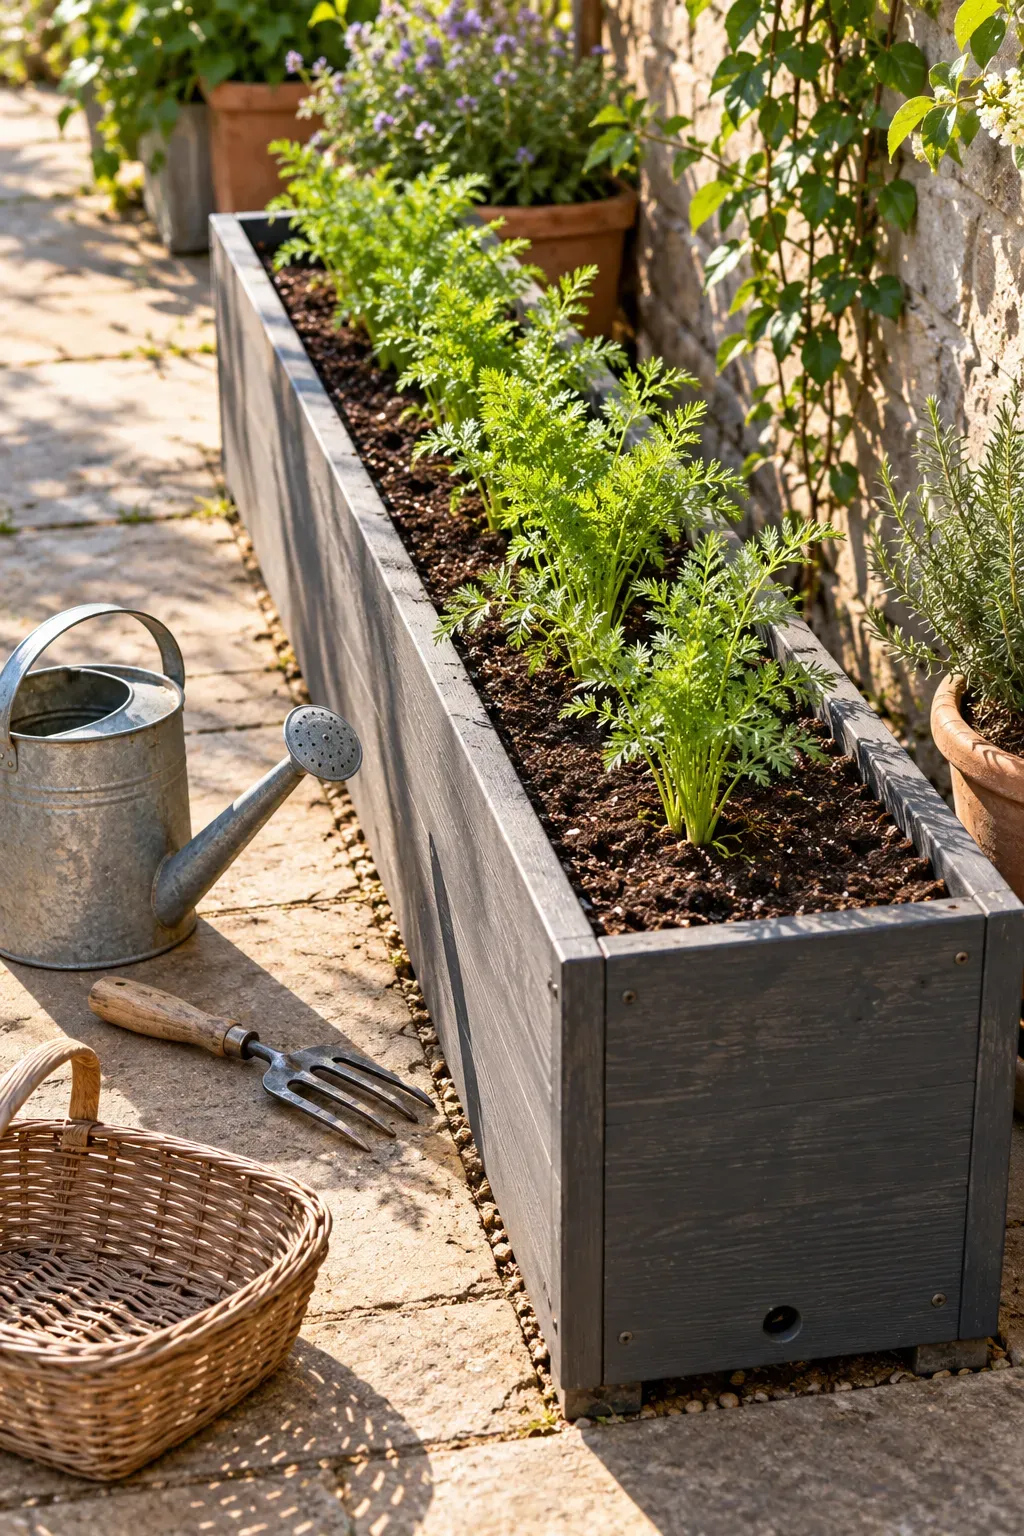
📌 Match the box to the crop
- Read the variety’s expected root size before choosing the container.
- Measure usable planting depth inside the box.
- Check the actual sun reaching the planting surface.
- Plan seed spacing along the full row.
- Keep a clear watering route without stepping across neighboring pots.
21. Build a Stable Tiered Flower Planter With Pots of Different Sizes
A smaller pot raised above a broad lower one gives flowers different levels without spreading containers across the patio. Keep the arrangement low and choose plants that will leave the structure visible.
Use a suitable tiered-planter support system or a construction plan designed for the pots’ filled weight. The upper pot needs firm support that will not settle as the lower pot’s soil shifts.
Plan the flowers around the tiers:
- Keep upright growth modest in the upper pot.
- Leave planting room around the lower rim.
- Choose plants with compatible light needs.
Check where water drains from the top. The lower planting still needs its own moisture check.
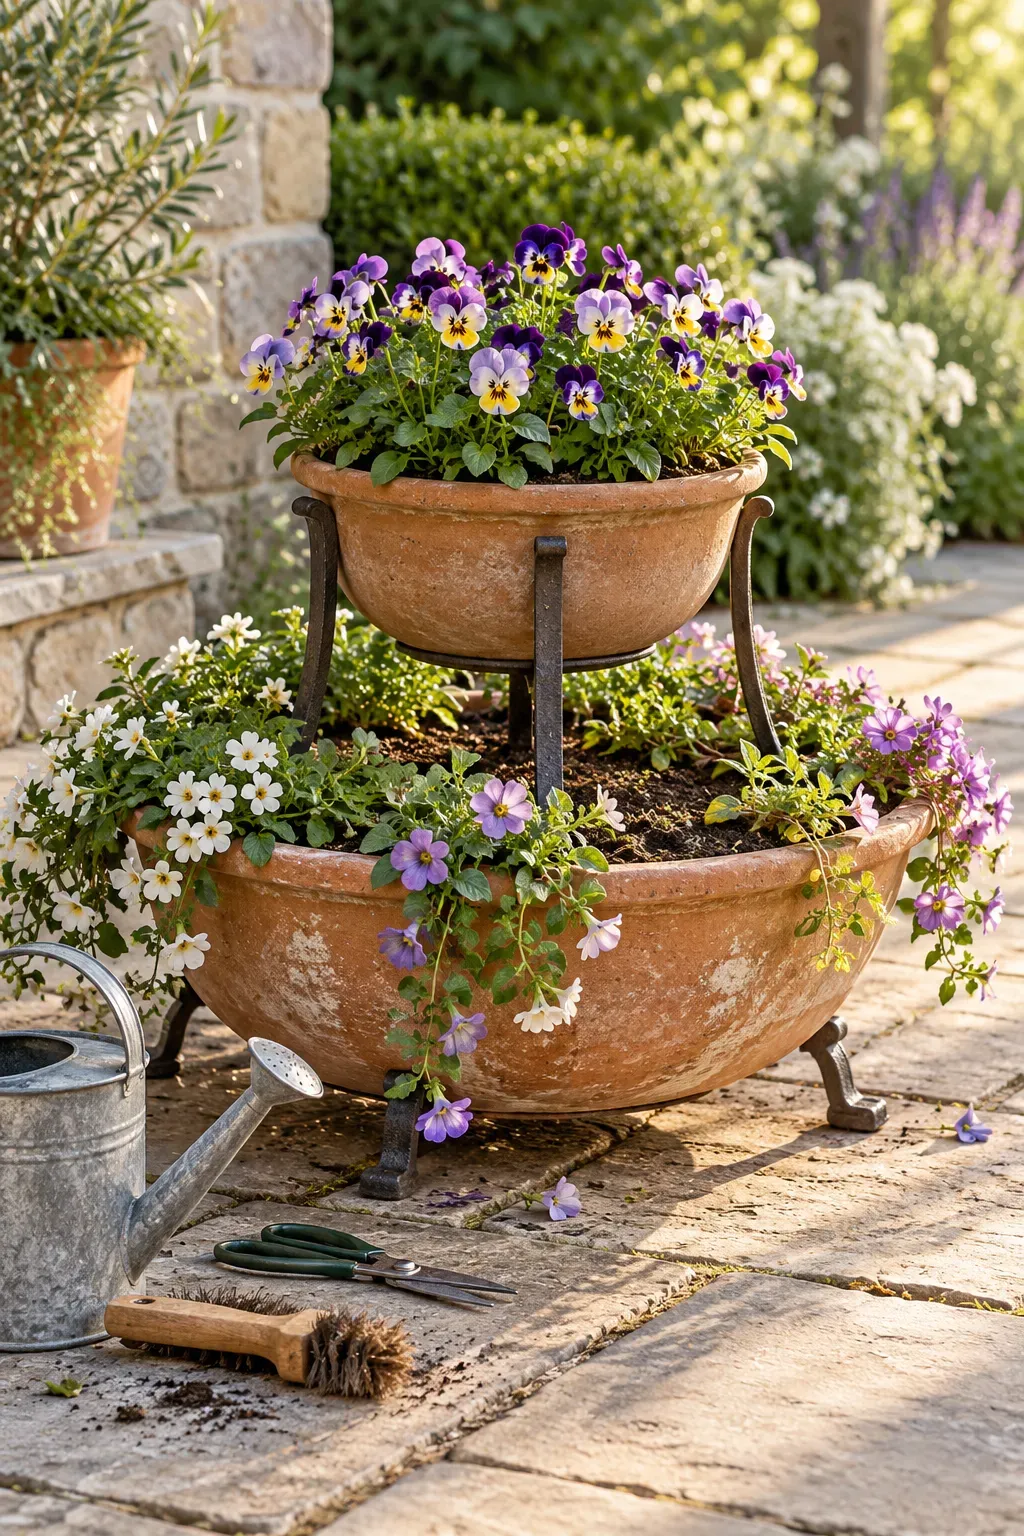
✅ Do this
Check the empty assembly from every side. Leave both pot rims accessible for planting, watering, and removing faded flowers.
🚫 Skip this
Do not balance a heavy upper pot on loose soil or an improvised stack of small containers.
22. Make a Removable Shade Frame for a Group of Containers
The hottest patch of paving can be awkward to garden in, especially when moving every pot is a chore. A removable shade frame lets you adjust the exposure over a small container group.
Choose shade cloth suited to the plants and conditions. Fit it to a stable frame with space above the foliage and open sides for access and airflow.
Build the setup around everyday use:
- Keep the watering side easy to reach.
- Secure loose cloth so it cannot flap against leaves.
- Make the covering simple to remove when conditions change.
Observe the plants beneath it. A cover should solve a specific light or heat problem, not stay up by habit.
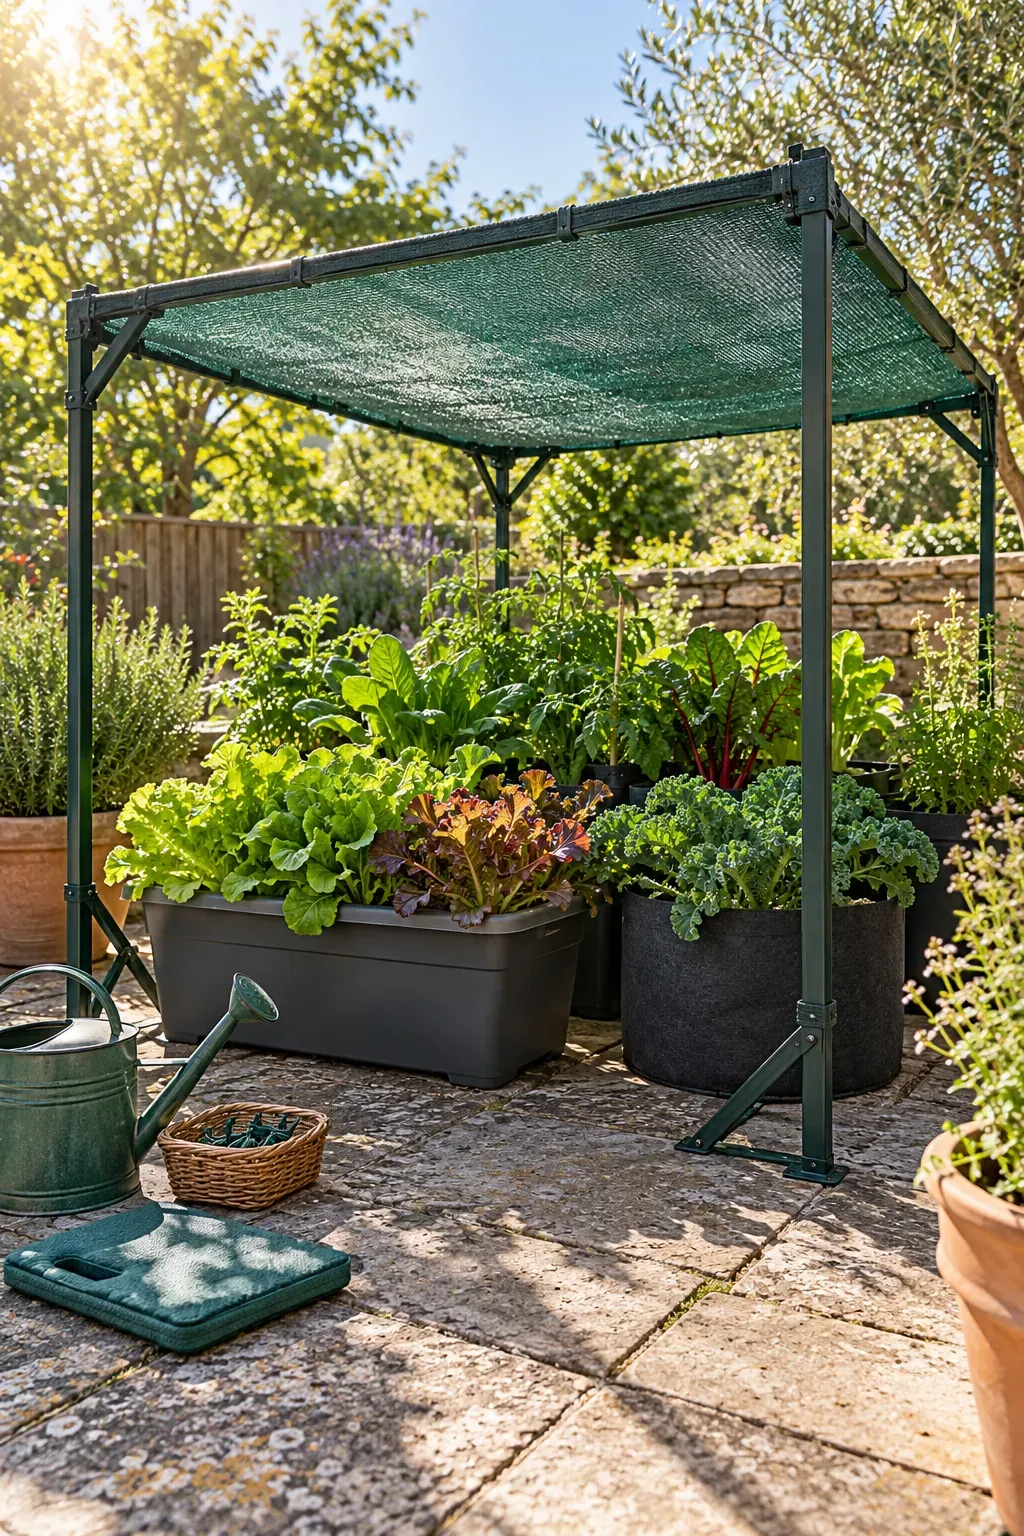
Fit the frame to the spot
- Watch where the strongest sun falls before marking the frame’s position.
- Choose a stable design that clears mature foliage and leaves room around the pots.
- Secure the cloth with fixings intended for the material and frame.
- Check the structure before windy weather and remove the covering when conditions exceed what the setup can handle.
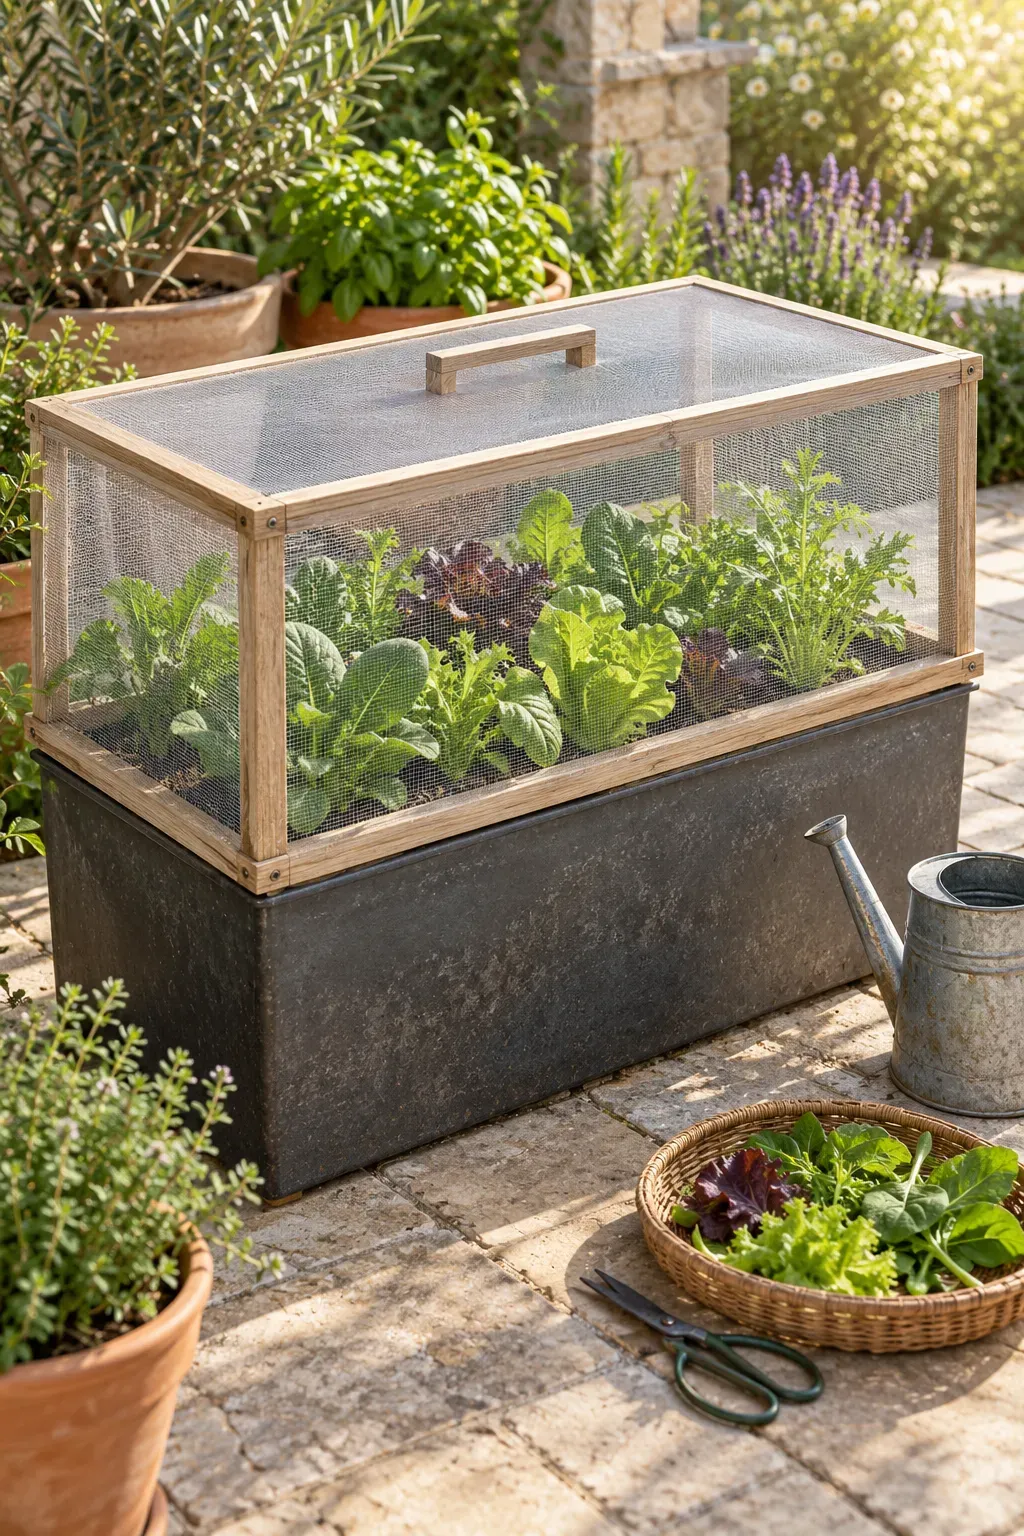
23. Build a Mesh Cover That Lifts Off a Leafy-Greens Planter
A fitted cover is easier to live with when lifting it does not mean untangling a loose net. Build a lightweight frame that sits neatly over a leafy-greens container, then attach suitable insect mesh.
Choose the mesh for the pest you want to exclude. Leave space above the crop, and close gaps around the planter rim without crushing stems.
Make access part of the design:
- Add a simple handle to the frame.
- Leave a clear place to set the cover during harvesting.
- Check beneath leaves before replacing it.
The cover is a barrier, not a cure for pests already inside. Inspect the plants before enclosing them.
🕸️ Mesh choice
Check the product’s intended pests. Large openings will not exclude small insects.
📐 Fit
Recheck the edges after watering or harvesting. A shifted corner can leave an opening.
🌿 Crop choice
This setup suits crops grown for their leaves. Flowering crops may need pollinator access.
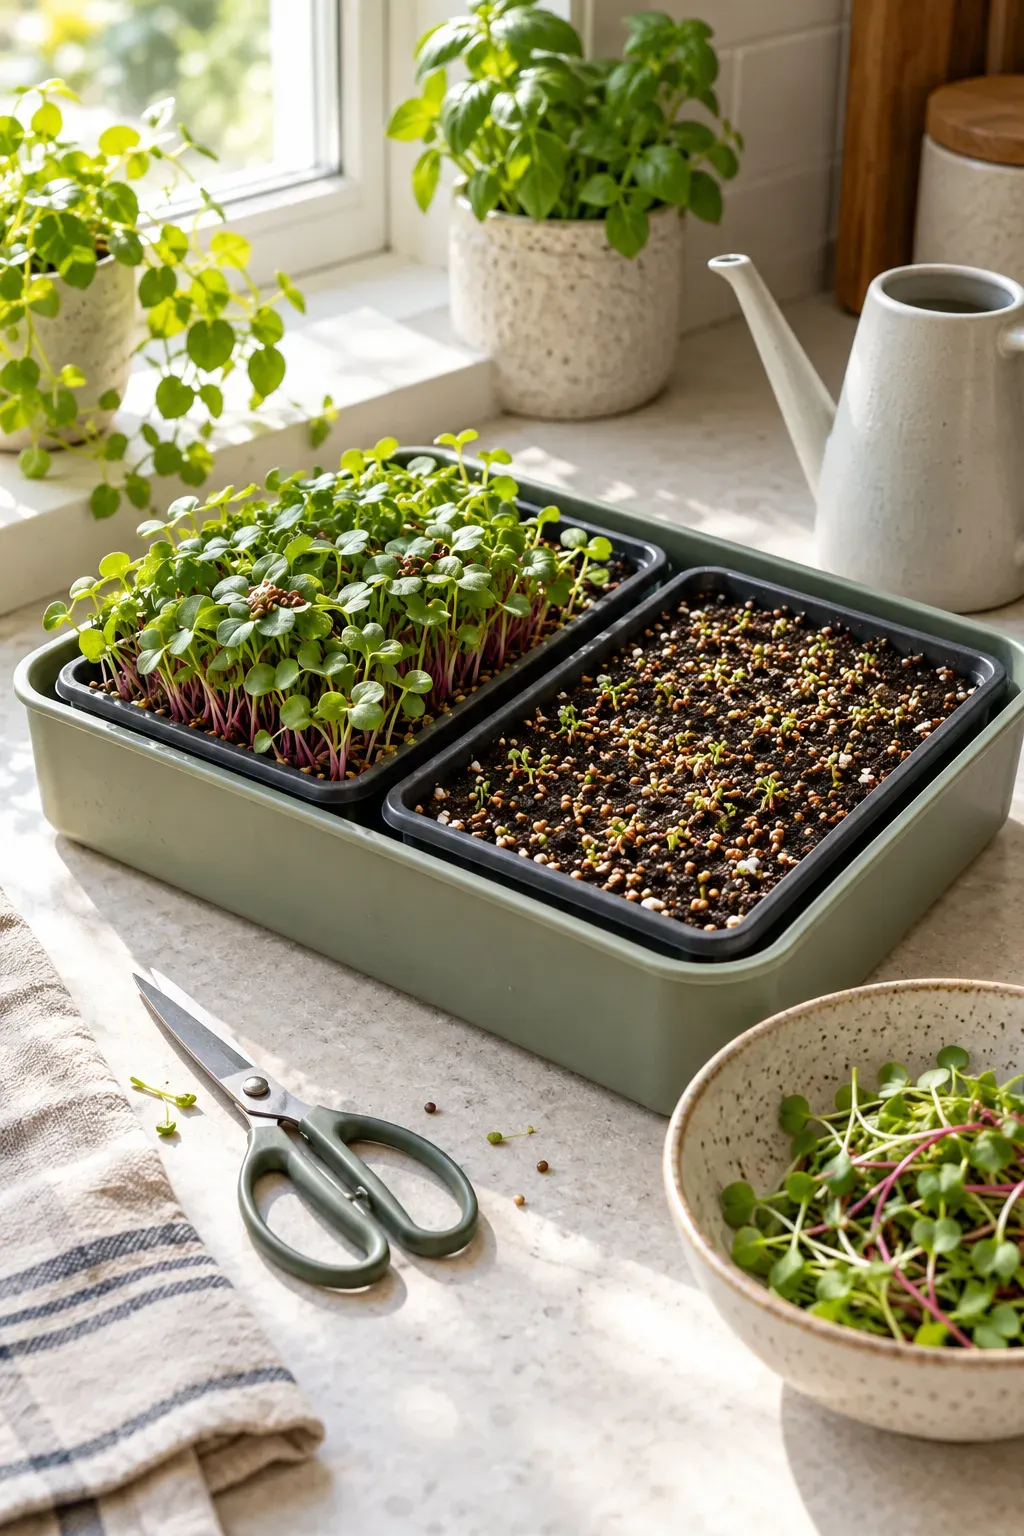
24. Turn a Shallow Container Into a Replaceable Microgreen Tray Station
A small growing tray can earn its place on a bright shelf without needing a deep planter. Use a waterproof outer container to hold removable microgreen trays with drainage.
Choose seeds sold for edible microgreen growing, and follow their sowing instructions. Keep the growing surface accessible so you can check moisture and cut the crop cleanly.
Arrange the station for quick resets:
- Use trays that lift out without bending.
- Leave room around the leaves for airflow.
- Keep scissors and harvested greens off wet surfaces.
After harvesting, remove the used growing material and clean the tray before starting again. Small, manageable batches make the routine easier to maintain.
💡 Keep a spare tray ready
A clean spare lets you start another batch while the harvested tray is being emptied and washed. Keep notes on the seed type and sowing date outside the damp growing area.
25. Build a Modular Planter Row With Lift-Out Inner Pots
A long planter can look finished even when its plants are ready for different jobs. Build a simple outer surround that holds separate inner pots, with enough clearance to lift each one out.
Choose pots suited to their plants, then size the surround around them. Support every pot properly and leave a clear drainage route beneath the row.
Use the removable setup to handle small changes:
- Replace a finished seasonal plant.
- Lift out a pot that needs closer inspection.
- Move a plant that has outgrown its neighbors.
Keep the arrangement short enough to reach from the available sides. A tidy row should make maintenance easier, including at the far end.

BEFORE
Plants share one long soil bed. Replacing a single tired planting means working around its neighbors and their roots.
AFTER
Individual pots lift out for attention or replacement. The outer surround keeps the row looking consistent while its planting changes.
A useful container garden starts with a space you can reach, water, and enjoy. Choose one of these DIY container garden ideas to solve the problem you notice most, whether that is crowded paving, awkward watering, or a sunny spot sitting empty.
Measure before building, match the container to the plant, and leave room for growth. You can add another project once you know how the first one fits your routine. Even a small change can make tending your pots feel less like moving furniture.
Save this list on Pinterest for the next time you are ready to make more room for growing.