
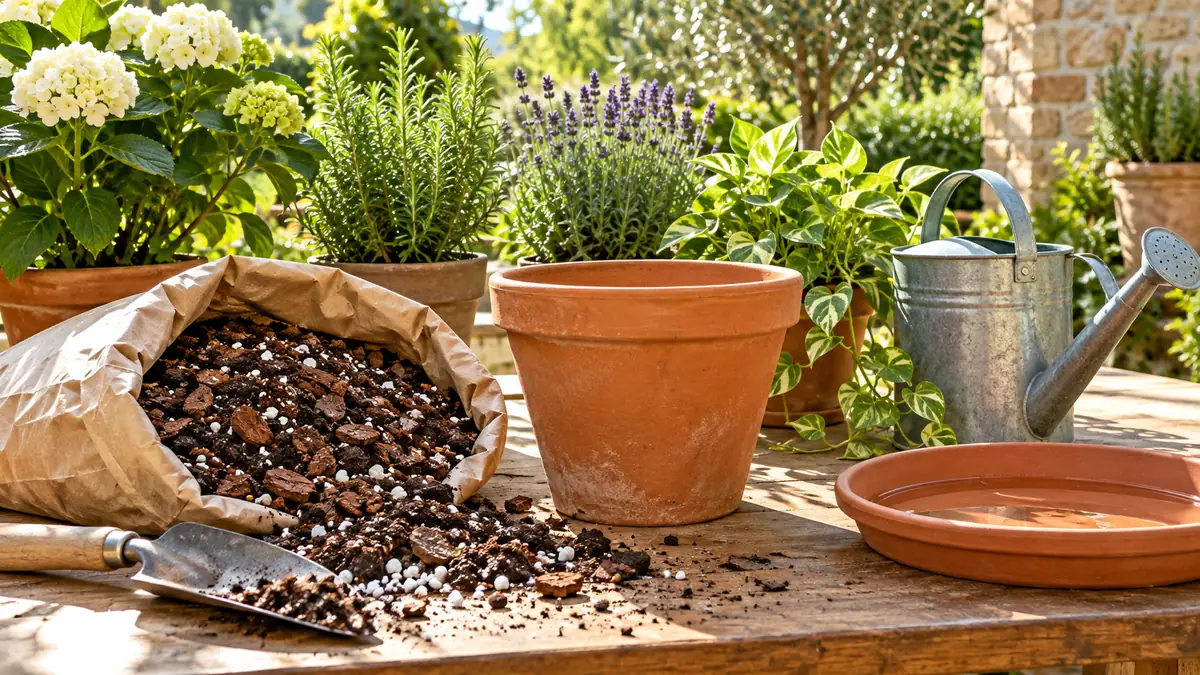
You water a plant, but the pot stays heavy and the mix feels wet long afterward. A few leaves turn yellow, so you wonder whether it needs more water or a layer of stones underneath. If you are learning how to improve drainage in pots, start by finding out where the extra water is getting stuck.
Roots need both water and air. Trouble starts when the mix stays so wet that roots cannot get enough air. A blocked hole, water trapped inside a decorative pot, or a mix that holds too much moisture can all play a part. Watering again before the plant needs it can make things worse.
This guide walks you through checking the pot, choosing suitable materials, and repotting when needed. You will not need to add gravel to the bottom or move your plant into a much bigger container. Those changes can leave the root area wetter than you expect.
Allow about 30-45 minutes for a small or medium plant that needs repotting. A pot sitting in trapped runoff may need a much shorter fix. These steps cover standard containers with drainage holes; self-watering planters have a different setup. By the end, you will have a clear route for excess water to leave and a better way to decide when to water again.
Plan your pot drainage fix
TOTAL TASK TIME: About 30-45 minutes if repotting
ACTIVE TIME: About 30-45 minutes for one small or medium pot
DIFFICULTY: Beginner
Clearing trapped runoff may take less time. Plant recovery takes longer and varies with root health and growing conditions.
What you need
For the initial checks
- Your potted plant and its saucer or cover pot
- A waterproof tray or washable work surface
- A cloth for spills
- A small brush for loose debris around accessible drainage openings
Only if repotting is needed
- A clean pot with drainage holes; the current pot may still suit
- Fresh potting mix suited to the plant
- A scoop or an old cup
- Clean, sharp scissors or pruners if rotten roots need removal
- A watering can or small jug
- Gloves, if preferred
No gravel layer is needed. Follow the handling directions on the potting mix bag and avoid breathing its dust.
At a glance
- Check why the potting mix stays wet.
- Choose a pot with clear drainage holes.
- Select a potting mix suited to your plant.
- Slide the plant gently out of its pot.
- Check the roots for rot.
- Repot at the original depth.
- Water according to the mix moisture.
- Empty collected water from the saucer or cover pot.
- Check moisture before watering again.
Choose the route your plant needs: If the pot and mix are suitable and trapped runoff is the only problem, skip the repotting steps and go to emptying the saucer or cover pot.
How to improve drainage in pots: check why the potting mix stays wet
A wet surface soon after watering is normal; wetness that lingers deserves a closer look. Feel the mix below the surface where you can reach without forcing through roots. Notice the pot weight, check for collected water underneath, and think about how often you water. Cool weather and low light can slow drying.
Yellow or drooping leaves alone do not prove poor drainage. If the mix dries at a suitable pace for your plant and no runoff is trapped, repotting may not help. Avoid watering again while you investigate already-soggy mix.
Find the wet spot before choosing a fix
Water outside the growing pot: Check the saucer or decorative cover pot. Trapped runoff can keep the root area wet.
Wet mix inside the pot: Check watering frequency, drainage openings, pot size, and whether the mix suits the plant.
Yellow or drooping leaves: Use these as a reason to investigate. They cannot tell you the cause by themselves.
Remember: There is no single drying time that suits every plant and pot.
Choose a pot with clear drainage holes
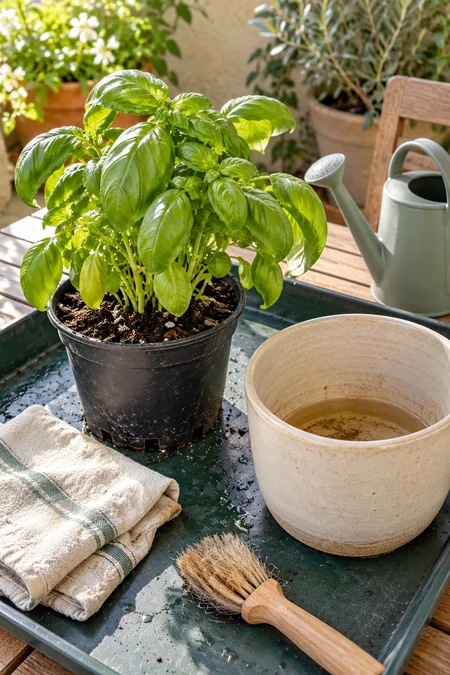
Your existing container may be suitable. Inspect its base over a tray and brush away loose debris around accessible pot drainage holes. Do not drive a tool into the root ball; roots filling an opening need attention after the plant is removed.
For container drainage inside a decorative pot without holes, use a removable nursery pot. Choose one that fits the roots without a large ring of unused mix. Moving a struggling plant into a much larger pot can prolong wetness.
Give excess water a clear exit
- Open base: Drainage holes must connect the growing mix to the outside of the pot.
- Suitable size: Keep a pot that fits the roots. Extra pot space is not a treatment for soggy mix.
- Removable inner pot: A nursery pot makes it possible to drain water away from a decorative cover pot.
- Accessible outlet: A tray or flat surface should not seal the drainage openings.
Heads up: Stones inside a container without holes do not create an exit for water.

Select a potting mix suited to your plant
Bagged mix labeled for containers is a better starting point than soil dug from the garden. Match it to the plant: many herbs and leafy plants need a mix that holds some moisture, while cacti need a faster-drying option.
For better potting mix drainage, choose a suitable ready-made blend before trying a homemade recipe. Different mixes already contain different amounts of bark, perlite, or other ingredients.
Skip the bottom gravel layer. Water can linger in the finer mix above it, leaving less depth for roots. Use suitable mix throughout the growing space, without packing it hard.
Build drainage into the growing mix
Choose: A container mix suited to the plant; a texture that holds moisture while leaving air spaces; suitable mix throughout the root area.
Skip: Garden soil as the main filling; a bottom layer of gravel or broken pottery; adding sand without a plant-specific mix recipe.
Why it matters: A coarse layer under fine potting mix can hold water above the boundary. It does not pull water out of the root area.
Slide the plant gently out of its pot
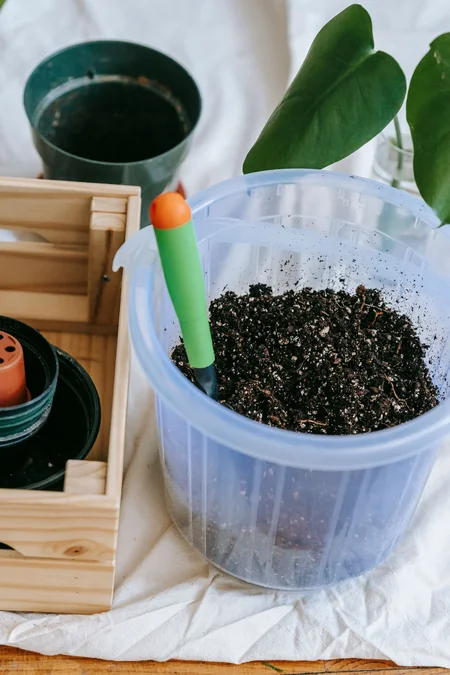
A tray beneath the pot will catch loose mix and drips. Tilt the container sideways while supporting the root ball near its base, rather than pulling on the stems. For a flexible nursery pot, squeeze the sides gently to loosen the edges.
If the plant will not slide free, check for roots caught through the drainage holes. Free those carefully before trying again. Avoid shaking or tearing the root ball apart.
Support the roots, protect the stems
- Catch the mess: Work over a broad tray or washable surface.
- Loosen the container: Gently squeeze flexible pot walls where the mix meets the sides.
- Support the root ball: Tilt the pot and ease it away from the plant.
- Pause if it catches: Check for roots caught in the drainage holes before using more force.
Avoid this mistake: Pulling on stems can damage the plant while leaving the root ball stuck inside.
Check the roots for rot
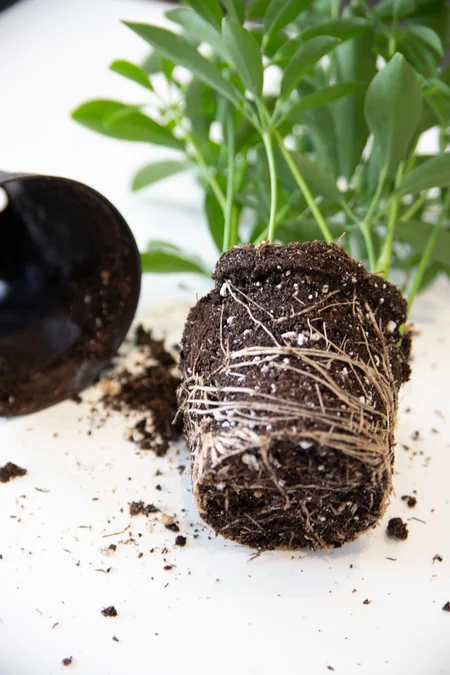
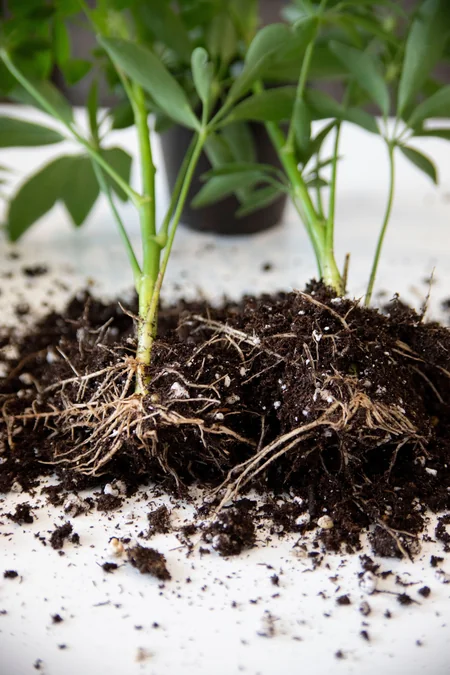
Healthy roots usually feel firm, even when their color is tan or brown. Rotten roots may feel mushy, fall apart, or lose their outer covering when touched. A sour smell can be another warning.
Gently loosen mix that falls away readily so you can examine the roots. If you find rotten sections, use clean, sharp scissors to trim them back to firm tissue. Keep healthy roots and avoid scrubbing them bare. Clean your tools afterward.
If most roots are rotten or the stem base is soft, better drainage alone may not save the plant.
Judge roots by condition, not color alone
Keep firm roots: Hold together when handled gently; may be pale, tan, or naturally darker; do not need trimming because of color alone.
Remove rotten sections: Feel soft or mushy; break down or shed their outer covering; need trimming back to firm tissue with clean, sharp tools.
Be gentle: Remove loose mix as needed for inspection. Do not strip or scrub healthy roots to make them look clean.
Repot at the plant’s original depth
The old soil line is your guide: keep the stems at the same depth as before. Add enough fresh mix beneath the root ball to position it, then fill around the sides. Settle the mix gently without pressing it hard.
For a small or medium pot, leave about 1 inch below the rim for watering. Keep drainage holes free of plugs or stones.
Check the planting level
At the stems: Match the original soil line. Do not bury the stem base deeper to make the plant stand upright.
Around the roots: Fill open spaces with suitable potting mix and settle it gently. Avoid pressing it into a hard mass.
Below the rim: Leave about 1 inch of watering space in a small or medium pot.
If roots were removed: Choose a container that fits the remaining root ball. The plant may need the same size pot or a smaller one.

Water according to the mix’s moisture
Fresh potting mix may already feel damp, and the old root ball may still hold plenty of water. Check both before reaching for the watering can. Do not soak an already-saturated root ball to settle the new mix.
For a leafy plant whose root ball and surrounding mix need water, pour slowly across the surface until some water drains below. Pause if water pools on top. Cacti and succulents with damaged roots may need a dry interval after repotting; follow the needs of that plant.
Check before the first watering
Root ball is still saturated: Hold off on another soaking. Fresh mix around the edges does not mean the center needs water.
Leafy plant and mix need water: Water slowly over the surface. Allow excess water to escape through the drainage holes.
Cactus or succulent has damaged roots: Check its aftercare needs before watering. A dry interval may be needed while damaged areas heal.
Avoid this mistake: Repotting is not an automatic signal to add more water.
Empty collected water from the saucer or cover pot
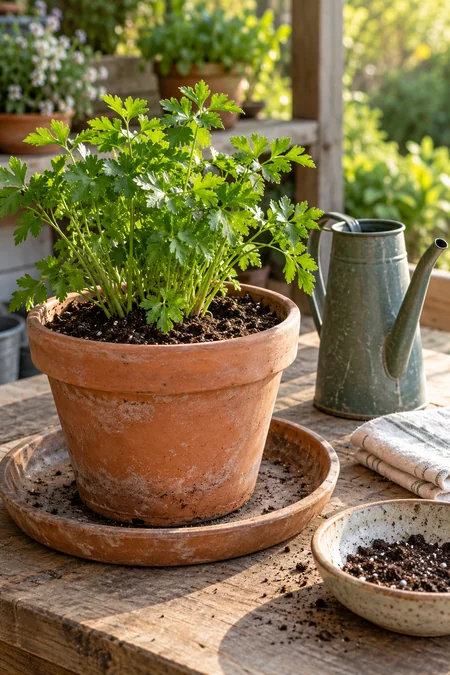
Runoff has to leave the root area, not sit beneath it. Once the pot finishes dripping, empty its saucer or decorative cover pot. Check again if more water collects.
Keep drainage openings clear of the surface below. Outdoors, stable pot feet can help where a flat base would otherwise block the holes.
Keep the exit clear after watering
- Saucer: Empty collected runoff after the pot drains.
- Decorative cover pot: Lift out the growing pot so you can check and empty the hidden water.
- Outdoor surface: Use stable pot feet if the drainage openings would otherwise be blocked.
- Later check: Empty water that collects after more dripping or rain.
Remember: A pot with holes can still stay waterlogged if it stands in collected runoff. Raising the pot does not replace emptying a full saucer.

Check moisture before watering again
The surface can look dry while the center remains wet. Check below the surface in an accessible spot without forcing through roots, and compare the pot weight with how it felt after draining. Use those clues together with your plant needs.
Many leafy plants need water before the whole root ball dries, while drought-tolerant plants can dry further. There is no fixed weekly schedule that suits both.
For soggy potted plants recovering from root damage, look for stable growth over time. Yellow leaves may not turn green again, so do not use their color alone as a signal to water.
Use plant clues, not a calendar
Feel below the surface: A dry top layer does not prove the whole root ball needs water. Avoid forcing fingers or tools through roots.
Compare the pot weight: For a pot you can safely lift, notice how it becomes lighter as the mix dries. Use weight alongside other checks.
Match the plant needs: Moisture-loving leafy plants and drought-tolerant plants need different watering decisions.
Watch the direction of recovery: Look for firmer growth and fewer new symptoms over time. Old yellow leaves may stay yellow.
Adjust as conditions change: Light, temperature, plant growth, and pot size all affect how quickly the mix dries.

Troubleshoot drainage problems that remain
Watch how the mix behaves after watering and between waterings. Water leaving the pot is a useful sign, but it does not prove that the whole root ball has the right amount of moisture.
What is your pot telling you?
| If this happens | Try this |
|---|---|
| The center stays wet while the surface dries. | Hold off on watering based only on the surface. Check whether the pot is oversized, the mix is too moisture-retentive, or the plant needs more light. Match any light change to the plant needs. |
| Water pools on top instead of soaking in. | Pause pouring. If the mix is already wet, check the drainage openings. If it is very dry, try slow, small passes to help it absorb water. Dense or badly compacted mix may need replacing. |
| Water runs out immediately, but the root ball stays dry. | Water may be running down gaps beside the root ball. Apply it slowly across the surface in several passes, allowing each pass to soak in. Check the root ball afterward rather than judging by runoff alone. |
| The plant wilts even though the mix is wet. | Do not add water automatically. Root damage can prevent water uptake. Check for trapped runoff and signs of rot. Avoid repeatedly unpotting a plant whose roots you have already inspected. |
| Older leaves remain yellow after the fix. | Watch for fewer new symptoms and stable growth. Damaged leaves may not recover their color. More water or fertilizer is not an automatic cure. |
| An outdoor pot keeps filling with rainwater. | Empty collected water and check that the base can drain. During prolonged rain, move the pot under suitable shelter if practical, while keeping enough light for the plant. |
Skip the quick-drying shortcut: Do not move a stressed shade plant into harsh sun to dry its pot. That can damage leaves without fixing the cause.
Answer common questions about pot drainage
Beginner pot drainage FAQ
Should I put rocks in the bottom of a pot?
No. A gravel layer does not improve drainage from the potting mix above it and can leave water held higher in the container. Use suitable mix throughout the growing space and keep the drainage openings clear.
Can I use a decorative pot without drainage holes?
Use it as a cover pot around a removable nursery pot with holes. Take the inner pot out for watering, let it drain, and empty any water collected inside the cover pot before replacing it.
Will adding sand fix soggy potting mix?
Not reliably. Fine sand can fill larger spaces in a mix and make it denser. For beginners, a ready-made container mix suited to the plant is a more dependable starting point than adding sand to wet soil.
How much perlite should I add?
There is no single amount that suits every plant and bagged mix. Check what your mix already contains and use a plant-specific recipe if you need to amend it. Perlite cannot replace drainage holes or prevent water from collecting in a full saucer.
Why is my pot still wet even though it has holes?
Holes let excess water escape, but the mix still holds moisture. An oversized pot, dense mix, low light, cool conditions, frequent watering, or trapped runoff can keep the root area wet for too long.
Do I need to repot every overwatered plant?
No. If the roots are healthy, the mix suits the plant, and the container drains, correcting watering and emptying runoff may be enough. Repot when the container, mix, or root condition gives you a reason to do so.
Your pot drainage quick reference
Find the cause, give excess water an exit, and water according to the plant needs.
What you need: A waterproof tray, cloth, and small brush. If repotting is needed, gather a clean draining pot, suitable potting mix, a scoop, and a watering jug. Have clean, sharp scissors ready if rotten roots need trimming.
Follow these steps
- Check the cause: Look for lingering wetness, trapped runoff, and watering too often.
- Choose a draining pot: Keep holes clear and avoid unnecessary extra pot space.
- Select suitable mix: Match it to the plant and skip the bottom gravel layer.
- Remove the plant if needed: Support the root ball rather than pulling on stems.
- Check the roots: Keep firm roots and trim rotten sections back to firm tissue.
- Repot at the same depth: Settle mix gently and leave watering space below the rim.
- Check before watering: Do not soak a root ball that is already saturated.
- Empty collected runoff: Keep the pot from standing in water.
- Check moisture again: Follow the plant needs rather than a fixed schedule.
Repot only when needed: If the pot and mix are suitable and trapped runoff is the only problem, empty the collected water and adjust watering. You can skip disturbing the roots.
Learning how to improve drainage in pots starts with a clear exit for excess water, suitable potting mix, and watering that matches your plant.
With those basics in place, your next job is to watch the mix and give the roots time to recover.
Check for moisture before the next watering, and look for fewer new symptoms rather than expecting old yellow leaves to turn green.
Save this guide to your Pinterest gardening board so you can check the steps when another pot stays soggy.