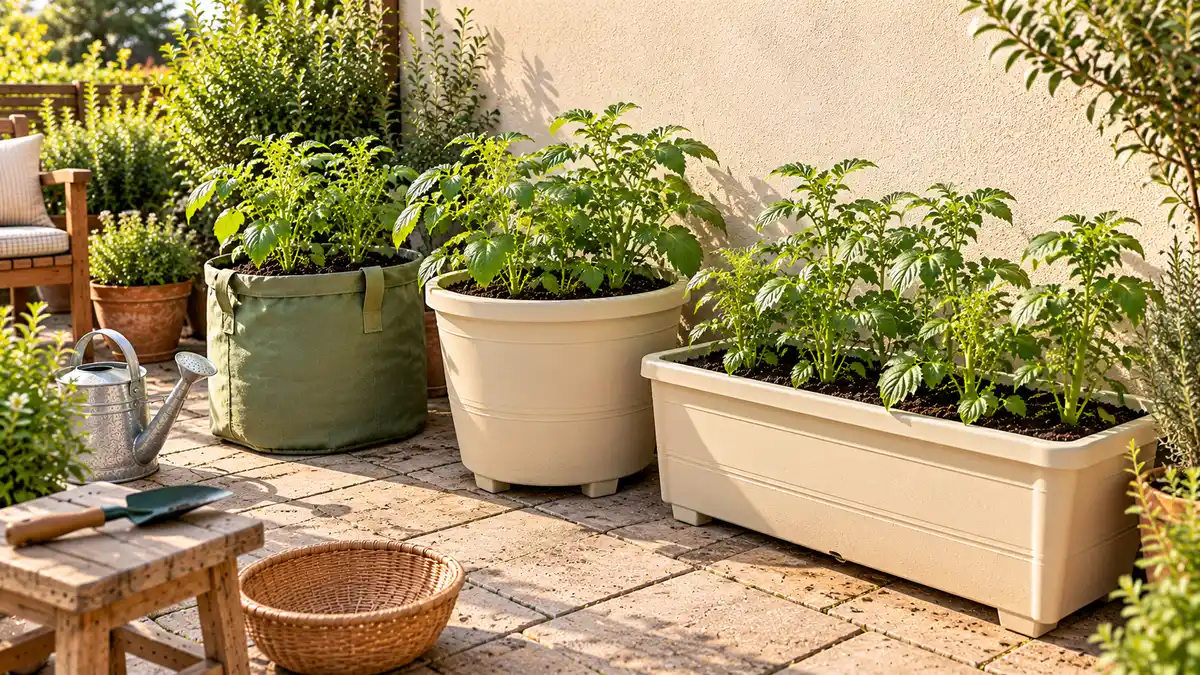
You want to grow potatoes, but your outdoor space is a patio, a paved corner, or a few steps outside the back door. There is no vegetable bed to dig, and the thought of squeezing another large pot beside the garden chair can feel a little ambitious.
Potatoes can grow in containers, but the setup matters. A cramped pot, blocked drain holes, or compost that keeps drying out can make a promising start frustrating. Tall stacks and overflowing harvest photos also make it hard to know what a small home setup can reasonably do.
These potato container garden ideas focus on useful choices: containers with room for roots and tubers, layouts you can reach, and simple ways to manage water and harvest time. You will find options for a first grow bag, a reused bucket, a wider patio planter, and more. Start with the idea that suits your space and the amount of care you can give. One manageable container is a sensible place to begin.
1. Start a Small Potato Patch in a Fabric Grow Bag
A broad fabric grow bag gives you a potato patch without a permanent planter. Choose a bag made for growing vegetables, with a stable base and enough depth to keep developing tubers covered.
- Set it in its growing spot before adding moist container potting mix.
- Start with certified seed potatoes, following spacing guidance for the variety and bag size.
- Keep the fabric base out of standing water.
Fabric lets moisture escape through the sides, so check the mix beneath the surface, especially in warm or breezy weather. Those stitched handles are useful, but a wet, planted bag can be surprisingly heavy. Leave room beside it for watering and harvest.
Give your grow bag a useful home
☀️ Sunlit spot
Check where nearby walls and furniture cast shade as the day changes.
💧 Clear runoff
Choose a surface where draining water will not collect beneath the bag.
🌿 Reachable rim
Leave an open approach so you can check the mix without stepping over plants.

2. Turn a Food-Safe Bucket into a Single-Plant Potato Container
An empty food bucket can become a modest first potato container. A five-gallon bucket is a compact option for one seed potato, though a larger container gives the plant more room and a better moisture buffer.
Choose an opaque bucket that previously held food. Skip brittle plastic and containers with an unknown history.
- Wash it thoroughly and remove the lid.
- Make several drainage holes in the base before planting.
- Fill with container potting mix, leaving room to cover developing tubers as needed.
Set the bucket where its drain holes stay open. Expect a small-scale experiment, and resist squeezing extra seed potatoes into the same bucket.
Before you reuse that bucket
- Its previous contents are known, and it has no chemical residue.
- The walls block light and feel sound rather than cracked or brittle.
- Water poured into the empty bucket escapes through the new holes.
- The handle is out of the walkway and is not relied on for lifting a full crop.

3. Use a Wide Patio Trough to Give Potato Plants Room
Width can be more useful than a dramatic tower of stacked containers. A deep, broad trough lets you space potato plants along the patio while keeping the soil surface within reach. A shallow window box will not do the same job.
Choose an opaque planter with drainage holes and enough growing depth for the variety you want. Position it before filling, because wet potting mix adds considerable weight.
- Keep seed potatoes spaced according to the supplier's guidance.
- Leave access along a long side for watering.
- Check moisture at both ends rather than assuming the whole trough dries evenly.
Avoid tucking extra flowers between the potato plants. Give this container one job.
Plan the trough before filling it
Across the top
Allow for mature foliage, not just the small shoots visible at planting time.
Below the surface
Use potting mix throughout the growing space. Skip a gravel layer that takes up root room.
Beside the planter
Keep a clear place to stand with a watering can and reach the far edge.

4. Build a Wooden Potato Planter with a Removable Harvest Side
Harvesting feels awkward when you have to tip a heavy wooden box. A planter with a removable side lets you work through the mix from ground level once the crop is ready.
Use sound, untreated, rot-resistant timber, a draining base, and a side panel secured firmly to corner posts. Keep the walls opaque and the panel closed throughout growth.
- Place the empty planter on level ground with space in front.
- Secure the panel before adding potting mix and seed potatoes.
- At harvest, lay a tarp down and remove mix from the top before releasing the panel.
The opening is for the final harvest, not repeated checks that disturb developing roots and tubers.
Build harvest access into the setup
- Keep the panel fasteners accessible from outside the planter.
- Leave enough clear ground for the panel and the loosened potting mix.
- Release the side only after reducing the pressure of the mix behind it.

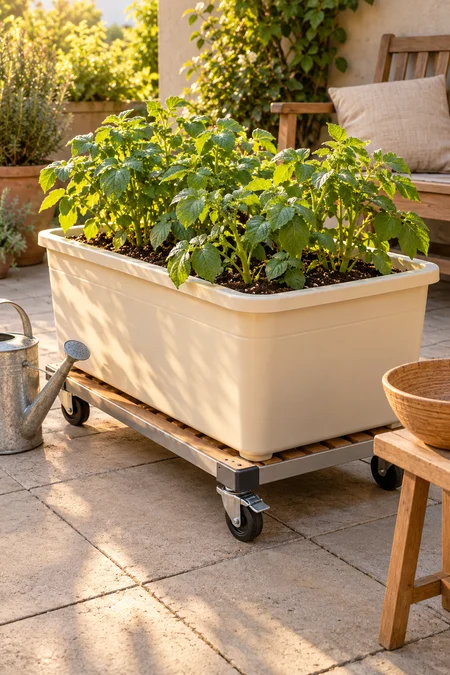
5. Put a Potato Pot on a Sturdy Locking Plant Caddy
The sunny patch on a patio can shift as nearby trees leaf out. A potato container on a low wheeled caddy gives you some flexibility without lifting the whole pot.
Choose a broad platform that supports the entire base, with locking wheels and a load rating above the combined weight of the container, wet mix, and plant. Keep it on firm, level paving.
- Make occasional moves to a better growing position.
- Lock the wheels again before leaving the pot.
- Keep runoff clear of the platform and wheel fittings.
Small casters catch in gravel and wide paving joints. Test the route before planting, and avoid slopes, steps, and raised edges.
A caddy makes sense
The patio is level, the route is smooth, and occasional movement will improve access or sunlight.
A fixed spot makes sense
The route includes loose gravel, steps, or a slope, or the container already has a suitable permanent position.
6. Choose a Raised Planter to Make Potato Care Easier to Reach
Bending over a floor pot can make a quick moisture check feel like a chore. A purpose-built raised planter brings the growing surface closer, provided its box is deep enough for potatoes and its frame can carry the wet mix.
- Choose a height you can reach without lifting your shoulders.
- Keep the box narrow enough to reach across, or allow access on both sides.
- Check the maker's load limit before filling it.
A shallow herb table will not provide the same growing room. Set the planter on level paving and keep a clear approach for a chair or watering can. A reachable rim matters more than extra height.
Check the working space while it is empty
- The frame stays steady without rocking.
- The growing box has useful depth, not just tall legs.
- Braces and shelves leave room for your feet or seated approach.
- Drainage runs away from the place where you will stand or sit.

7. Reserve One Container for an Early Potato Crop
For a first taste of homegrown potatoes, dedicate a pot to an early-maturing variety. It can suit a shorter growing window, but planting too soon into cold, wet mix will not help it along.
Choose certified seed potatoes described as early, then follow the supplier's planting guidance for your climate. Keep this pot somewhere easy to check as spring weather changes.
Plan for a small fresh harvest. Potatoes gathered young have tender skins and are best used soon. Flowering alone is not a reliable harvest signal for every variety. Use the expected growing time as a guide, then gently check a small part of the container for tuber size. Re-cover any tubers you leave growing.
Match the crop to your plan
🌱 Variety
Look for an early maturity description. Small seed potatoes are not automatically early varieties.
☀️ Growing window
Allow for local frost and heat. An early variety still needs suitable growing conditions.
🥔 Harvest goal
Picking young trades more growing time for an earlier meal. It does not promise a larger crop.

8. Stagger Separate Potato Pots for Different Harvest Times
Planting every container together can leave you with every pot ready at once. Staggering separate pots may spread the work and the harvest, as long as each planting still fits your local growing season.
- Plant the first pot during the suitable planting window.
- Schedule another pot later, using the variety's growing time and expected weather as guides.
- Record each planting date on a weatherproof marker and in a notebook.
Keep later plantings in their own containers. Adding seed potatoes around established plants makes watering and harvest harder. Avoid extending the schedule into persistent heat or approaching frost just to fill every pot. Weather can also narrow the gap between harvests.
Check before starting the next pot
- Work backward from the likely end of suitable growing weather.
- Allow room for the new pot’s mature foliage, not just its first shoots.
- Note actual harvest dates so next season’s schedule reflects your own patio.

9. Grow Different Potato Varieties in Separate Containers
Separate pots make variety choices easier to track. You can grow a potato suited to salads beside one chosen for roasting, then harvest each when it is ready.
Keep one variety per container and record its name at planting. A weatherproof marker saves guesswork later.
- Choose varieties for the meals you actually cook.
- Note their expected maturity times before planting.
- Keep each harvest separate until you have compared it.
For a fairer comparison, use similar containers, mix, and care. Note the results without treating one season as a guarantee.
Make a comparison you can use
Keep conditions similar
Compare container size, sunlight, and watering before deciding that the variety caused a difference.
Record what matters
Note cooking texture, harvest timing, and how well each plant fitted the space you gave it.
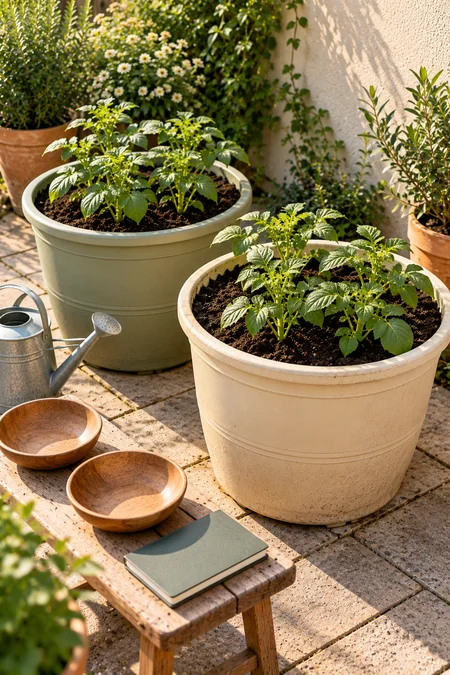
10. Give Fingerling Potatoes Their Own Patio Planter
Small, slender potatoes do not necessarily come from small plants. Fingerling varieties still need a roomy container, steady care, and enough growing time for the variety you choose.
Give them a dedicated deep planter if you enjoy roasting potatoes whole or slicing them into salads. Start with certified seed potatoes, and check both the maturity description and spacing guidance before planting.
Keep the harvest gentle.
Loosen the mix around the plant rather than tugging on the stems. Work through it carefully so narrow tubers are not missed near the edges. A shallow harvest tray makes them easy to see. Choose fingerlings for their shape and cooking qualities, not as a shortcut to growing potatoes in a tiny pot.
🥔 Fingerling describes the tuber
It does not tell you that the plant stays compact or matures early. Check the named variety’s description before choosing its container and planting date.

11. Arrange Potato Containers Along a Sunny Patio Edge
A row of potato pots can share a patio with the garden chair and washing line. The useful trick is to plan around the plants' full spread, not the empty containers you carry outside.
Watch where sunlight falls through the day, then place the pots along a bright edge with space between them. Leave a clear route to the door and somewhere to stand beside each rim.
- Keep trailing hoses out of the walking lane.
- Allow leaves to spread without blocking a drain.
- Leave enough room to turn with a full watering can.
Check the layout again as the foliage grows. A gap that looked generous at planting can soon disappear beneath leaning stems.
Give the patio three kinds of space
☀️ Growing space
Avoid deep shade from furniture, overhangs, and nearby containers.
💧 Working space
Reach the mix directly instead of pouring water through a mass of leaves.
🚪 Walking space
Keep doors free to open and leave a continuous route across the patio.

12. Shade the Container Walls While Keeping Potato Leaves in Sun
Shade the pot, not the whole plant. On an exposed patio, a low screen can reduce direct sunlight on the container wall while leaving potato foliage in the light above it.
Position a securely supported screen on the sun-facing side of the pot, with an air gap between them. Keep it below the main foliage and check where its shadow falls as the sun moves.
Leave access open. You still need to reach the mix and see the drain outlets. Avoid wrapping the container tightly in plastic or letting a decorative outer pot trap runoff. This setup can limit direct heating, but it cannot make a hot patio cool in every condition.
Check the shade at pot level
- The screen shades the exposed container wall rather than covering the leaves.
- Air can move through the gap beside the pot.
- The supports stay clear of the walking route.
- The watering rim and drainage outlets remain reachable.

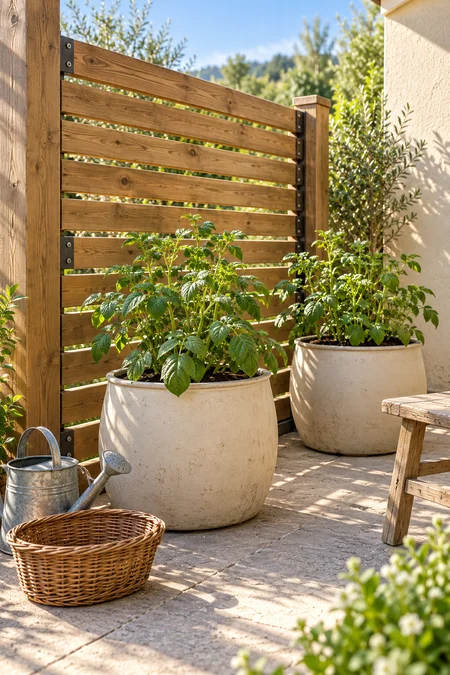
13. Create a Sheltered Potato Corner on a Windy Patio
Constant wind can dry container mix and leave potato stems leaning across the paving. A sheltered corner beside a securely fixed, partly open screen gives the planting some protection without sealing it into a box.
Choose a bright spot with room between the foliage and the screen. Use broad-based containers on the ground, and keep the opening easy to reach for watering.
- Leave gaps for air to move through the shelter.
- Check moisture more often during dry, windy spells.
- Avoid placing pots where wind funnels between buildings.
Shelter should ease ordinary exposure. A lightweight decorative panel that rocks in a breeze needs a more secure setup before plants sit beside it.
✅ Build in breathing room
Use a securely fixed permeable screen and keep leaves from rubbing against its surface.
🚫 Skip a tight enclosure
Do not wrap the foliage in solid plastic or crowd pots together until you cannot check between them.
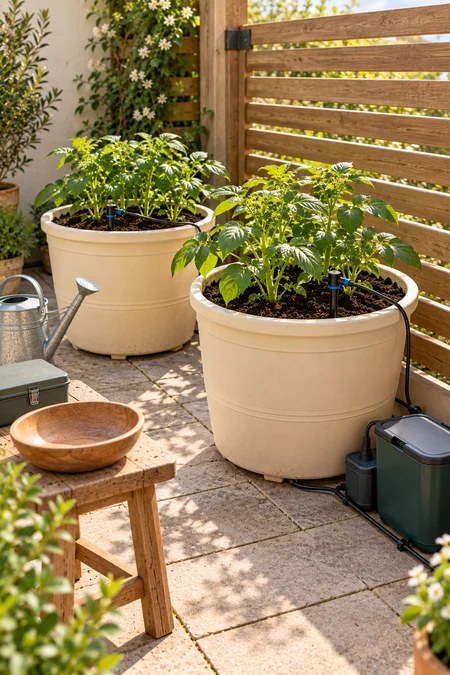
14. Fit Potato Containers with a Simple Drip-Watering Line
Run a container drip line along the patio edge to bring water directly to the potting mix. It can make several potato pots easier to water, especially when reaching each rim with a can becomes awkward.
- Follow the kit instructions for its water supply, filter, and pressure controls.
- Secure tubing away from the walkway and position emitters over the mix.
- Run a trial, then check moisture across each container rather than only beside a dripper.
Adjust emitter placement and watering time if parts stay dry. Recheck after rain or a change in weather. A timer repeats a setting, so it still needs your judgment.
Test the whole watering route
- Check the farthest emitter as well as the one nearest the supply.
- Look for kinked tubing, loose connections, and drippers aimed outside a pot.
- Confirm that the mix is moist below the surface and excess water can drain away.
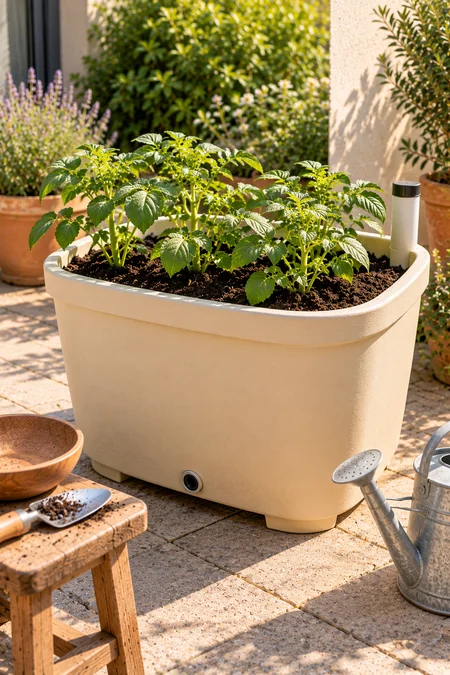
15. Try a Deep Self-Watering Planter with an Overflow Outlet
A reservoir beneath the growing mix can give you more flexibility between water checks. For potatoes, choose a purpose-built self-watering planter with a deep growing chamber, a working overflow outlet, and clear setup instructions.
The reservoir takes up part of the container, so check the actual planting depth rather than judging by its outside height. Use the potting mix recommended for the system and keep the overflow clear.
Follow the instructions for getting young plants established. Top watering may be needed before roots can use moisture supplied from below. Check the mix as well as the reservoir. Self-watering does not mean leaving potatoes in soggy conditions or filling the tank on a fixed schedule regardless of rain.
Look beyond the outside dimensions
🌿 Growing chamber
Allow room for roots, tubers, and the mix covering them above the reservoir.
💧 Overflow outlet
Keep the outlet visible and unblocked so excess water has an escape route.
🔎 Water checks
Use the fill access or indicator as directed, and check moisture in the growing mix too.
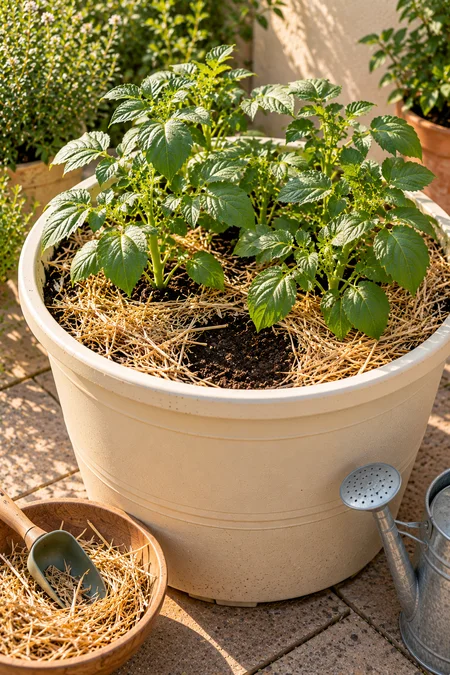
16. Add a Light Mulch Layer to an Established Potato Pot
A little mulch can slow surface drying once potato plants are established. Spread a light, loose layer of clean straw over the potting mix, leaving space around the stems and below the rim for watering.
- Check the mix beneath the mulch before adding water.
- Keep a small patch open for easy moisture checks.
- Move the mulch aside when you need to add more potting mix.
Avoid packing straw into a thick, soggy mat. This layer helps manage the surface, but it does not replace the potting mix needed to keep developing tubers covered.
💧 Look below the straw
Dry-looking mulch can sit over damp mix. Check underneath before watering, and loosen or remove material that has become matted around the stems.
17. Leave Room Below the Rim for Adding More Potting Mix
Filling a potato container to the brim at planting leaves nowhere to put extra mix later. Start with enough mix beneath and over the seed potatoes, following the planting guidance for your variety, while reserving space above.
As shoots grow, add mix around their bases when needed to keep developing tubers covered. Leave the upper leaves exposed rather than burying the entire plant.
Keep a watering lip. Stop below the rim so water can soak in instead of carrying mix onto the paving. Set aside spare potting mix in a covered container nearby. Adding more height does not guarantee more potatoes, and repeated topping up cannot make an undersized pot roomy enough.
✅ Add mix with a purpose
Check for settled mix or developing tubers near the surface. Cover them gently while keeping the upper foliage in the light.
🚫 Skip the overflowing mound
Do not pile mix above the rim or keep burying the whole plant to chase an oversized harvest.

18. Use an Opaque Container to Keep Light Away from Developing Tubers
Clear storage tubs make roots easy to watch, but they are a poor choice for an exposed potato container. Choose solid, opaque walls that keep light out of the growing mix.
Check a reused container before planting, especially thin plastic that looks solid indoors but glows in strong sunlight. Replace it with an opaque planter if light passes through.
Keep the sides intact, without cracks or open inspection windows.
Check that any harvest flap closes securely.
Cover tubers that become exposed at the soil surface.
Opaque walls protect the sides. They cannot block light reaching a potato left uncovered at the top.
Check the shell before filling
- The container wall does not transmit sunlight.
- Seams and harvest openings close without light gaps.
- The material is sound enough to stay intact through the season.
- Drainage holes remain open. Blocking light must not block drainage.
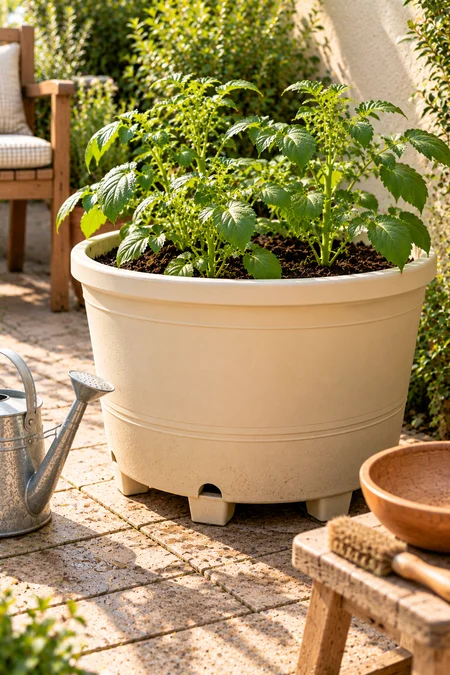
19. Set Rigid Potato Pots on Low Feet to Keep Drain Holes Clear
Low pot feet can create a drainage gap beneath a rigid potato planter. They are useful where a flat base sits tightly against smooth paving and leaves little room for water to escape.
Choose supports suited to the pot's shape and filled weight. Spread them beneath strong parts of the base, keeping them clear of the drainage holes.
Position the supports on firm, level ground.
Check that the empty pot sits without rocking.
Recheck its stability and drainage after filling and watering.
Keep the lift low. This idea is for a rigid planter with a supported base, not a fabric bag balanced across separate feet.
Follow the water beyond the pot
🪴 Pot base
Feet create clearance beneath existing holes. They do not replace drainage holes.
💧 Runoff route
Remove fallen leaves and spilled mix that collect beneath the planter.
📍 Supporting surface
Avoid low spots where water collects around the feet after rain.
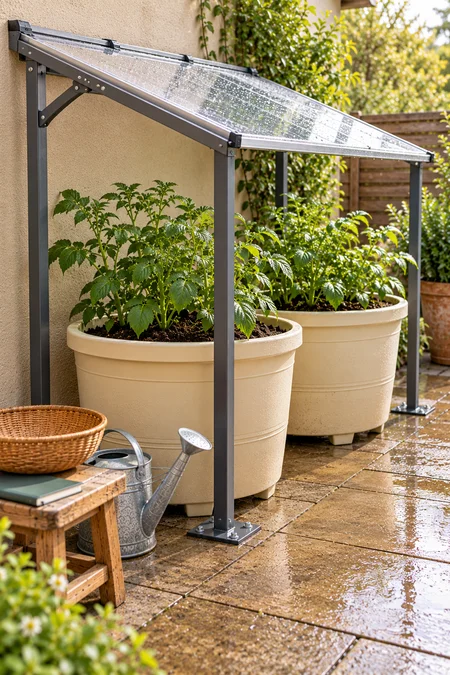
20. Make a Removable Rain Cover for Wet-Weather Potato Containers
During a prolonged wet spell, even a draining potato pot may stay wetter than you want. A temporary roof can reduce rain entering the mix while you keep checking moisture below the surface.
Use a small, sturdy frame with a removable sloping clear roof and open sides. Secure the frame and roof before bad weather, leave space above the foliage, and direct runoff away from the pots.
Keep the cover off the leaves.
Allow air to move freely around the plants.
Remove the roof when it is no longer needed, especially in warm sunshine.
A rain cover cannot fix blocked drain holes. Restore drainage first, and remember that a sheltered pot may still need watering.
Before leaving the cover in place
- The roof slopes so water does not collect on top.
- Its lower edge sheds water beyond the containers.
- Fastenings are secure and the frame does not rock.
- Open sides and leaf clearance leave room for airflow and growth.
- The roof can be removed without lifting a planted container.
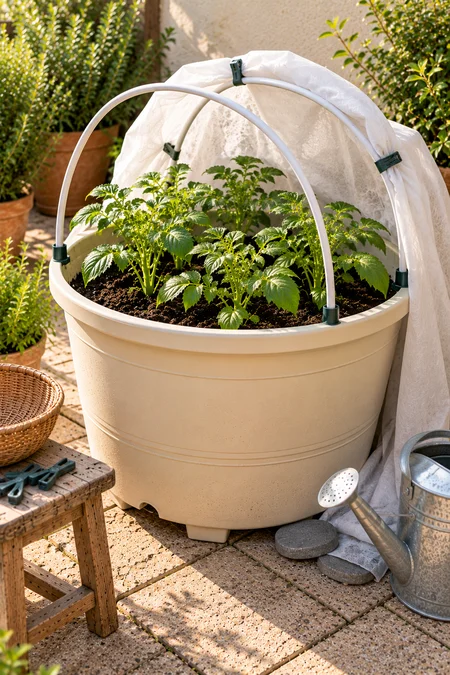
21. Add Removable Frost-Cloth Supports Around Young Potato Plants
A chilly forecast is easier to handle when the supports are already in place. Fit smooth hoops around a young potato planting so horticultural fleece can cover the foliage without weighing it down.
Use a cover large enough to drape over the container and reach the ground. Secure the edges without pulling the fabric tight against the shoots.
- Check the forecast before putting the cover on.
- Leave room for the leaves beneath the hoops.
- Remove or open the cover when conditions warm.
Fleece offers limited protection, not a promise against a hard freeze. Follow the cover maker's guidance, and remember that container roots are more exposed to cold than roots in the ground.
Keep the cover easy to manage
🌿 Smooth supports
Keep sharp ends and rough joints away from the fleece so it does not snag.
📍 Secure edges
Use stable weights or suitable clips without blocking the door route.
☀️ Daytime access
Make the cover easy to lift so you can inspect plants and check moisture.
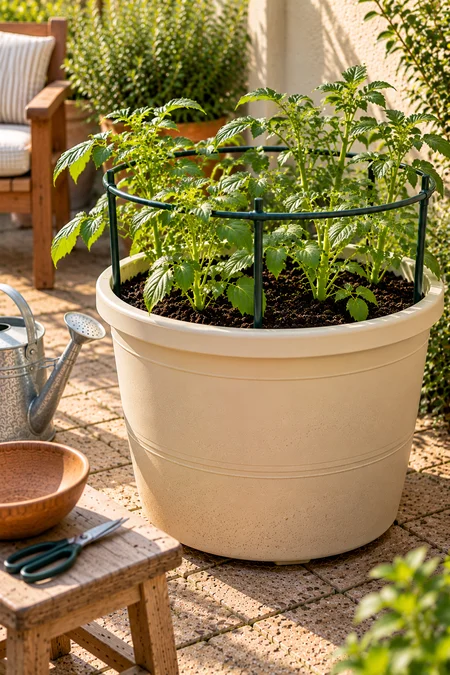
22. Support Sprawling Potato Stems with a Low Open Ring
Potato stems can lean over a pot's edge and into the walkway. A low open plant-support ring helps hold them loosely together without turning the container into a tight bundle of leaves.
Choose a ring wide enough for the planting, with smooth edges and sturdy legs. Put it in place early, before roots and tubers fill the mix.
Guide, do not squeeze. Let stems rest against the support rather than tying them tightly. Keep the center open for growth and watering. A ring manages sprawling stems, but it does not replace the shelter a windy patio may need.
🌿 Leave room inside the ring
If stems press tightly together or rub against the metal, the support is too restrictive. Avoid forcing new stakes through an established root ball to correct it.
23. Plan a Tarp-Based Harvest Station Beside Your Potato Bags
A harvest tarp keeps loose potting mix from disappearing into paving joints. Before opening or emptying a grow bag, clear a level patch beside it and lay out a durable tarp with room for the mix to spread.
- Set a shallow harvest tray within reach.
- Scoop out mix gradually, checking for tubers as you go.
- Ease the bag onto its side only when it is light enough to manage.
Work gently around the roots rather than stabbing through the mix with a fork. Move gathered potatoes out of direct sun, then collect the remaining mix. Fold the tarp inward after use so the last soil crumbs stay contained.
Give the harvest a clear order
1. Contain the mix
Keep tarp edges away from drains and doorways before the bag is opened.
2. Check the edges
Look through the bottom and folded sides of the bag for small tubers.
3. Clear the space
Separate harvested potatoes, leftover roots, and potting mix before folding the tarp.

24. Follow a Finished Potato Crop with a Container of Leafy Greens
Once the potatoes are harvested, the empty planter can earn its space again. Lettuce or other leafy greens may suit the next planting if the weather matches their growing needs.
Remove leftover tubers and roots, then inspect the mix. Reuse it only after a healthy crop, provided it still drains well. Replace compacted or suspect mix, and replenish nutrients according to the needs of the new crop.
- Choose greens suited to the season ahead.
- Leave room for their mature leaves.
- Water gently while new roots settle in.
A cleared pot does not need immediate planting. Wait for suitable conditions if the patio is too hot or cold.
Before the next crop goes in
- Remove missed potatoes that could sprout among the greens.
- Check the drain openings after harvesting and clearing roots.
- Keep mix from a diseased crop out of the new edible planting.
- Choose a planting date that suits the greens, not just the empty container.

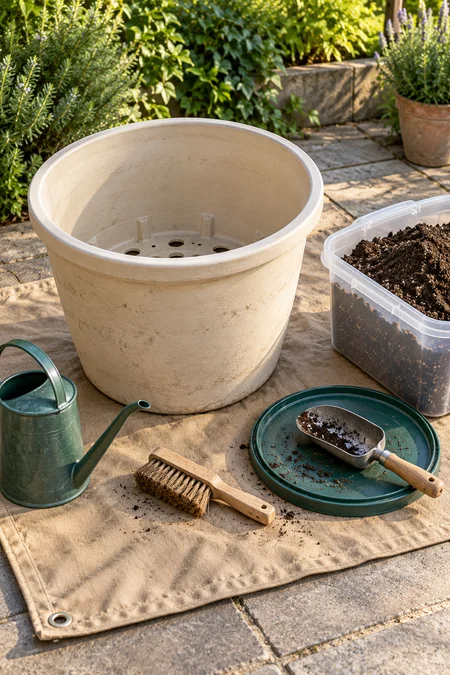
25. Set Up a Fresh-Mix Reset Station for the Next Potato Crop
Keep the sound container and give the next potato crop fresh potting mix. A small reset station makes it easier to empty, inspect, and clean each planter before the new planting window arrives.
Spread a tarp on level paving, remove old roots and tubers, and scrub loose soil from the pot. Check seams, handles, and drainage holes while everything is visible. Routine cleaning is useful, but it does not guarantee a diseased container is ready to reuse.
Store supplies dry and covered. Keep fresh mix separate from old material, and note which containers need replacing. When planting time returns, start with suitable seed potatoes and a sound, prepared pot.
Keep if sound
Sturdy containers from healthy crops, intact supports, and useful tools can serve again after appropriate cleaning.
Replace before planting
Use fresh mix for the next potato crop. Replace cracked pots and failing supports, and keep suspect material separate.
Start with one manageable container
Start with a container you can reach, water, and manage comfortably. A sunny position, clear drainage, and enough room for growing tubers matter more than how many pots you fit onto the patio.
Choose the potato container garden ideas that solve a real problem in your space, whether that is a dry corner, awkward harvest access, or limited room beside the door. Keep a few notes on your variety, planting date, and results so you can adjust next season.
Save this list to Pinterest for planting time, and begin with one setup that fits your everyday routine.